- Services

Getting to know us
- Industries
Recent case study:
Oracle EBS Cloud Deployment
Consolidating and Migrating assets into Oracle Cloud Infrastructure.
.png?width=250&name=stonewater-logo%20(1).png)
Most Visited Pages
-
- Resources
DSP-Explorer acquires leading Oracle Applications Managed Services Provider, Claremont, to further extend its data management capabilities.

Resources
- Contact us
Deploying a .NET core app on OCI (Container instance)
Contents
Ah, the good old days of deploying on virtual machines! While they still have their charm, there's no denying the magic of containerising applications. It's like giving your apps a sleek, modern home that's easy to manage, letting you focus on what you love most: writing code. The thrill of a quick restart, pulling the latest image, updating your system, and grabbing your code changes (all thanks to proper configuration) is unbeatable. Add a robust CI/CD pipeline into the mix, and you've got yourself a time-saving, efficiency-boosting machine.
In this guide, I'll show you how straightforward it is to host a containerised .NET Core (a free and open-source application platform supported by Microsoft) app on Oracle Cloud Infrastructure (OCI). I noticed there's not a lot of documentation out there, so I'm here to bridge that gap.
Please note: As with everything in IT, there are numerous ways to achieve the same goal. To keep things simple, I'll be using the user interface as much as possible, both within Visual Studio and OCI. However, all these steps can easily be executed via the command line if that's your preference.
1. Building our app
Before diving into the deployment on OCI, we first need to create our application. While I'll be focusing on an ASP.NET Core web app, these steps can be applied to any web application that can be containerised.
1a. Open Microsoft Visual Studio and select "Create a new project".
Open up Visual Studio and start a new project. Easy peasy!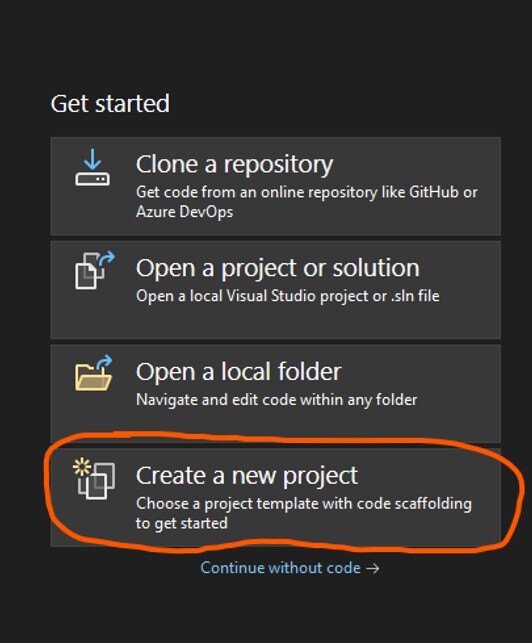
1b. Select "ASP.NET Core Web App".
For this guide, I'll select "ASP.NET Core Web App", but since we're using the user interface, these steps can be adapted to any language or framework that supports containerisation.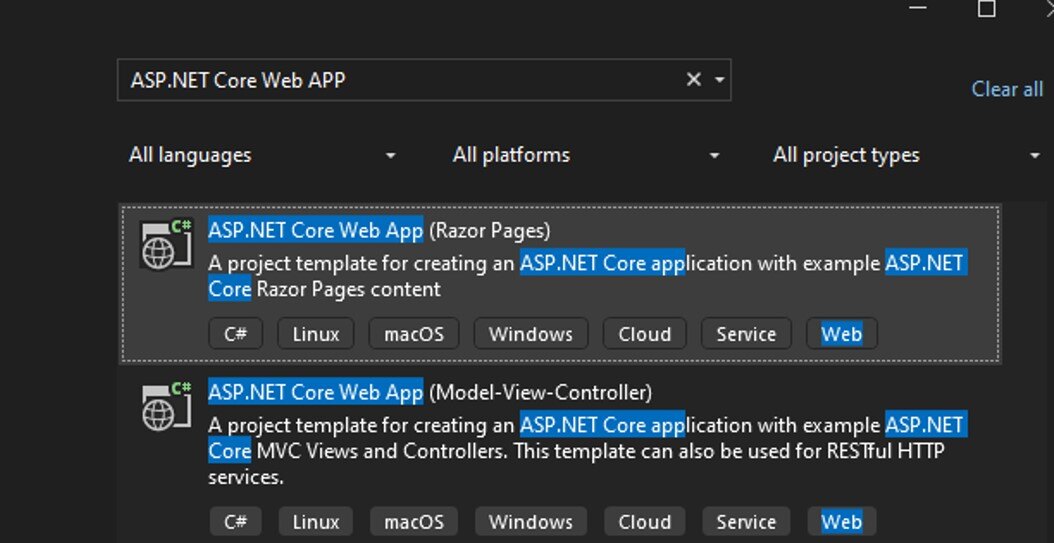
1c. Name Your Project and Choose a Location.
Give your project a meaningful name and select a location on your machine where you want to save it. Make it something you'll remember!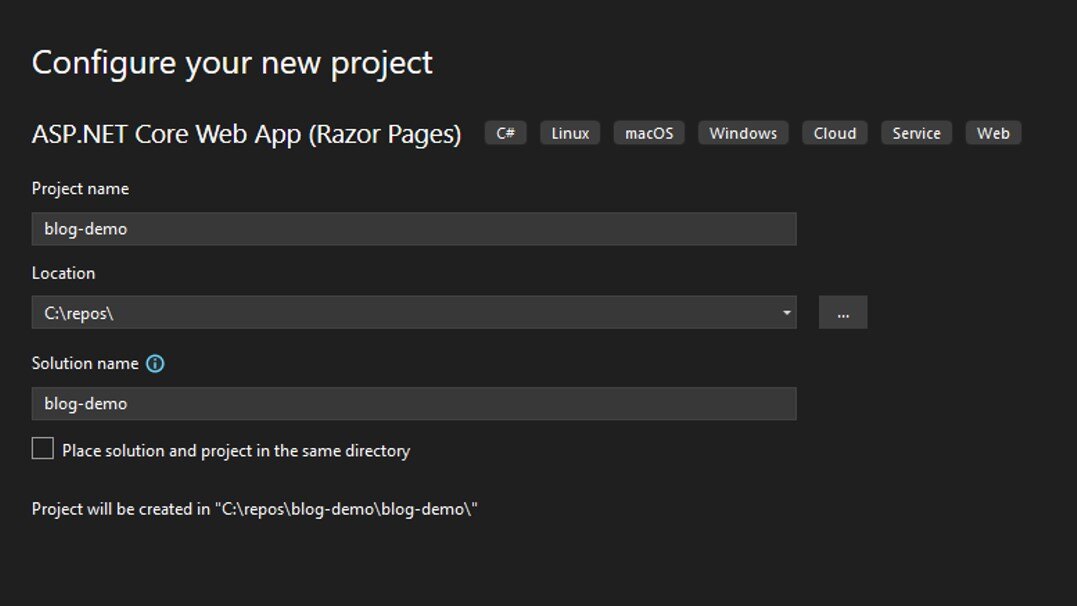
1d. Configure Additional Settings.
On the additional information page, customise the settings for your project. Since we'll be hosting the app on a container instance, make sure to select "Enable container support". I've also deselected "Configure for HTTPS" because we'll be running this behind a load balancer, which will handle all the SSL-related configurations. Everything else can stay as default.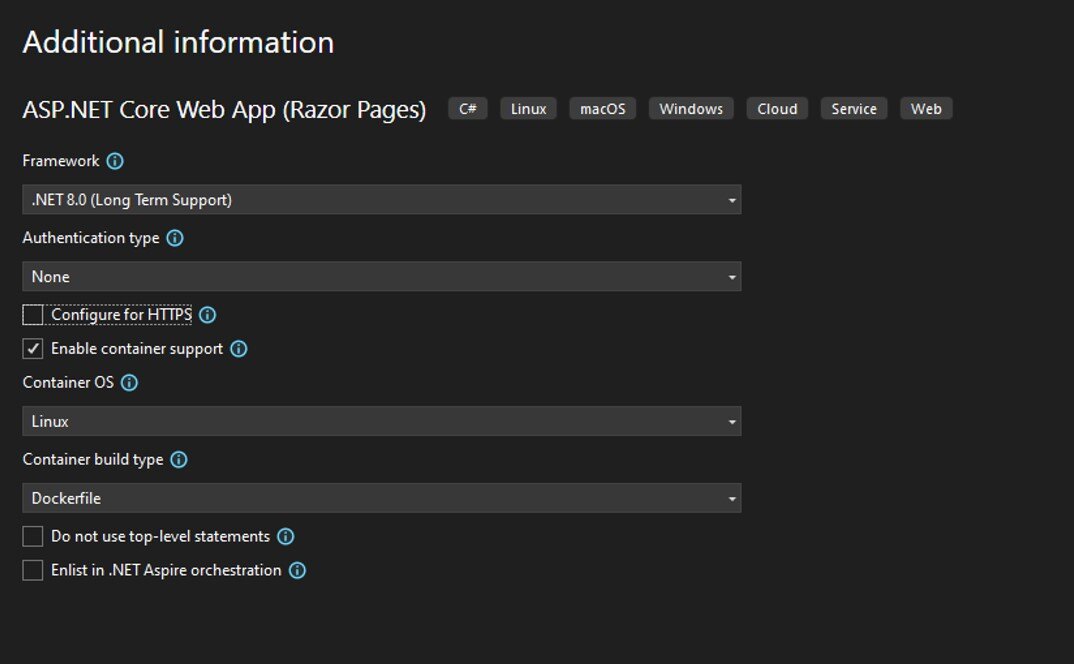
1e. Modify the Home Page.
You now have your app! Let's make a quick change to the home page so we can see our updates when we deploy.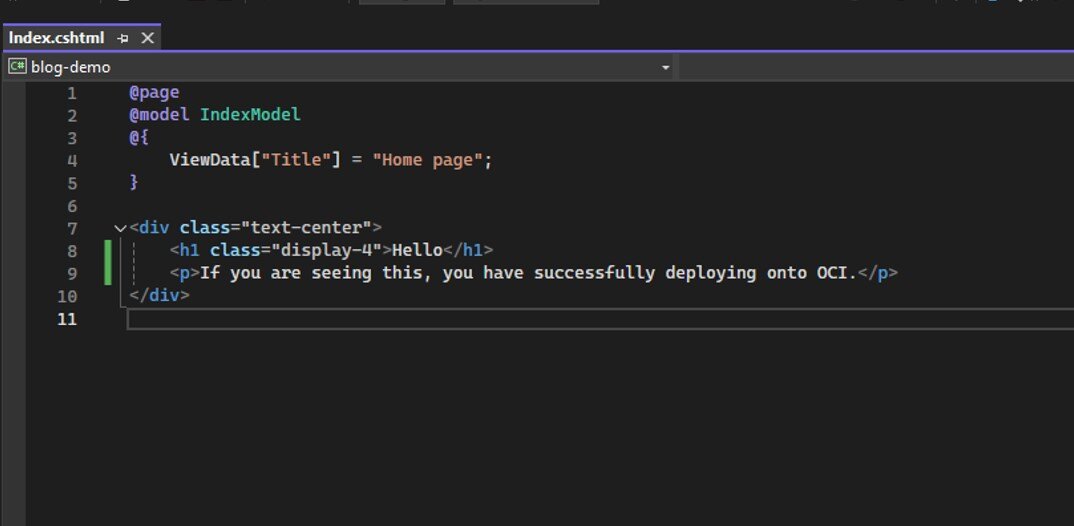
2. OCI Auth Token
Before we can publish our application, we need to ensure we have all the necessary details from OCI. If you've used other container registries, you'll find this familiar. If not, don't worry! We'll walk through it step by step.
2a. Log in to Your OCI Tenant and Navigate to Identity Domains
First, log in to your OCI tenant. From the main menu in the top left, select "Identity & Security", then under "Identity", click on "Domains".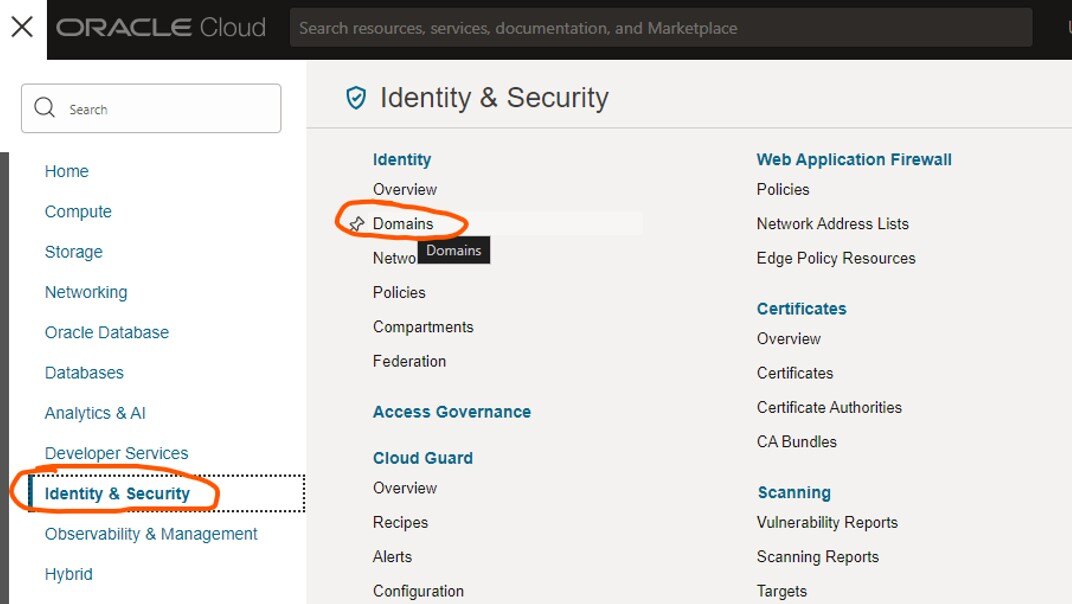
2b. Locate Your Active Domain
You should now see a table listing your domains. Look for the currently active domain. For this guide, we'll focus on Oracle Identity Cloud Service (OIDCS), which is being adopted by all new and most existing customers. If you see a different option, you might need to consult the documentation or reach out to DSP for guidance.
2c. Select Your Domain
My domain is named "OracleIdentityCloudService", but yours might be different. Click on your domain to continue.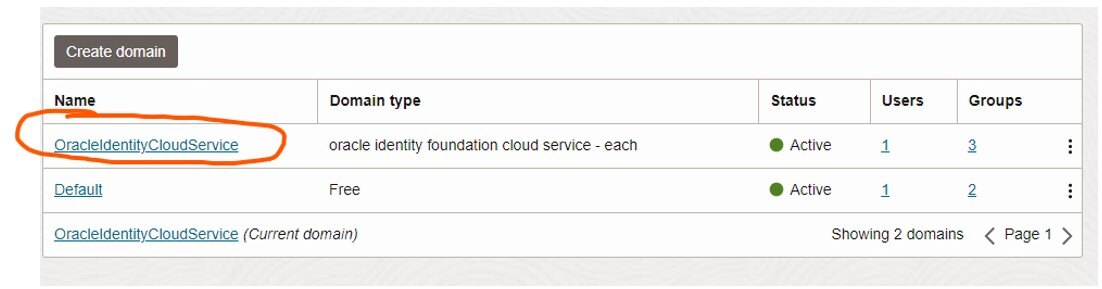
2d. Navigate to Users
On the left-hand navigation menu, click "Users" and select the user who will publish the container image. Ensure they have the correct permissions. Check out the Oracle documentation for more details: Registry Policy Repository Access.
2e. Generate an Auth Token
Scroll down on the user page until you see the "Resources" section on the left-hand side. Click on "Auth tokens".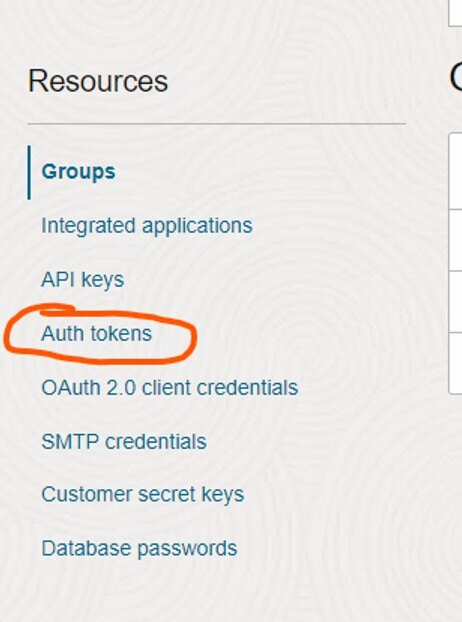
2f. Create a New Auth Token
Click the "Generate token" button, and a drawer will appear from the right. Give your token a meaningful name and click "Generate token" at the bottom. This will create your token. Copy it and keep it safe—we'll need it later to authenticate.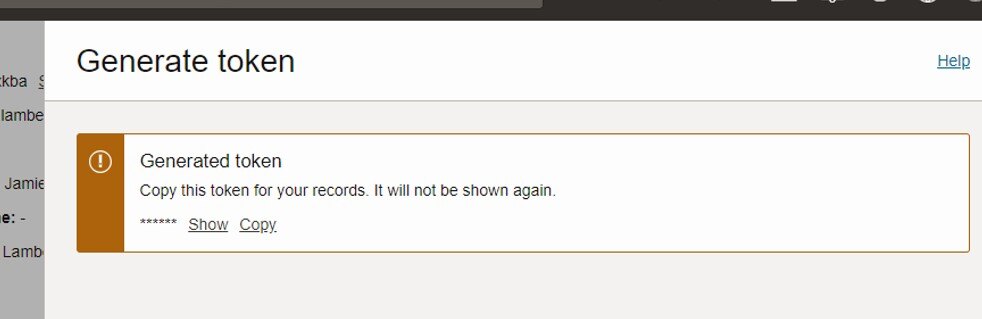
3. OCI Container Registry
In this step, we'll configure the container registry to hold our app image. Depending on your OCI settings, you might not need to create the container registry manually; publishing the image to OCI can create the registry for you. However, I prefer doing it manually so we have all the necessary details in one place, avoiding the hassle of searching around OCI later.
3a. Navigate to the Container Registry
From the OCI homepage, open the top left menu and select "Developer Services". Then, under "Containers & Artifacts", click "Container Registry".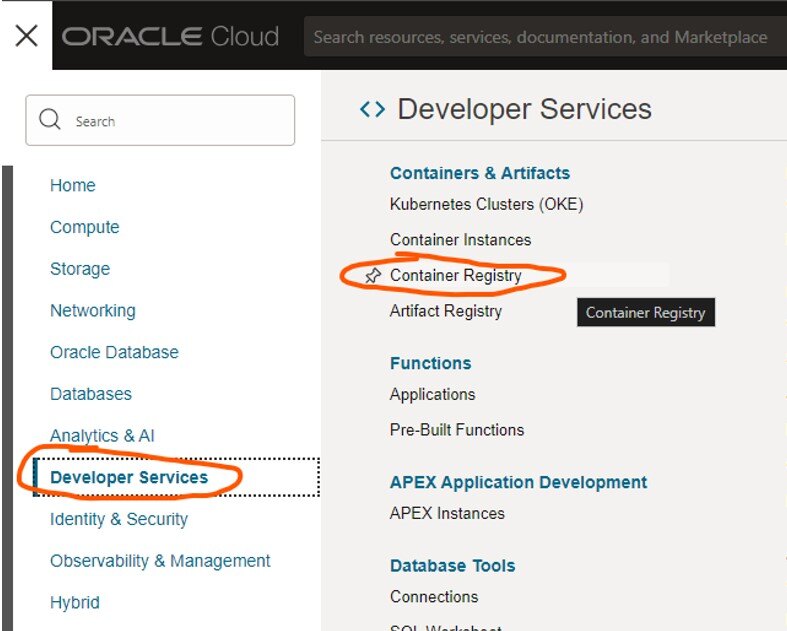
3b. Create a New Repository
Click "Create repository", select your compartment, decide if you want this repo to be private or public, and give it a meaningful name. For this guide, I'll name mine "dsp/blog-demo". I like to use a prefix like "dsp/" to keep things organised, but that's entirely optional.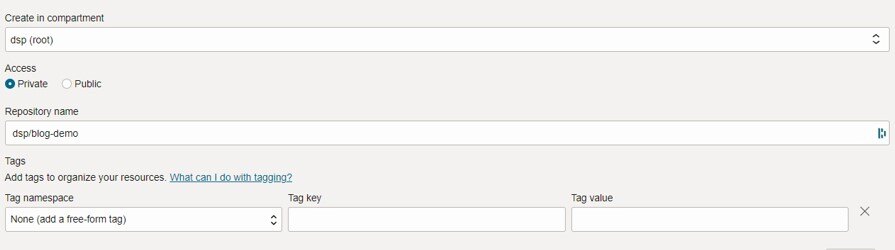
3c. Note Down Repository Details
After creating your repository, select it from the dropdown. You should see all the relevant information displayed. Make a note of the user and the namespace used, and keep the auth token we generated earlier handy. We'll need all these details later.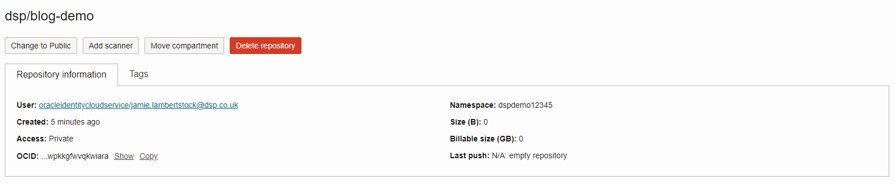
4. Publish time!
Now, let's head back into Microsoft Visual Studio to publish our app to the OCI container repository. As a reminder, you'll need the three important pieces of information you noted earlier:
- Auth Token
- Repo User
- Repo Namespace
4a. Open Your Project and Prepare for Publishing
Open your project if it isn't already, and navigate to the Solution Explorer. Right-click on your project and select "Publish…" from the menu.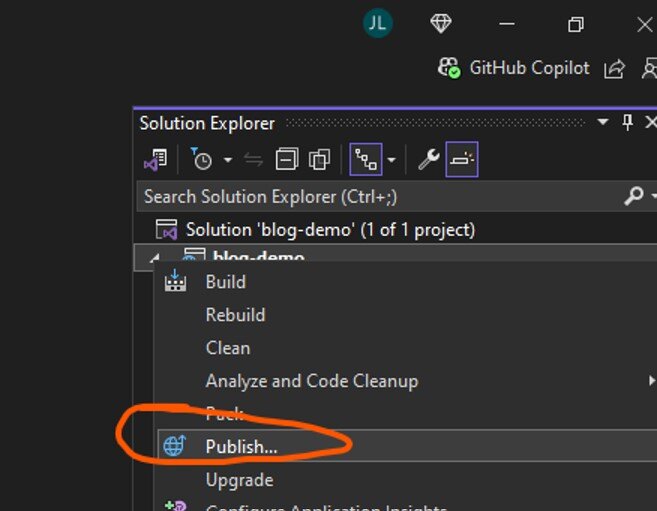
4b. Add a Publish Profile
If it's the first time you're publishing an app within this project, the "Add a publish profile" menu will open automatically. If not, click on "Add a publish profile".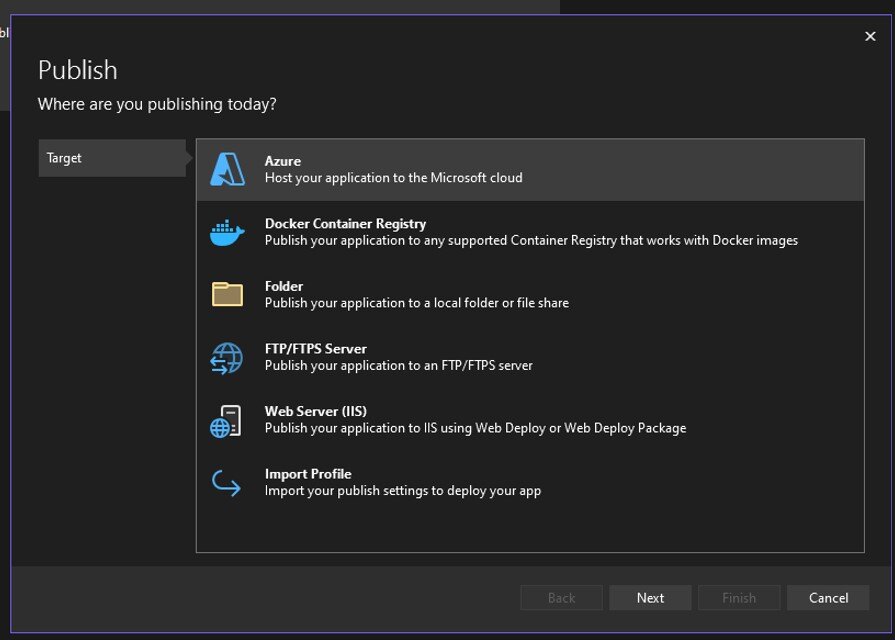
4c. Select Docker Container Registry
In the publish popup, select the "Docker Container Registry" option and click "Next".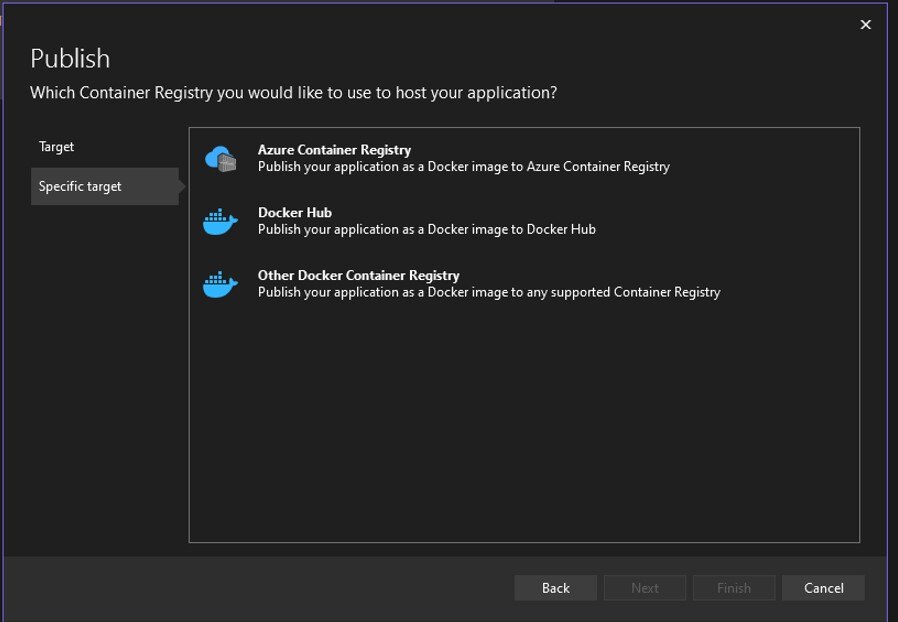
4d. Choose Other Docker Container Registry
Select the "Other Docker Container Registry" option and click "Next".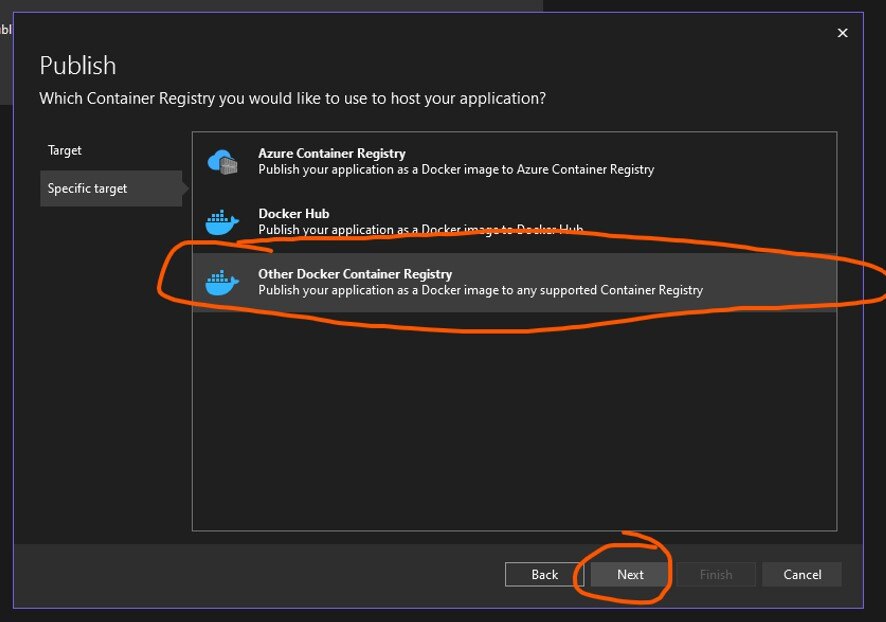
4e. Enter Your Registry Details
You'll be presented with three input boxes:
- Registry URL
- Username
- Password
Registry URL
The registry URL is composed of your OCI region key (found here), followed by '.ocir.io', and then your repo namespace. If you used a prefix when creating your repo name, include it here. Otherwise, leave it blank.
It should look something like this:
<region_key>.ocir.io/<repo-namespace>/<optional-repo-prefix>
For example, mine would be:
uk-london-1.ocir.io/dspdemo1234/dsp
Username
Your username is your repo namespace, followed by your repo user in this format:
<repo-namespace>/<repo-user>
So, for me, it would be:
dspdemo1234/oracleidentitycloudservice/jamie.lambertstock@dsp.co.uk
Password
This is the auth token you noted down in step 2f.
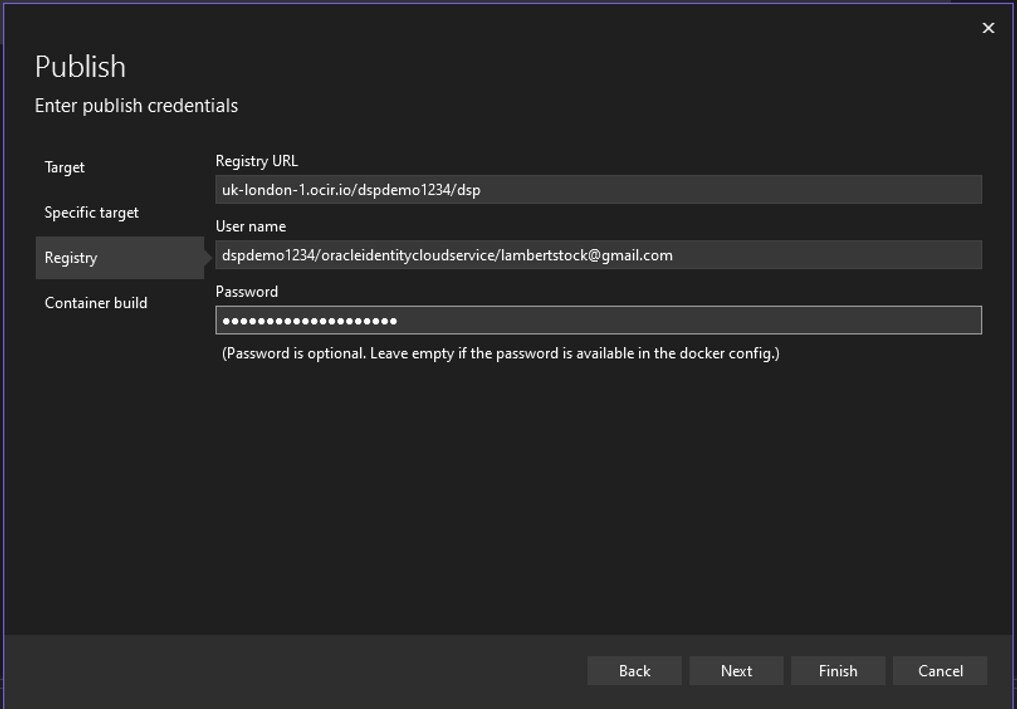
Once you have entered all three, click "Next" to continue.
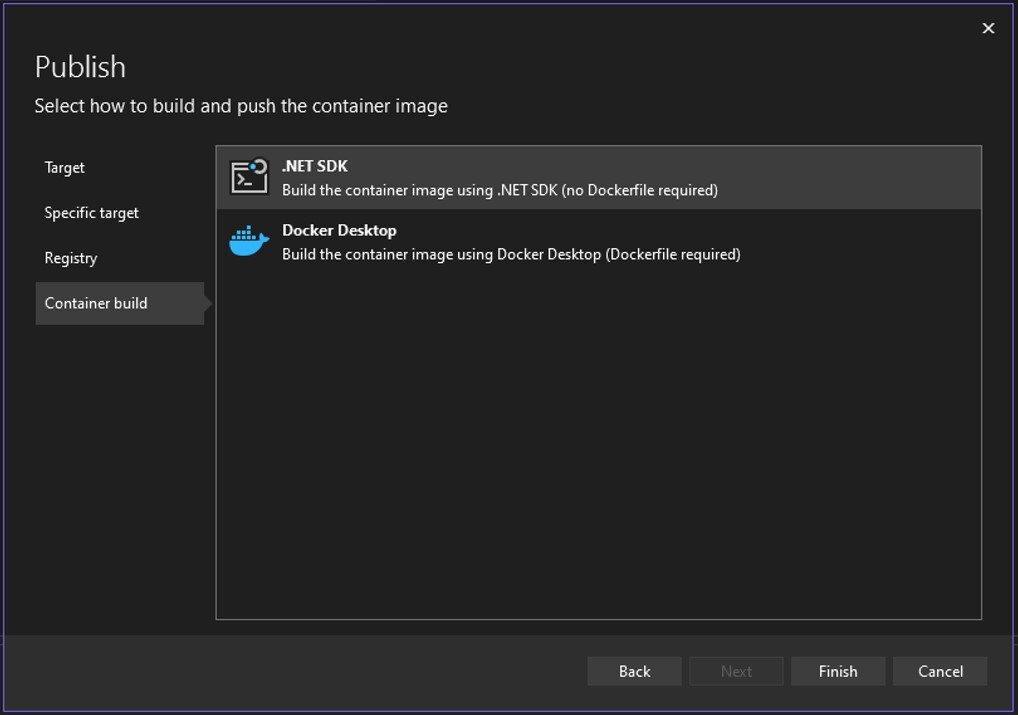
4f. Select Your Build and Push Method
Choose how you wish to build and push the image. I prefer using Docker Desktop over the .NET SDK as it simplifies debugging. Note that you'll need Docker Desktop installed for this option. Make your choice and click "Finish".
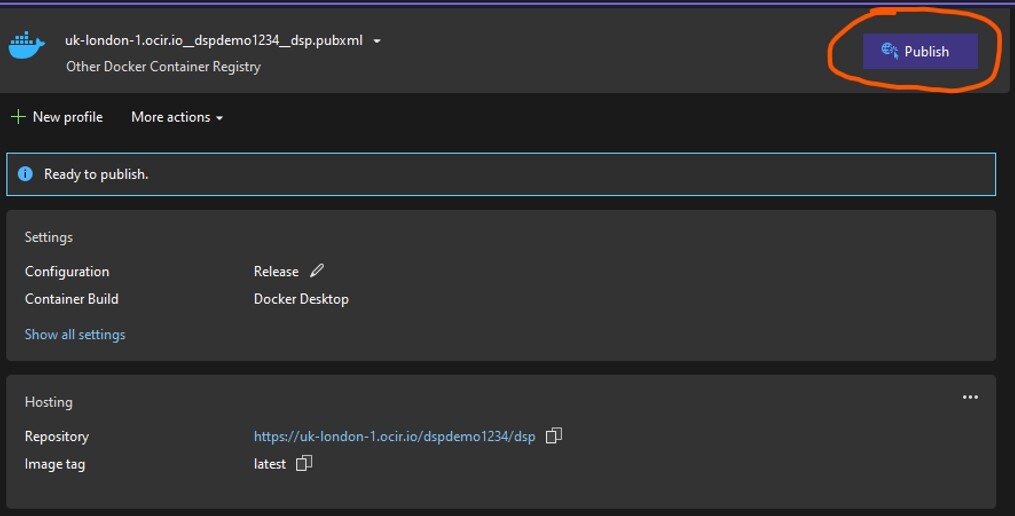
4g. Publish Your App
Now it's time to press that exciting publish button! It should be at the top of the page. Click it, and if all goes well, it'll build your image and push it up to OCI.

5. Container instances
Now that we have our app image in OCI, it's time to host it on something! For this, we'll use container instances, which we can shape to our requirements.
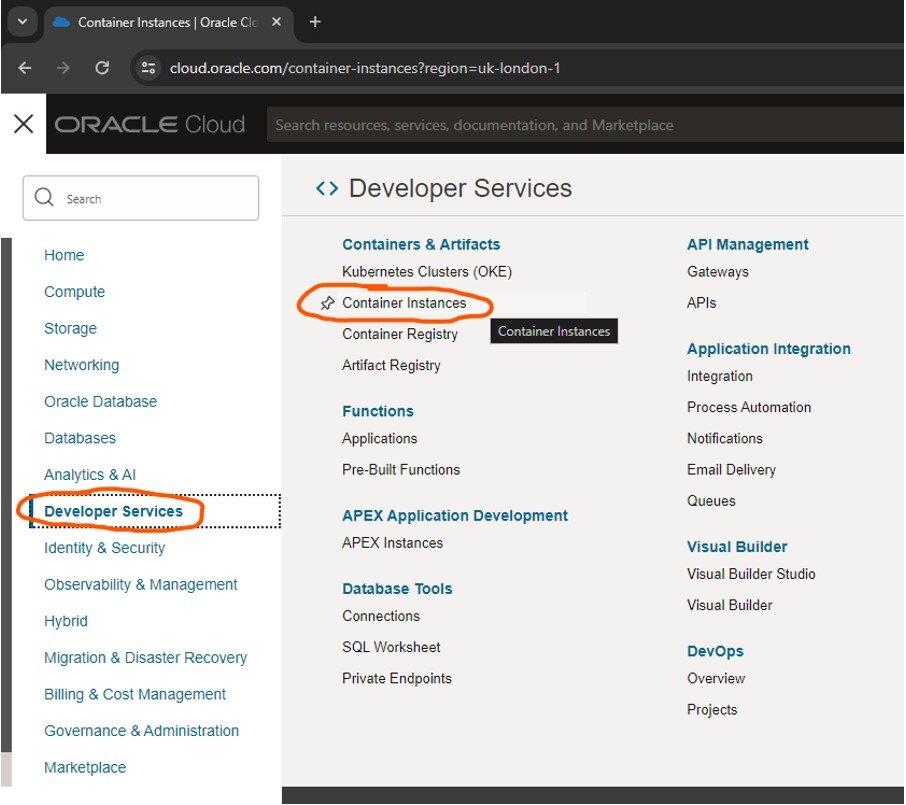
5a. Navigate to Container Instances
Head to the container instances in OCI. This can be found in the top left menu under Developer Services, then under the subheading Containers & Artifacts, select "Container Instances".
5b. Create a New Container Instance
You should now be on the Container Instances page. Click the big button to create a container instance.

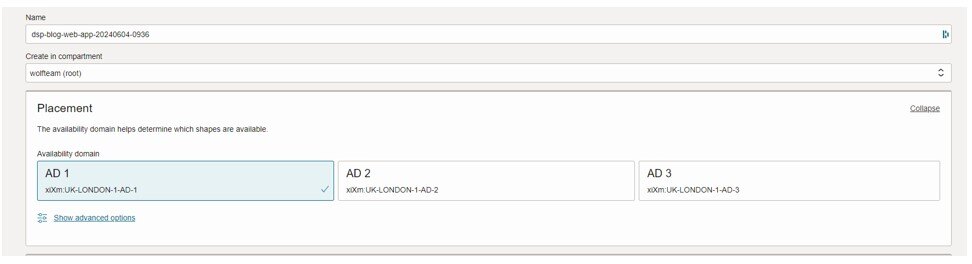
5c. Name Your Container
You'll be greeted with a page full of options. Start by giving your container a name so you can easily identify it in the future.
5d. Configure the Shape
The shape configuration determines how many CPUs, memory, and other resources your container can use. Since you can change this later as your demand increases, start with a smaller configuration. One of the great joys of container instances is their flexibility!

5e. Set Up Networking
The next important section is networking. While networking can get complex, it follows the same principles as other parts of OCI. Since I'll be using a load balancer in front of my app (which handles SSL), I won't assign a public IP address. The load balancer will connect via the subnet. Depending on your use case, you might want a public IP to connect directly to the container.

5f. Select Your Container Image
Once you've finished configuring the basic settings, click "Next". On the container image page, click the "Select image" button, which will open a drawer from the right. Under the repository, select the image we pushed in step 4.

5g. Configure Environment Variables
After selecting your image, click the "Select image" button at the bottom. You can then set any environment variables your container needs. In my example, I don't have any, but this will depend on your application. Once you're happy with the settings, click "Next".
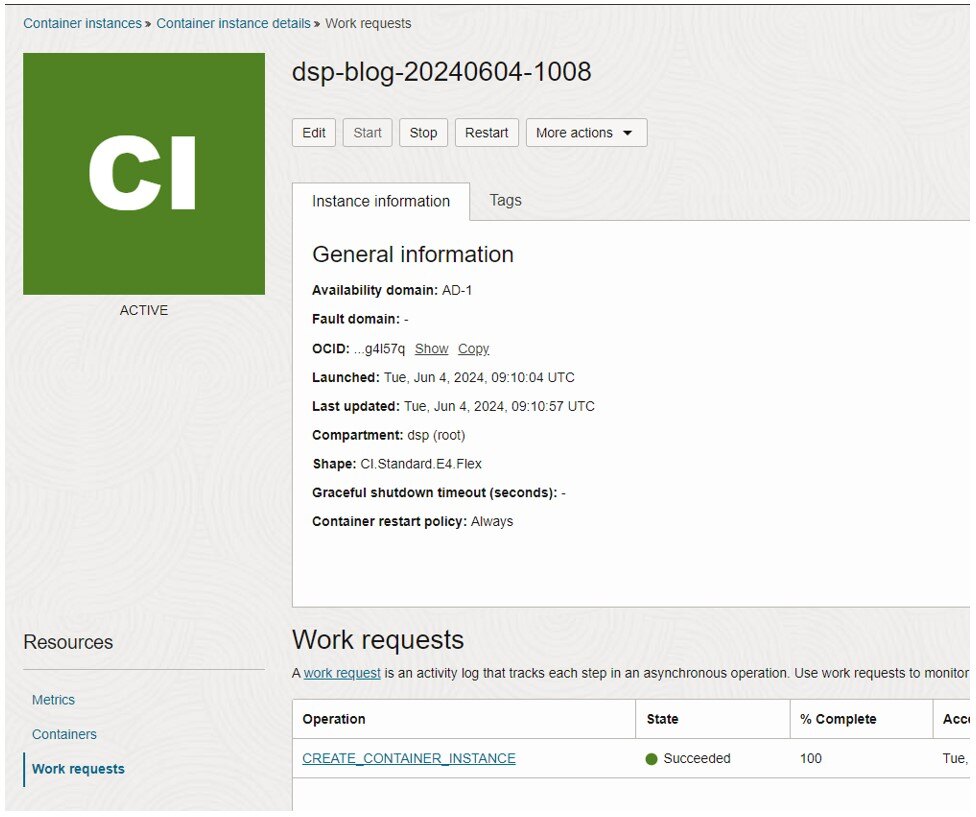
5h. Review and Create
You'll see an overview page summarising everything you've configured. Review it to ensure everything is correct (you can always go back if needed), then click the "Create" button at the bottom. This will redirect you to the container page, where the status will show the progress. Perfect time for a tea break—come back in 3-5 minutes (this will depend on how big your image is).

5i. Troubleshooting
If something goes wrong, the container will be deleted. However, you can still check what happened. Common issues are often related to permissions (try re-entering your user and password when selecting the image) or network problems pulling the image. Hopefully, everything goes smoothly, and you'll have a working container instance running your custom container image.
6. Load balancer
Depending on your setup requirements, you might be done now! You have your image running on a container instance. However, in my example, I still need a way to access my lovely website. The next steps will depend on your specific setup.
6a. Setting Up the Load Balancer
Since I didn't assign a public IP to my container, I'll put a load balancer in front of it. This will handle SSL and proxy traffic to my instance. My container is running the web app on port 8080. There are many detailed guides on load balancer setups, so I'll keep this brief and provide screenshots of my configuration for reference.
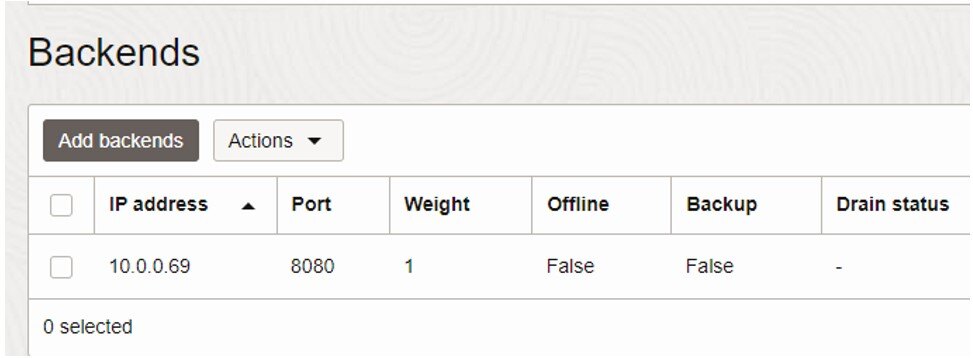
Backend Sets
Configure the backend sets with the private IP of your container and the port used for web traffic (port 8080 in this case).
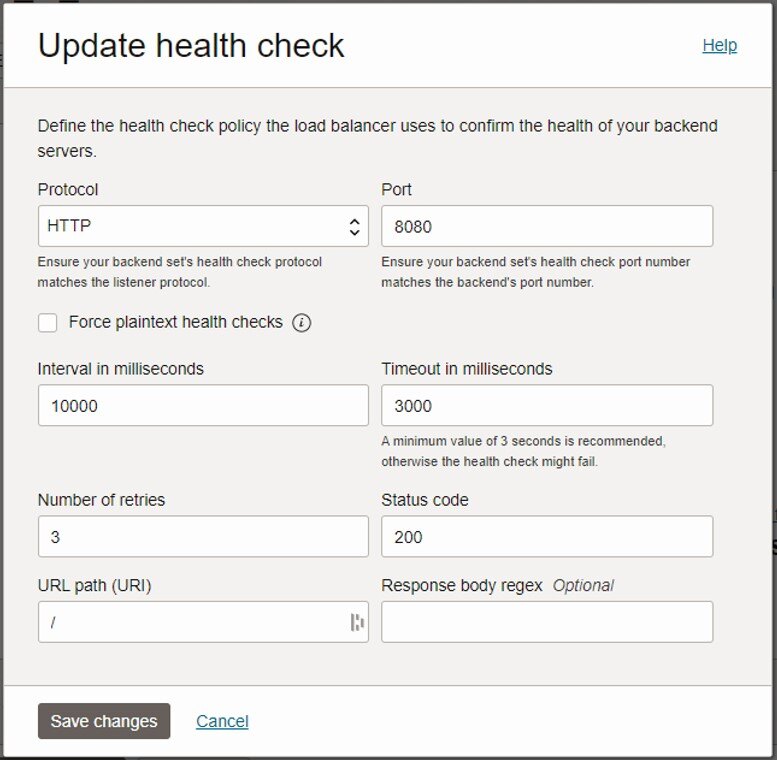
Health Check for Backend Set
Set up a health check to ensure your backend set is always running smoothly.
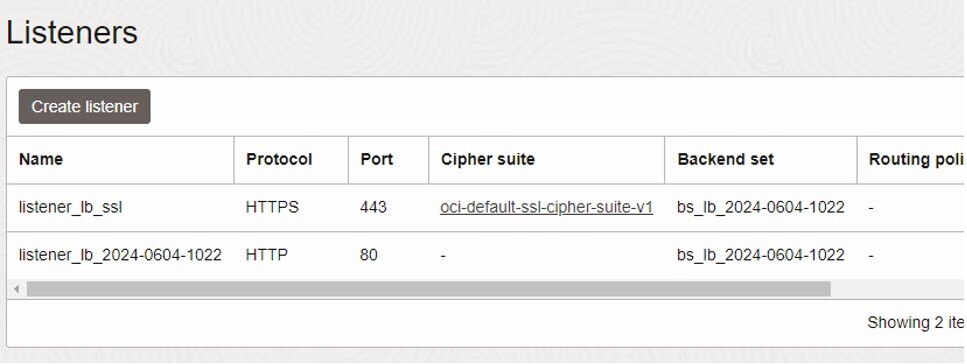
Listeners
I have configured two listeners:
- One for port 80 (non-SSL)
- One for port 443 (SSL)
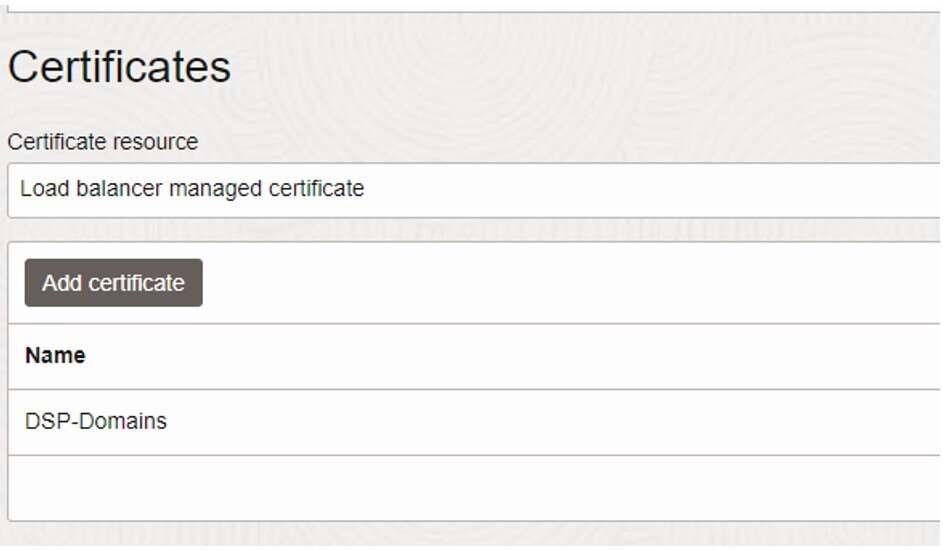
SSL Configuration
I've added a wildcard SSL to the load balancer, connected to the SSL listener.
6b. Update DNS
Finally, update your DNS with your load balancer's IP address. And there you have it—our lovely .NET site running on OCI!

Conclusion
And there you have it! We've taken a .NET Core app from development to deployment on Oracle Cloud Infrastructure using container instances and a load balancer. Along the way, we've:
- Built and configured our app in Visual Studio
- Generated an OCI auth token
- Set up our OCI container registry
- Published our app to OCI
- Configured and launched a container instance
- Set up a load balancer to handle traffic and SSL
Containerising applications and deploying them on Cloud infrastructure can seem daunting, but with the right steps, it becomes a smooth and manageable process. Whether you're deploying a simple web app or a complex microservices architecture, OCI provides the tools and flexibility you need to scale efficiently.
If you've followed along, you now have a solid foundation for deploying containerised applications on OCI. Don't hesitate to explore further and customise your setup to fit your specific needs. The Cloud is your playground!
Happy coding, and may your apps run flawlessly!
Find out more about Oracle Cloud Infrastructure on our website or contact our experts today.