- Services

Getting to know us
- Industries
Recent case study:
Oracle EBS Cloud Deployment
Consolidating and Migrating assets into Oracle Cloud Infrastructure.
.png?width=250&name=stonewater-logo%20(1).png)
Most Visited Pages
-
- Resources
DSP-Explorer acquires leading Oracle Applications Managed Services Provider, Claremont, to further extend its data management capabilities.

Resources
- Contact us
How to Use Azure Functions in your Data Pipelines
Contents
Data Pipelines in Azure
Azure Data Factory (ADF) is the bespoke data integration tool offered by the Azure cloud platform, which provides a low-code GUI interface to orchestrate your data pipelines. In addition, ADF comes with Data Flows (DF) as its default data transformation tool, which again offers a visual interface to apply your transformation logic to data in a pipeline. Although this whole setup might allow users from a non-technical background to author their transformation logic in data pipelines easily, what if some complex business logic needs to be embedded onto the data that is too difficult to implement using DF or is not possible at all? Here, we would need the flexibility a scripting language offers to implement that logic into our data pipeline and do so as cheaply as possible. Enter Azure Functions. Before you read on, you can find out more about our Azure services here.
Azure Functions
Azure Functions are event-triggered pieces of code that run as a serverless compute service. No extra infrastructure is required to run scripts after an event is triggered, and it scales automatically. Azure Functions can be written in languages such as Java, JavaScript, C#, TypeScript, PowerShell and Python. Microsoft is continually updating support for other languages from time to time. Azure Functions can easily be made and deployed using Visual Studio Code (VS Code), a popular integrated development environment developed by Microsoft. In the ETL process, Azure Functions offer us the flexibility to do all such steps from our code editor.
HTTP Trigger in Azure Function
Since Azure Functions are event-driven, we have many types of triggers for our functions to execute. The most common we find in our data pipelines are HTTP triggers, blob triggers and timer triggers. We can, for example, use the HTTP trigger to encapsulate an API endpoint, transform its complex response in JSON, and provide a customized output that sinks into our data warehouse. So, the extract and transform part in ETL is done by our function in the pipeline. This is what we’ll be doing as an example to showcase the power and utility of using Azure Functions in a data pipeline in ADF. We can do so by using the Azure Function extension in VS code and python to author our function. Our infrastructure setup is showcased below:
Making Azure Function in VS Code
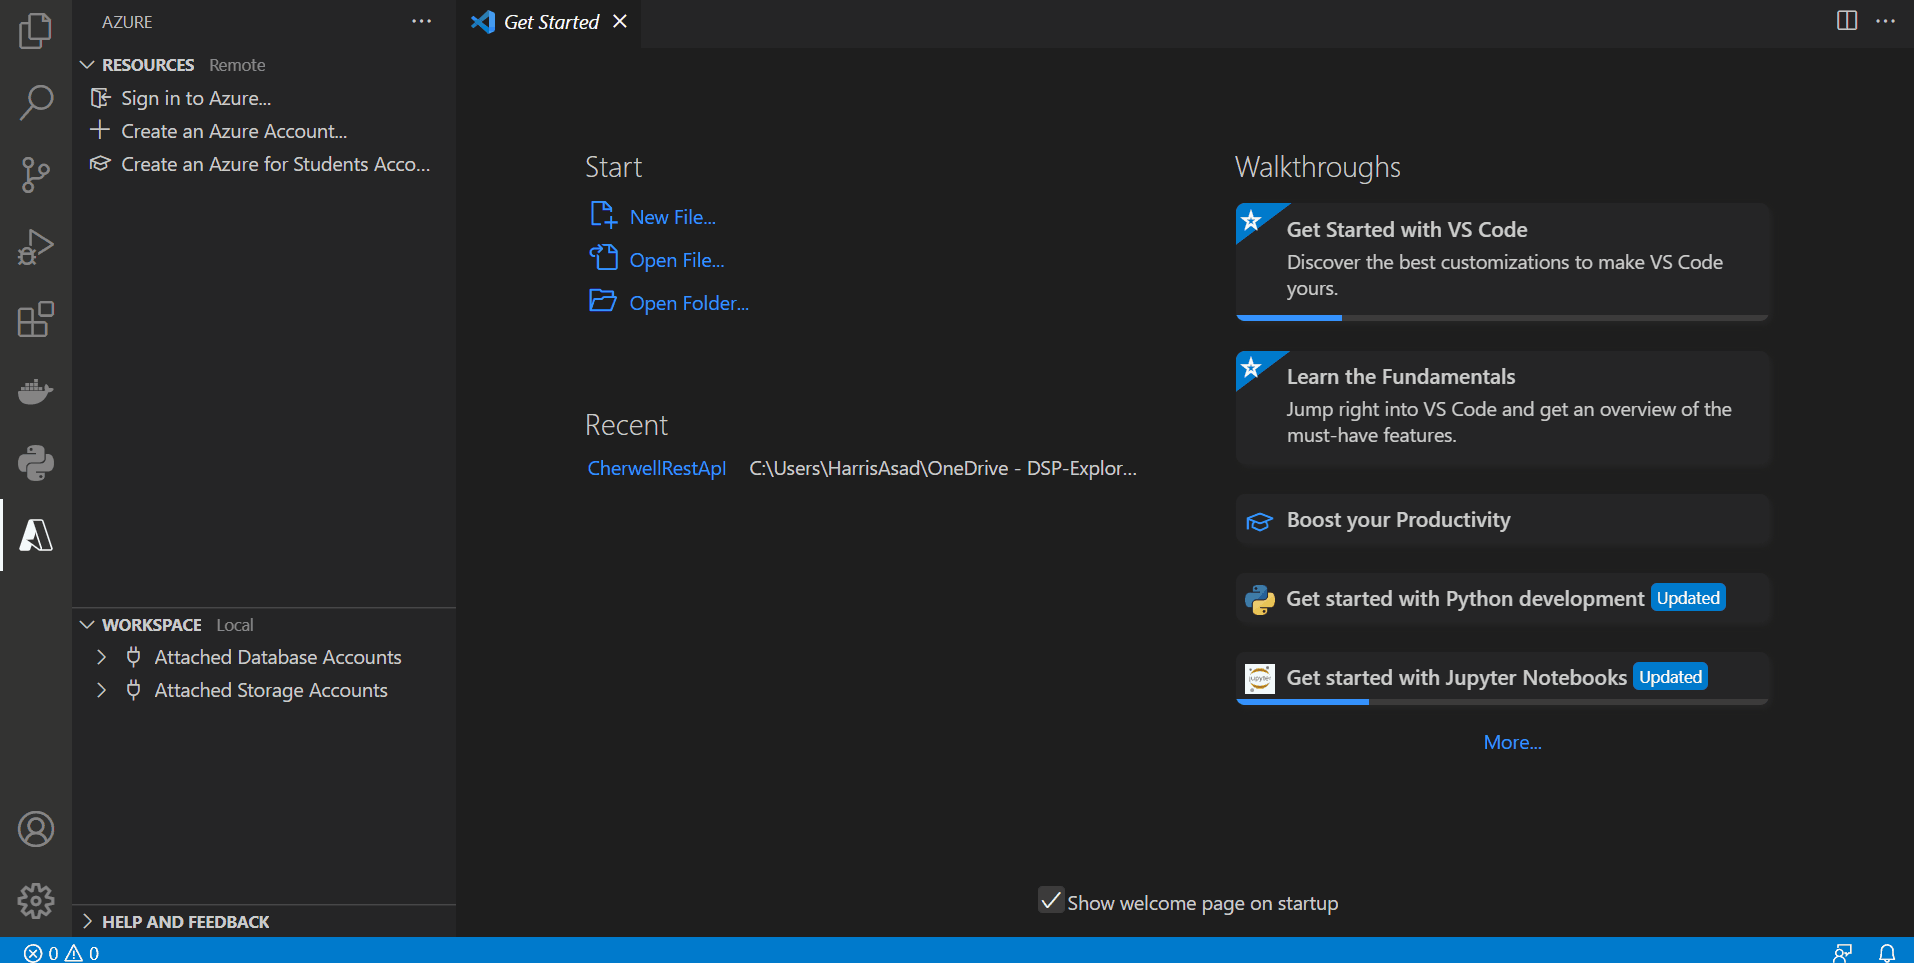
After installing VS code, an extension for Azure Function and Azure Account need to be installed:
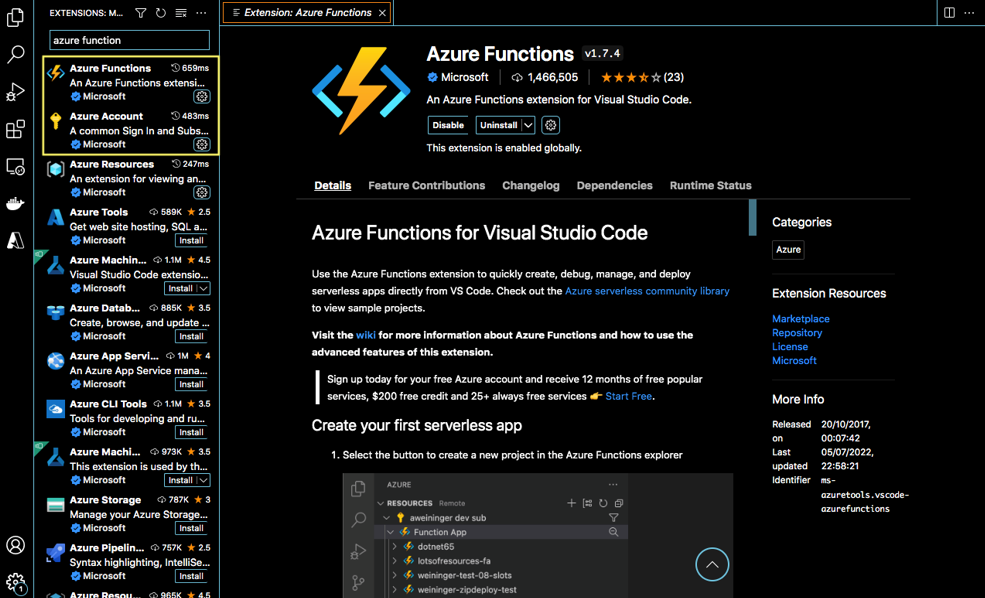
After installation, the option of signing into your Azure account is open. After signing in, we can create an Azure Function after setting up its directory on our computer. It should be noted that the files created after creating an Azure Function rest in our computer in the directory we chose (in our case, the directory is named ‘Azure Function’). We can then make the script of our function in the language we choose. In our case, we will be making the function using python. The steps are delineated below:
Problem Statement
In our example, we will be using fetching time series data for different assets from the Nasdaq Data Link API endpoint, which is in the following format:
GET https://data.nasdaq.com/api/v3/datasets/{database_code}/{dataset_code}/data.JSON
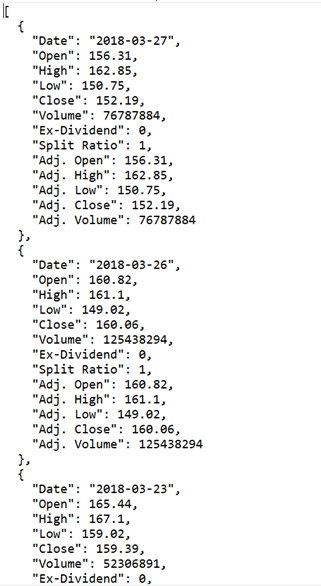
Although, there’s a problem in the JSON response format we receive from this endpoint when we enter values for the database code and dataset code. The rows and columns are in different arrays, amongst other metadata. We then need to extract only relevant information from this JSON format and copy that into our blob storage. The JSON output is shown below when fetching data for Meta stock:
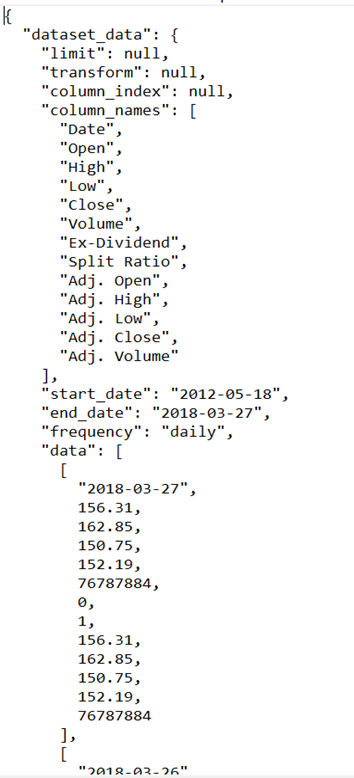
Therefore, we need to fetch ‘column_names’ and ‘data’ out of this response and then combine them. Using this endpoint in ADF while making this pipeline will force us to use DF, which will be a tedious process of flattening the file and extracting relevant information. But what if we change our database and dataset code? The resulting JSON output will be different. Therefore, we need a dynamic solution to not only fetch the required information from our endpoint but also be flexible enough to edit it easily in a single source.
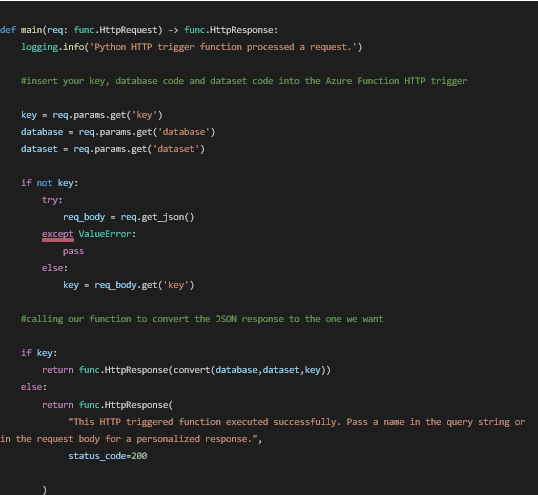
Authoring the Azure Function for our Problem Statement
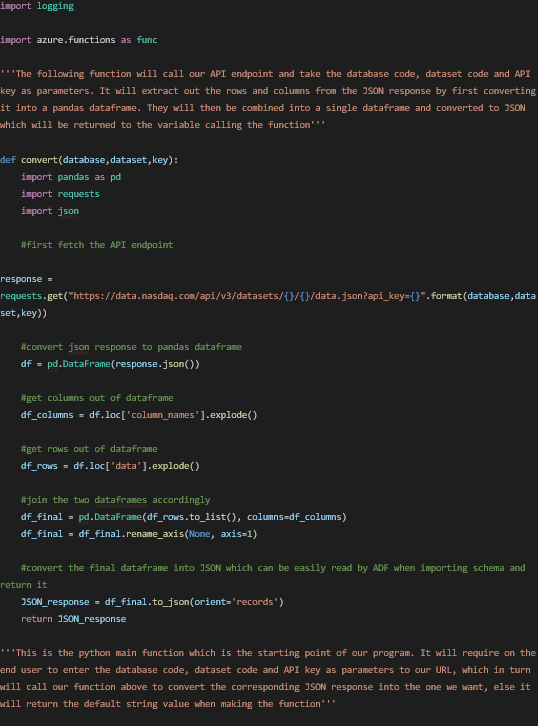
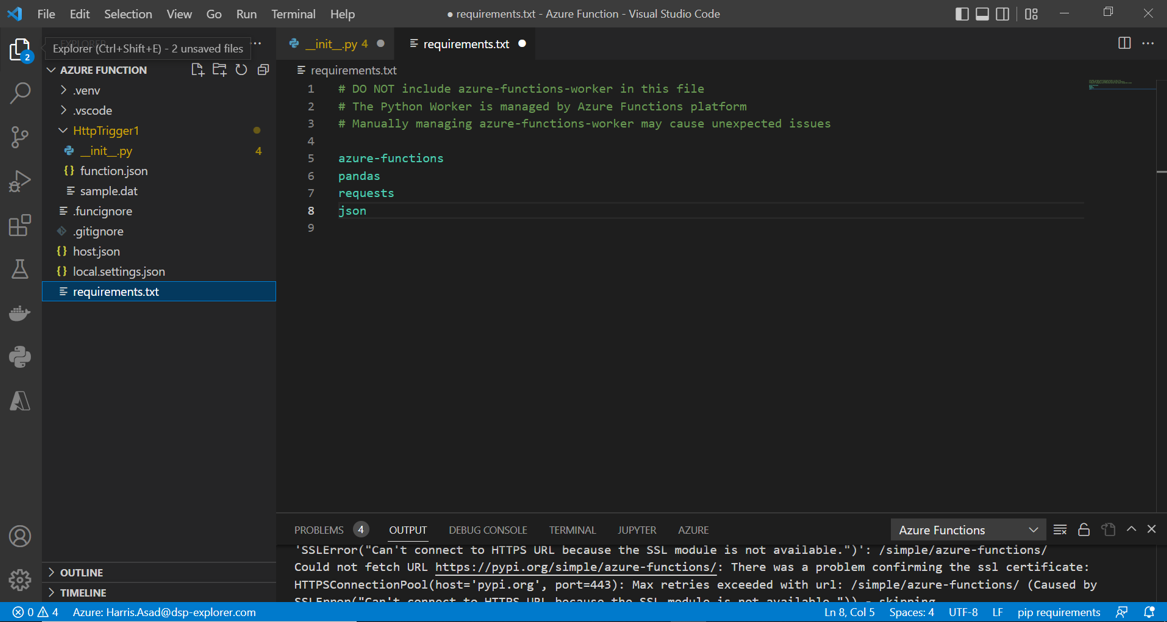
It is to be noted that the authoring of the function is done in the __init__.py file that opened when we first made the function in our locally chosen directory, ‘Azure Function’. Any python package that is being imported needs to be mentioned in the ‘requirements.txt’ file as shown below:
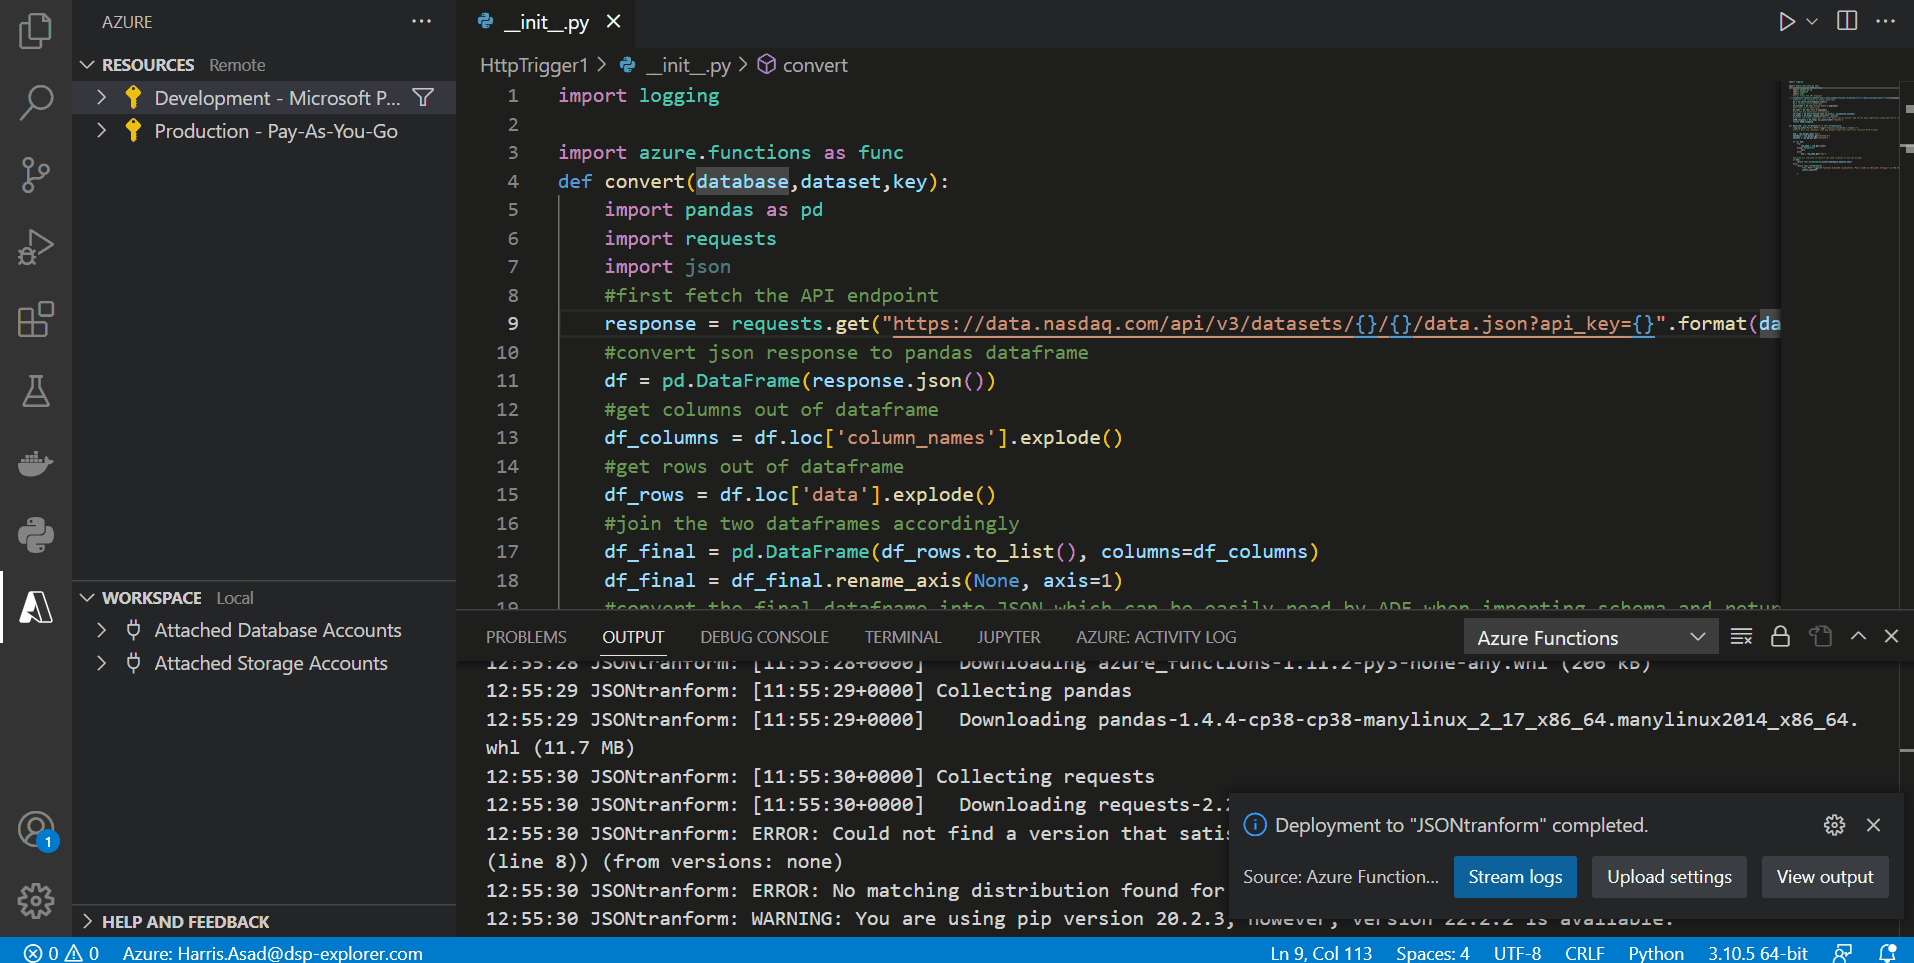
After everything has been coded and assuming our function app has already been created (named JSONtransform), we need to deploy this function to our function app in the cloud. This can be done by going to the Azure icon in VS code and clicking the deploy button in the bottom left next to the workspace (icon shaped like a cloud):

Results
Once the function has been deployed, let’s test our result. We need to input three parameters to our function URL (since it is an HTTP trigger), i.e. the database code, the dataset code and the API key. Go to your Azure account, select Function App to see a list of your function apps, and select the one in which you deployed your function. Click functions to see a list of deployed functions to your app. In our case, we only have one. Right-click the function and select ‘Copy function URL’. Paste the URL in your browser and add the parameters:
In our case, we imported the stock price data for Meta with database code = ‘WIKI’, dataset code = ‘FB’, and the API key is our secret (you can get yours by signing up on the NASDAQ website). By inputting these parameters next to our function URL, we get the desired JSON response as shown below:
This is the ideal response to get from an API endpoint. Each piece of data is now specified by its column. We can now easily import schemas into the data factory and copy this data into our data warehouse. The extraction and transformation layer in ETL for our API endpoint will now easily be done for all databases and datasets coming from our endpoint by just calling our Azure Function within the pipeline in ADF and entering our parameters.
Conclusion
We have so far seen how Azure Functions with the HTTP trigger can help translate complex business logic in our data pipelines. There are also other possibilities to using it, for example, by using the blob storage trigger, whereby the function will be activated whenever a new file comes into our blob container. The way to do that can be subject to another blog post in the future. This example is just an overview of how powerful and flexible Azure Functions can be when we want custom transformations to be performed on our data.
If you would like to speak to one of our Microsoft Azure experts, get in touch through enquiries@dsp.co.uk or book a meeting...