- Oracle Managed Services
Oracle Managed Service Case Study
Discover how we migrated Stripe to Oracle Cloud and then saved them time, resource and costs by managing their cloud environment.
.png?width=200&name=stripe-background-image_750x400%20(2).png)
Oracle Managed Services
- Oracle Cloud Services
Oracle Cloud Service Case Study
Discover how we deployed Oracle Cloud to solve C2C Rail's challenges.

Oracle Cloud Services
- Oracle Consulting Services
Oracle Consulting Case Study
Discover how we saved LV millions...

Oracle Consulting Services
- Oracle Application Development
Oracle APEX Case Study
Discover how we developed a feature-rich mobile tasking application for NHS York Trust, saving Doctor's time and improving patients experience.

Oracle APEX Services
- Contact Us
Model Deployment in OCI
Contents
Oracle have recently taken another step in making your model development process even easier. With OCI’s new Model Deployment feature within their Data Science suite, deploying a model to an API is as simple as clicking ‘Deploy’!
The Purpose of Model Deployment
Prior to this development, model deployment was restricted to the functions outlined here and implementing an API on top of this required additional work. Now with the click of a few buttons your model is deployed to an API with an HTTP endpoint that you can programmatically send classification requests to. On top of that you can select the VM shape you desire, the number of instances, and even configure the load balancer - which is enabled by default - to ensure your service is highly available to anyone using your model’s API.
This is a far cry easier than previous deployment methods which required the data scientist to create a docker image of their model, develop the API themselves, and then manually deploy this to a compute instance. Anything that makes the deployment process easier gives us more time to focus on developing robust models as we should be doing.
In celebration of the roll-out of the Model Deployment feature I’m going to walk you through developing a simple machine learning model for handwritten digit recognition, deploying it with an HTTP endpoint using OCI Model Deployment, and then making classification requests using the super simple API.
Creating the Notebook Session
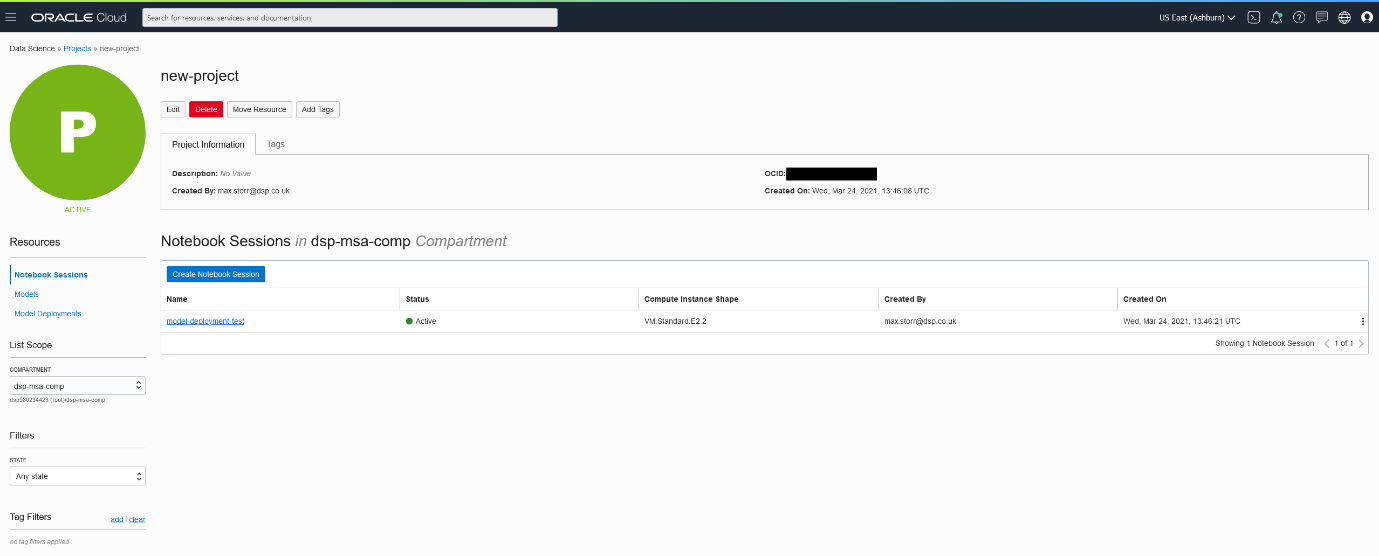
To make the development process simple I advise you to go to your OCI Console, find the Data Science section and create a new project. Then open your new project and create a notebook session, using all the default settings works fine for this example.
Finally you should have a view that looks like this:
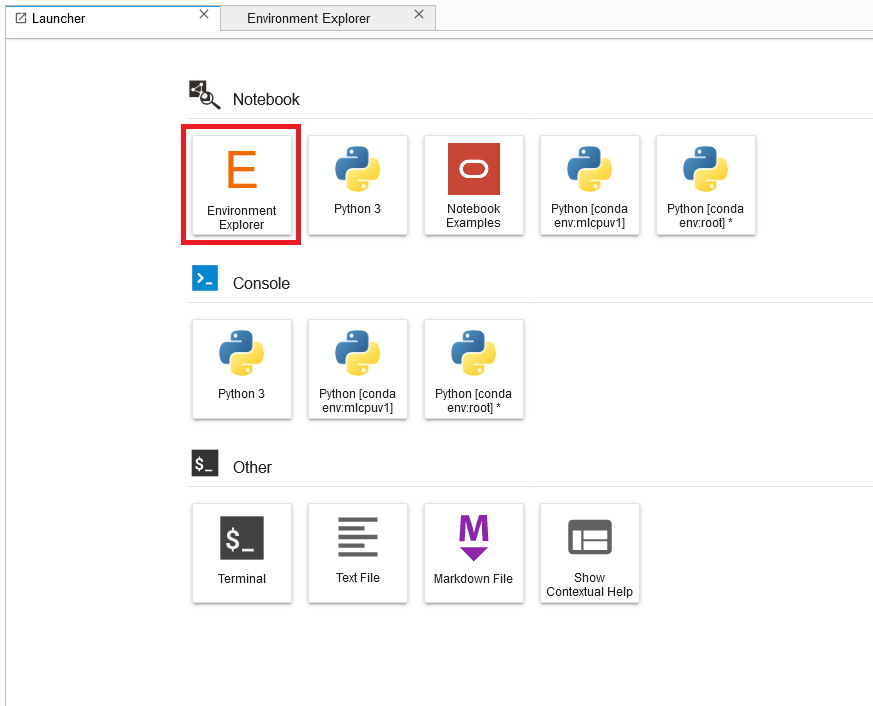
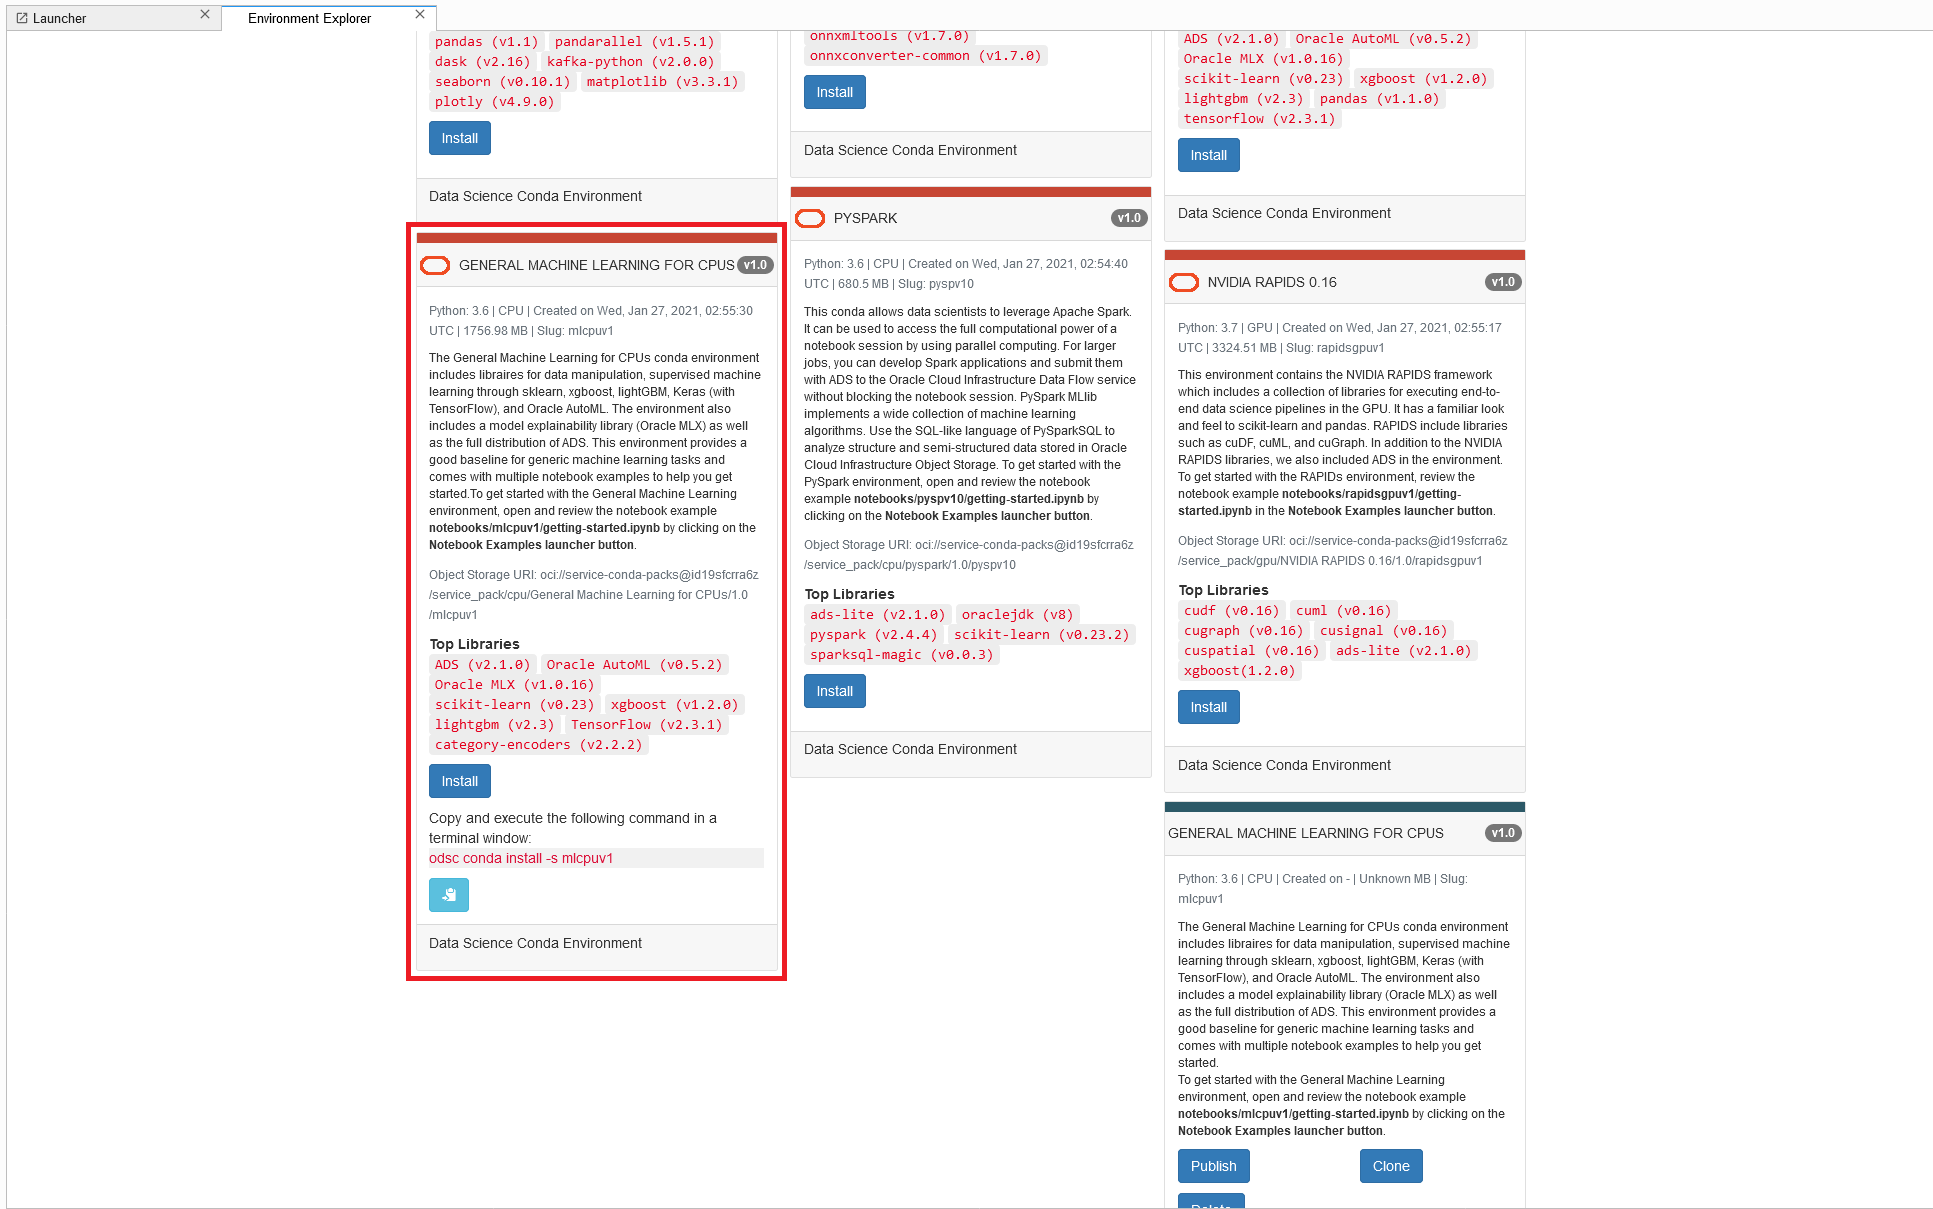
Once inside of your notebook session we can make use of OCI’s Conda environments which contain all of the necessary dependencies for this project. On your launcher select ‘Environment Explorer’, choose the ‘General Machine Learning for CPUs’ environment and copy and paste the provided code into a terminal session. You should now be able to create a notebook using the ‘mlcpuv1’ conda environment and we can move on to the exciting part – developing the model!
Here are some screenshots to help you along with the process, with the necessary steps outlined in red:
Developing the Model
If you already have a model artifact saved within your model catalogue you can skip this stage: from there it’s as simple as clicking ‘Deploy’. But just in case you don’t, I’m going to provide an example notebook here which you can upload to make the training process as easy as possible.
The example provided uses the scikit-learn python module, a common machine learning development library, to create a Support Vector Machine (SVM) capable of recognising handwritten digits. Trained on a larger dataset including alphabetical letters, this sort of model could be used to sort mail for postal services; another great example of how machine learning can be used to automate manually intensive work so that we can focus on the bigger picture.
Deploying Your Model Artifact
Once you’ve created the model artifact and saved it to the model catalogue, you should be able to find it within your project page as seen here:
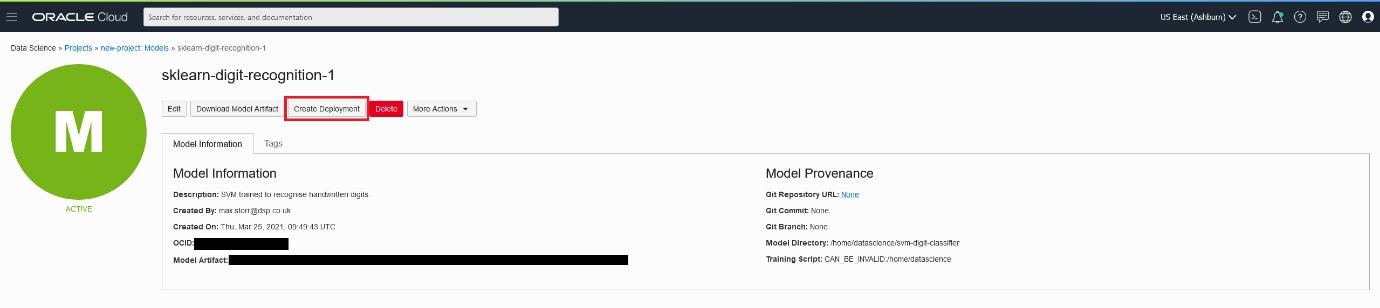
You can go ahead and click on ‘Create Deployment’, which automates the entire process of containerising your model, assigning it a compute instance, and creating an API for it. Just select your desired compute shape, the number of instances you want, wait for deployment and you’re done! Now we can move on to invoking your model.
Invoking Your Model
If you are following along with the example notebook provided above then the code to invoke your model has already been provided, but in case you’ve deployed a model you already had, here is another example notebook providing the necessary code to invoke classification responses from your model endpoint.
Your model endpoint can be found in the new Model Deployments page inside of your Data Science Project, shown here:
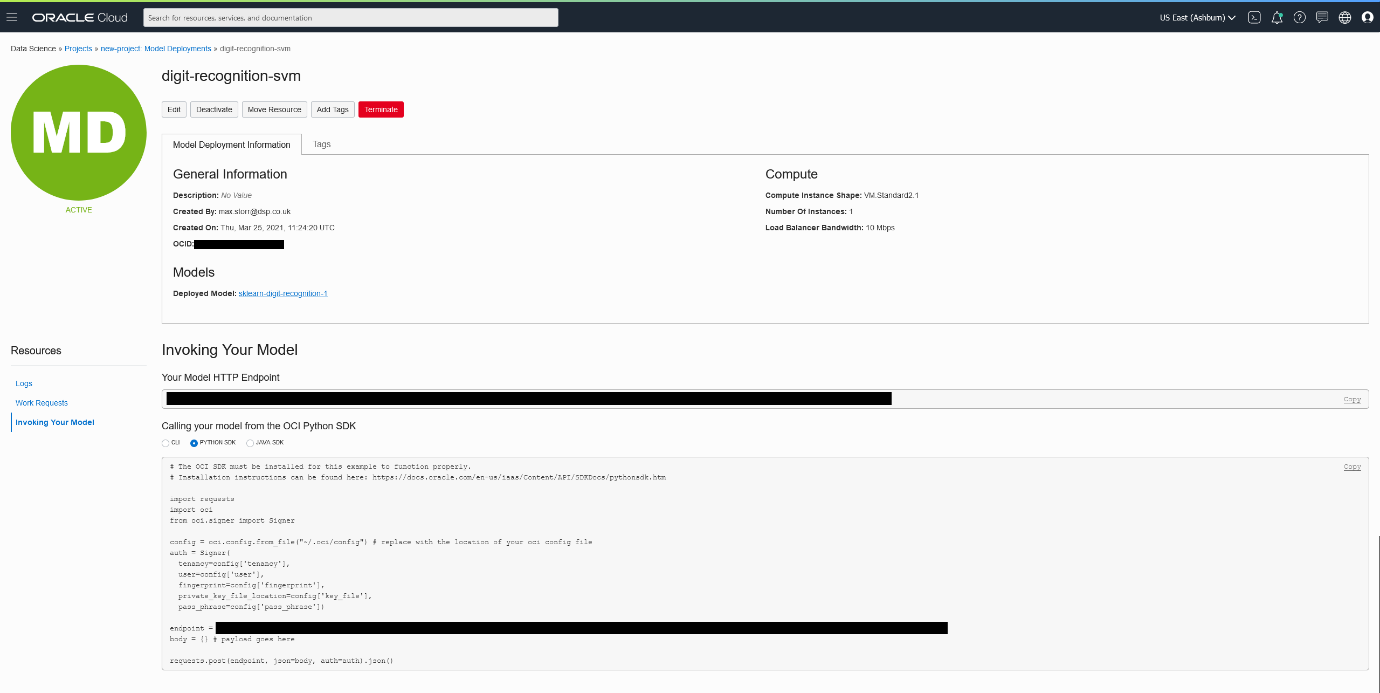
This page provides the URI required to make classification requests and also a Python SDK code snippet if you needed it; however this was already provided in my notebook examples.
At this point our model is now up in the cloud, and you can make classification requests from anywhere in the world. Here’s an example of our model’s classifications:

Hopefully I’ve demonstrated how simple Oracle have made it to deploy your models, but if you’ve had any problems deploying your own models or if you’ve encountered any issues running my example notebooks please send me an email at max.storr@dsp-explorer.com and I’ll be glad to help.
For more information on DSP-Explorer's work with Machine Learning and Business Intelligent solutions, head to our dedicated webpage, or get in touch with one of our experts via the form on this page.