- About

Getting to know us
- Industries
Recent case study:
Oracle EBS Cloud Deployment
Consolidating and Migrating assets into Oracle Cloud Infrastructure.
.png?width=250&name=stonewater-logo%20(1).png)
Most Visited Pages
-
- Resources
DSP-Explorer acquires leading Oracle Applications Managed Services Provider, Claremont, to further extend its data management capabilities.

Resources
- Contact us
Computer Vision Models with Azure Machine Learning - Part 1
Contents
DSP acquires leading Oracle Applications Managed Services Provider, Claremont, to further extend its data management capabilities.
DSP is recognised for the second consecutive year in the 2023 Gartner® Market Guide for Oracle Cloud Infrastructure Professional and Managed Services
Explorer Recognised as Oracle Digital Partner of the Year 2019
Introduction
Azure Machine Learning (ML) is a low-code solution to the development process of machine learning algorithms. Provided with plenty of helpful templates, drag-and-drop functions that satisfy all of the typical processes required for developing an ML algorithm, and the ability to deploy your model to an API at the click of a button, developing ML solutions is made easy.
In this blog, I’m going to explain how Azure Machine Learning makes training computer vision models, and publishing them to an API, as easy as pie.
Azure ML: An Overview
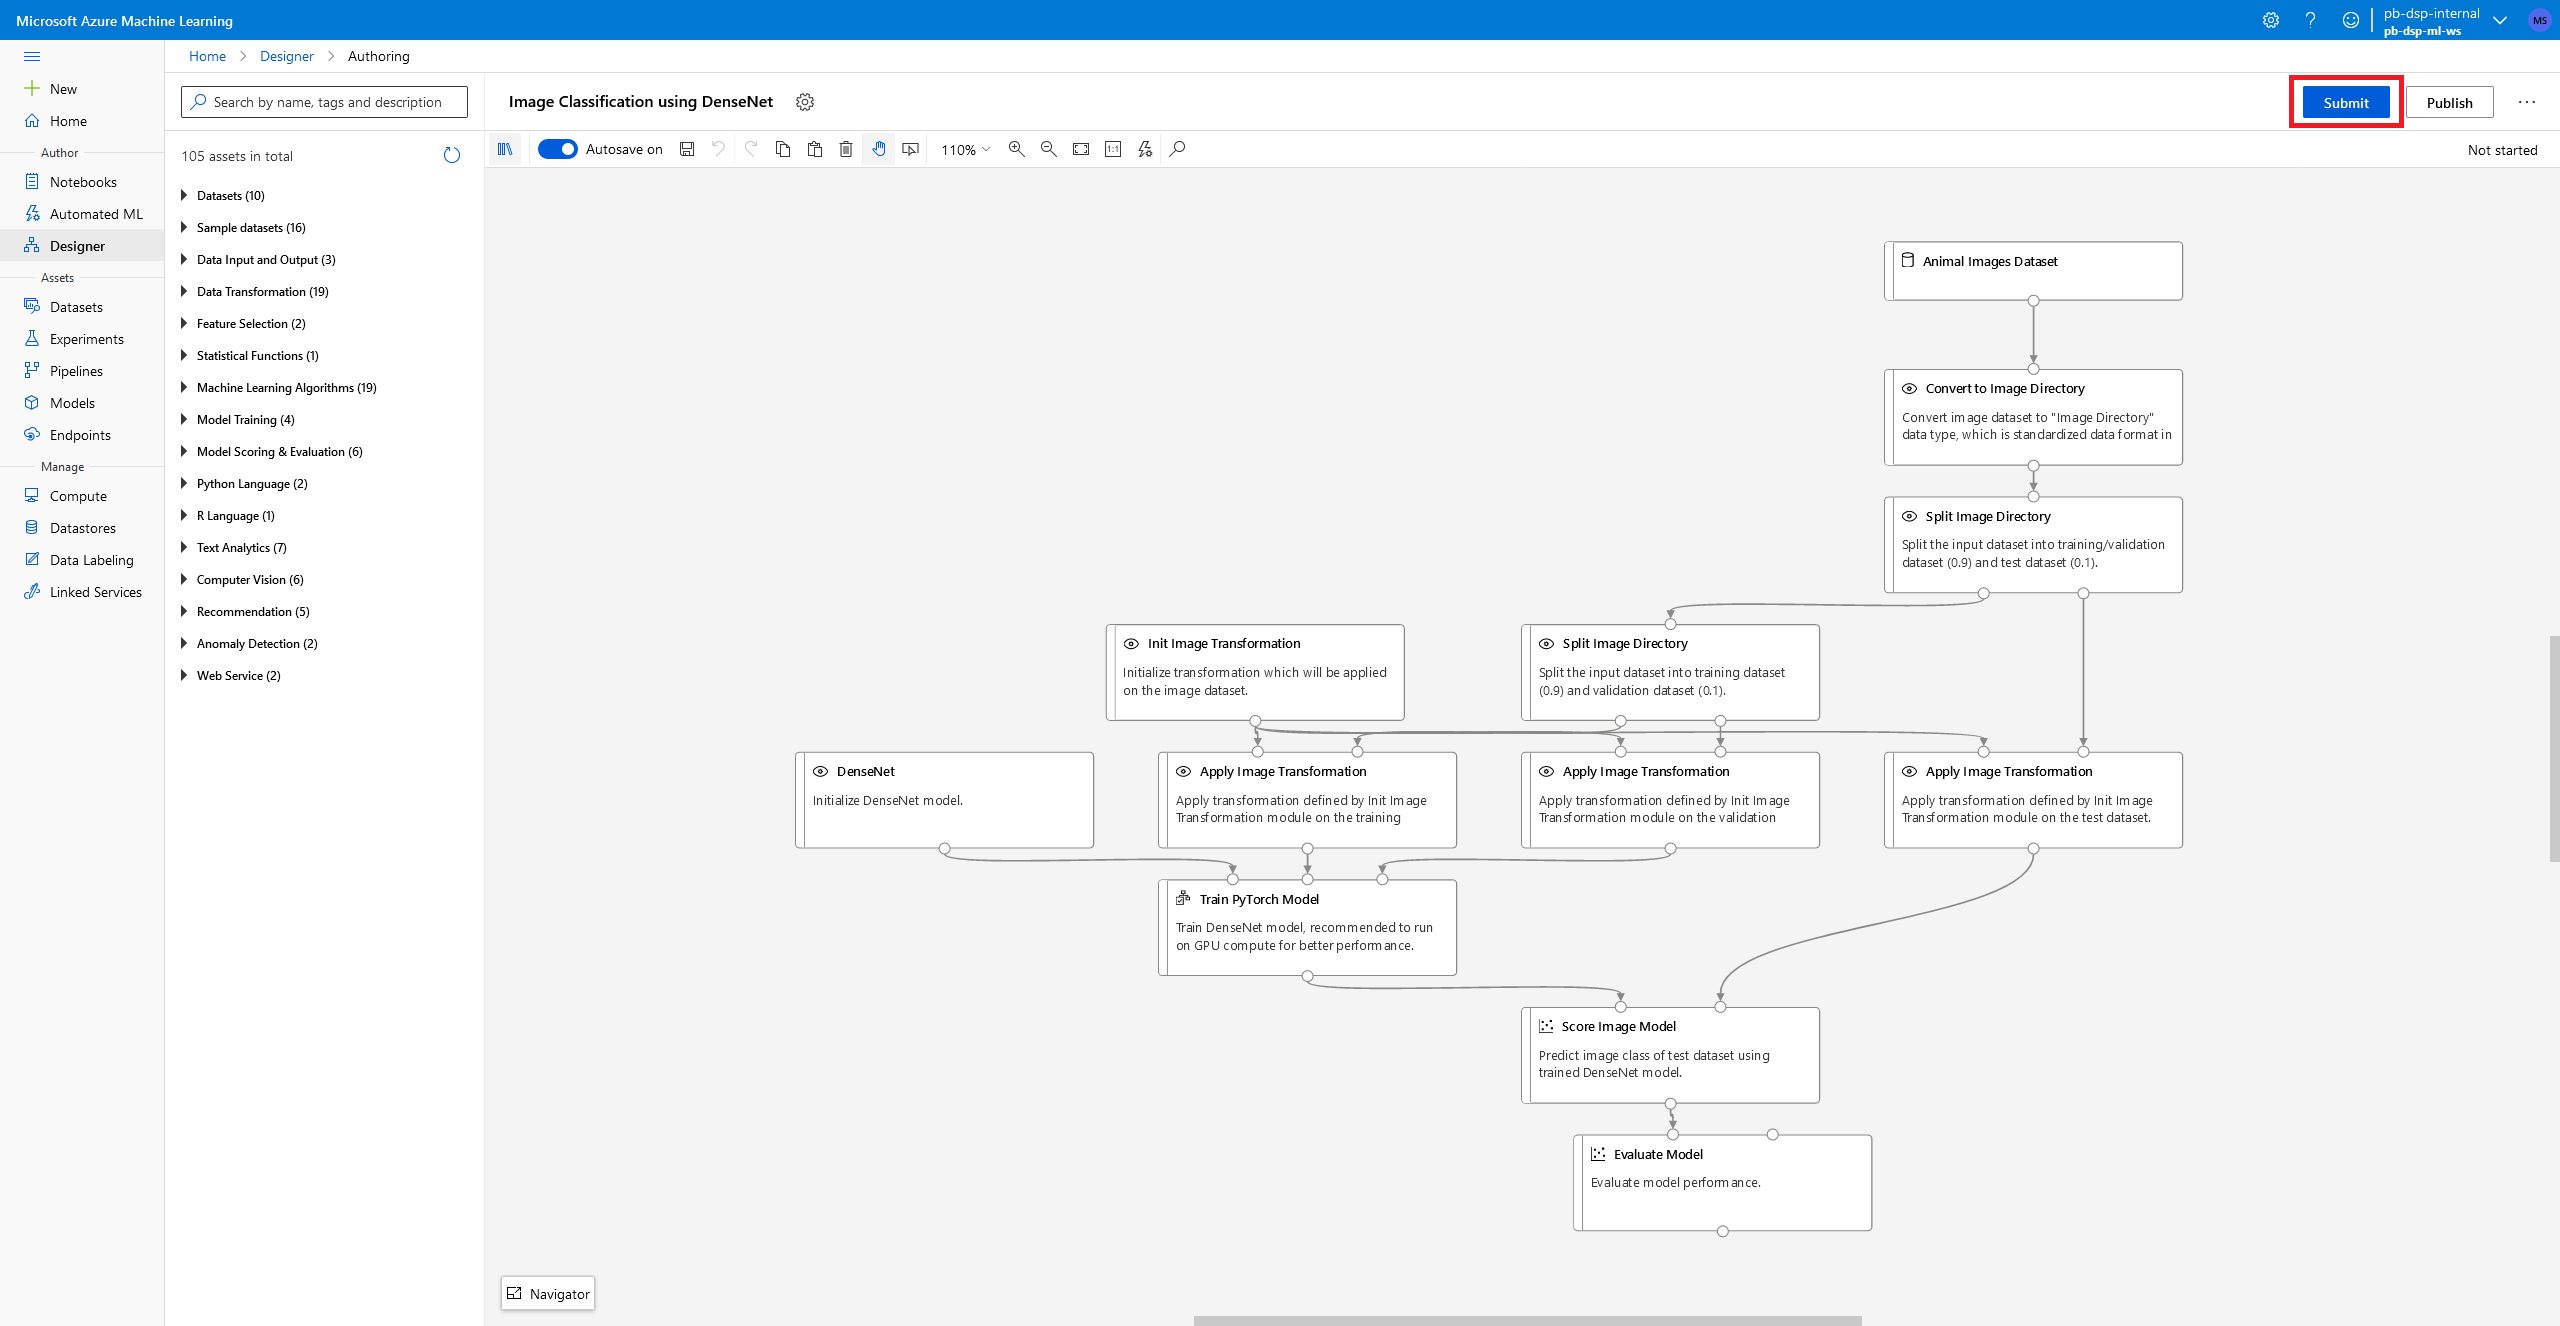
Azure ML has plenty of helpful tools for machine learning development, the ‘Designer’ tool allows you to create, train, and deploy ML models at the click of a few buttons using an easy-to-use graphical interface, shown here:

This was created using one of Azure ML Designer’s presets called ‘Image Classification using DenseNet’. Each of the boxes in this flowchart were arranged for me to create an image classification model; whilst I am going to explain each of the components, it’s important to note that what makes designing inside of Azure ML so easy is that you can treat it as a blackbox. For most purposes simply swapping the input with the dataset you want to classify is all it takes to create a fully functioning computer vision model.
To give a brief overview of this flowchart, we input our dataset (Animal Image Dataset), convert it to a directory, and split this dataset into train, test, and evaluation sets. Train and test sets will be used in the training of the model, and the evaluation set is entirely unseen by the model’s training process and will therefore be used to evaluate its accuracy at the end. Our images are transformed into a constant size (256x256 pixels) and then passed to the training process.
Here we’re using a pre-trained model called ‘DenseNet’. You can research Transfer Learning for more information on this, but to summarise we are making use of DenseNet which has been pre-trained on a much larger dataset than we would want to afford to train on, resulting in a highly robust model, and we are just tweaking it to classify only cats, dogs, and frogs. After training the model we score it on our evaluation set and save the model.
To demonstrate how easy it is to develop a computer vision model using Azure ML we’ll work through the process of training and deploying the preset example.
Training and Deploying the Model
- Press the submit button highlighted in the top right.
-
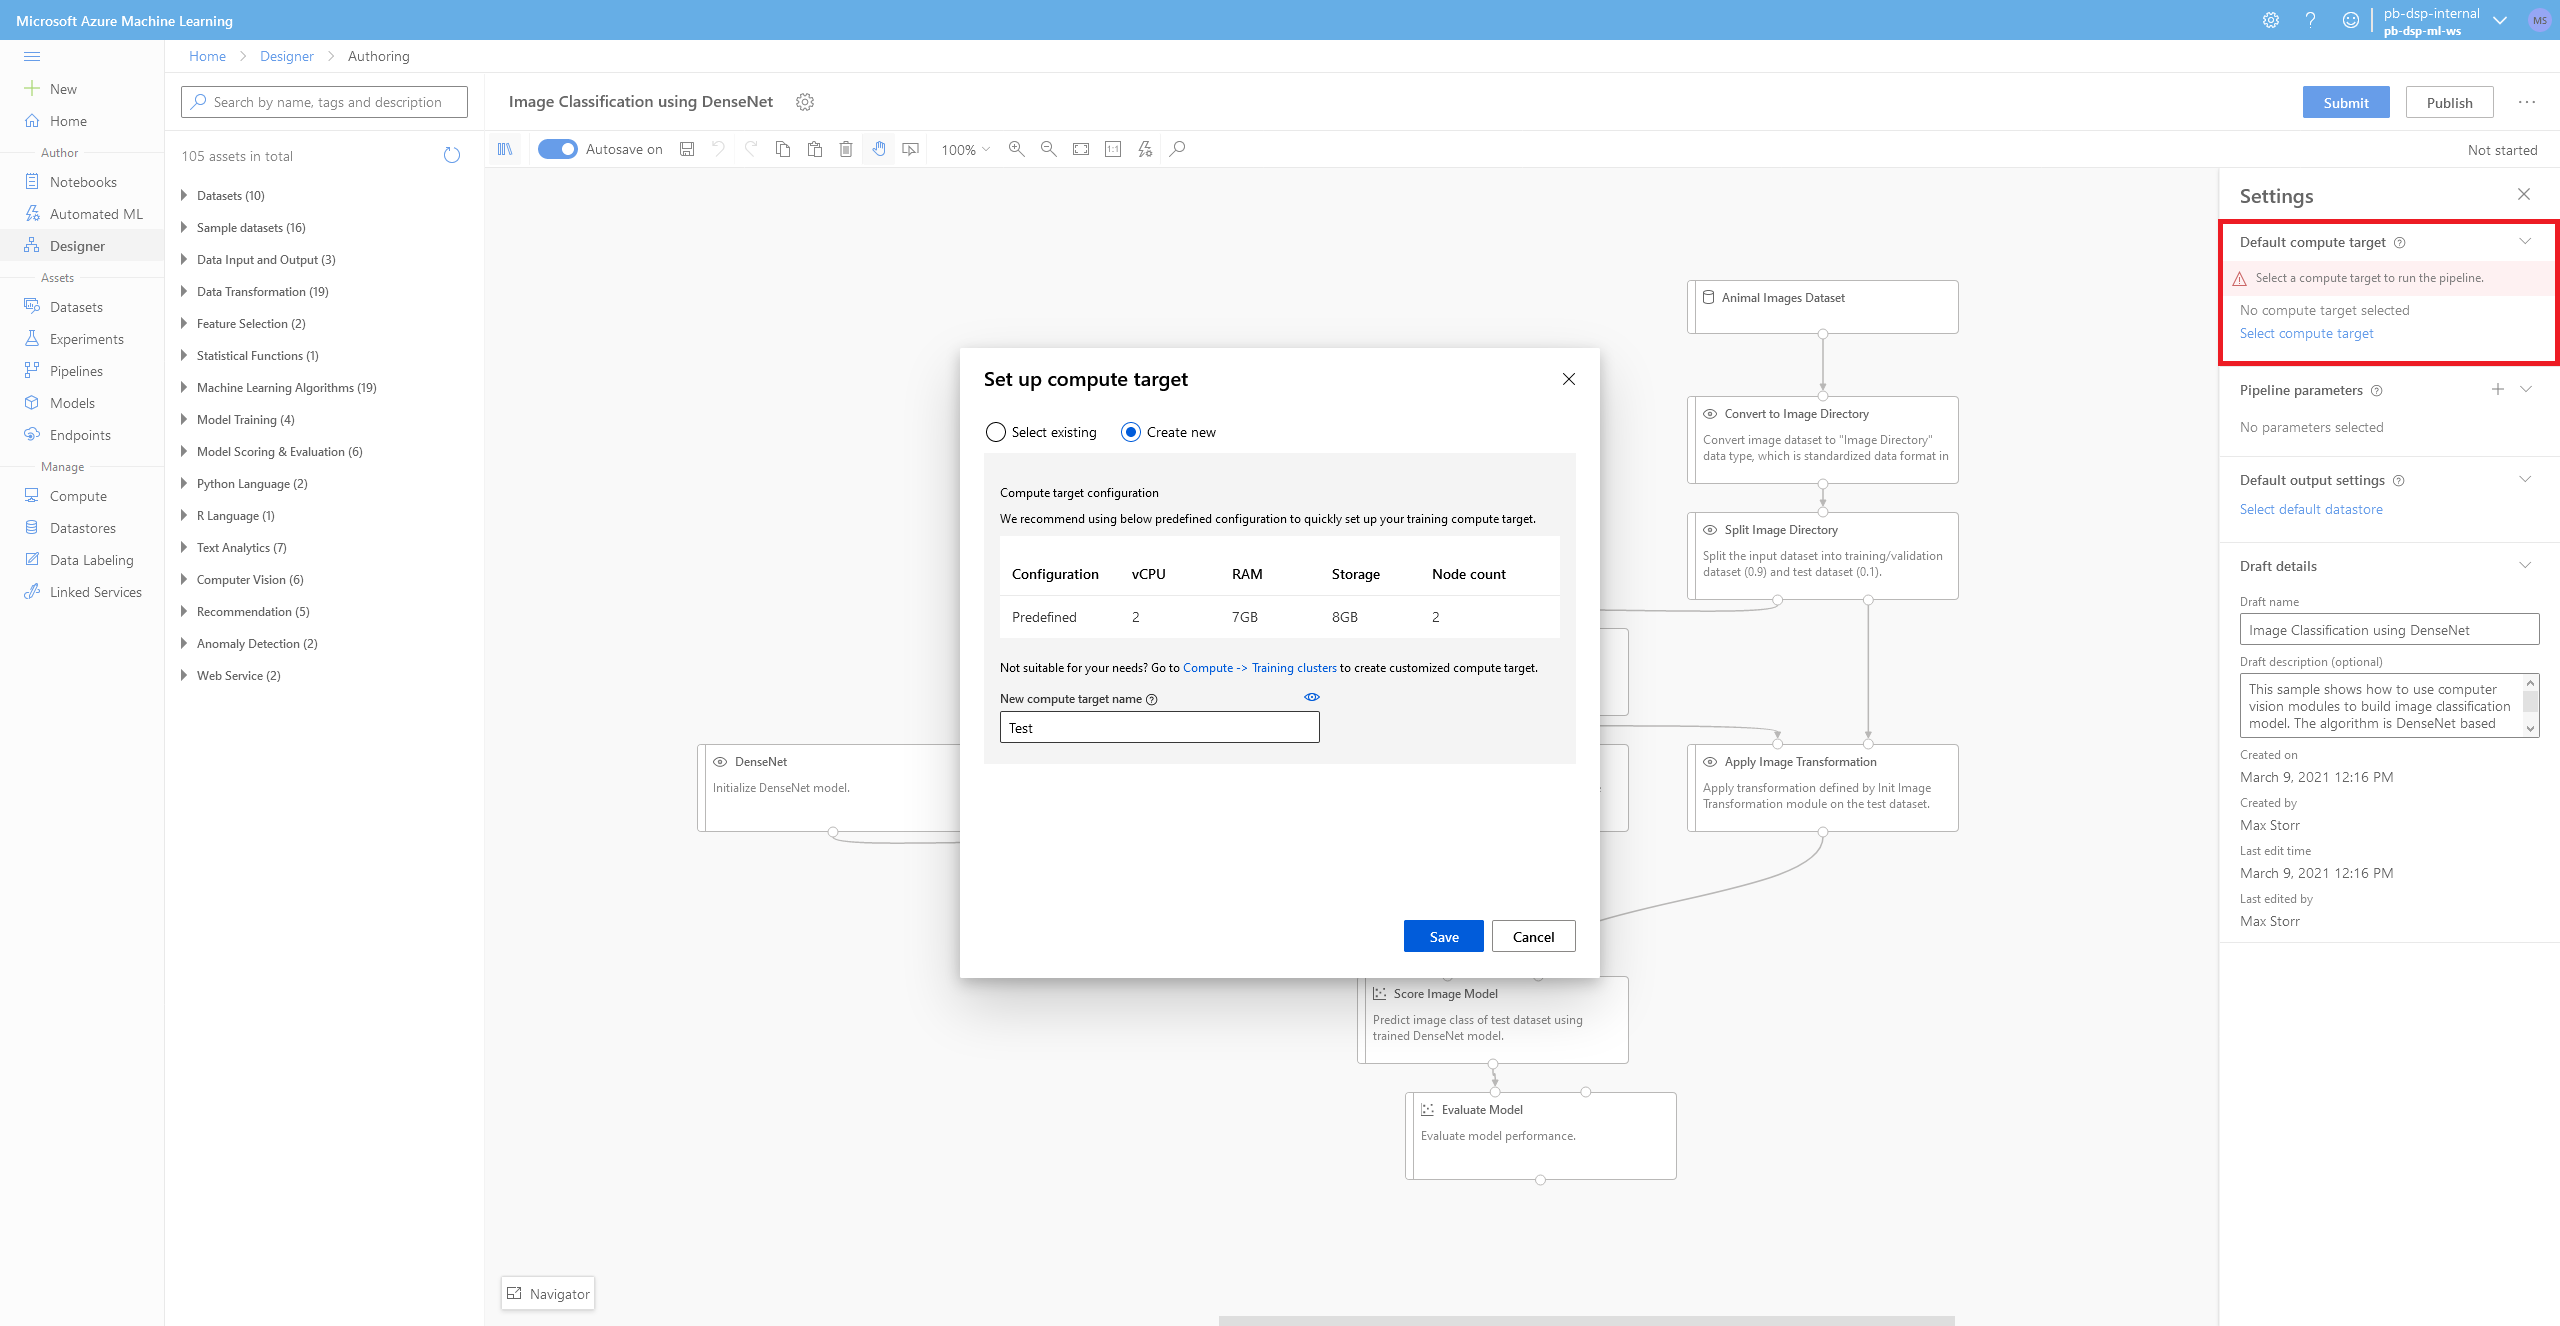
You will notice that you have to create a compute instance in order to submit the graph – go to ‘Create new’ and name your compute instance something recognisable like ‘Animal-Classification’. This creates a compute cluster, which will dynamically allocate you between 0 and 2 vCPUs with the defined specs as you attempt to perform any computation that requires them.
-
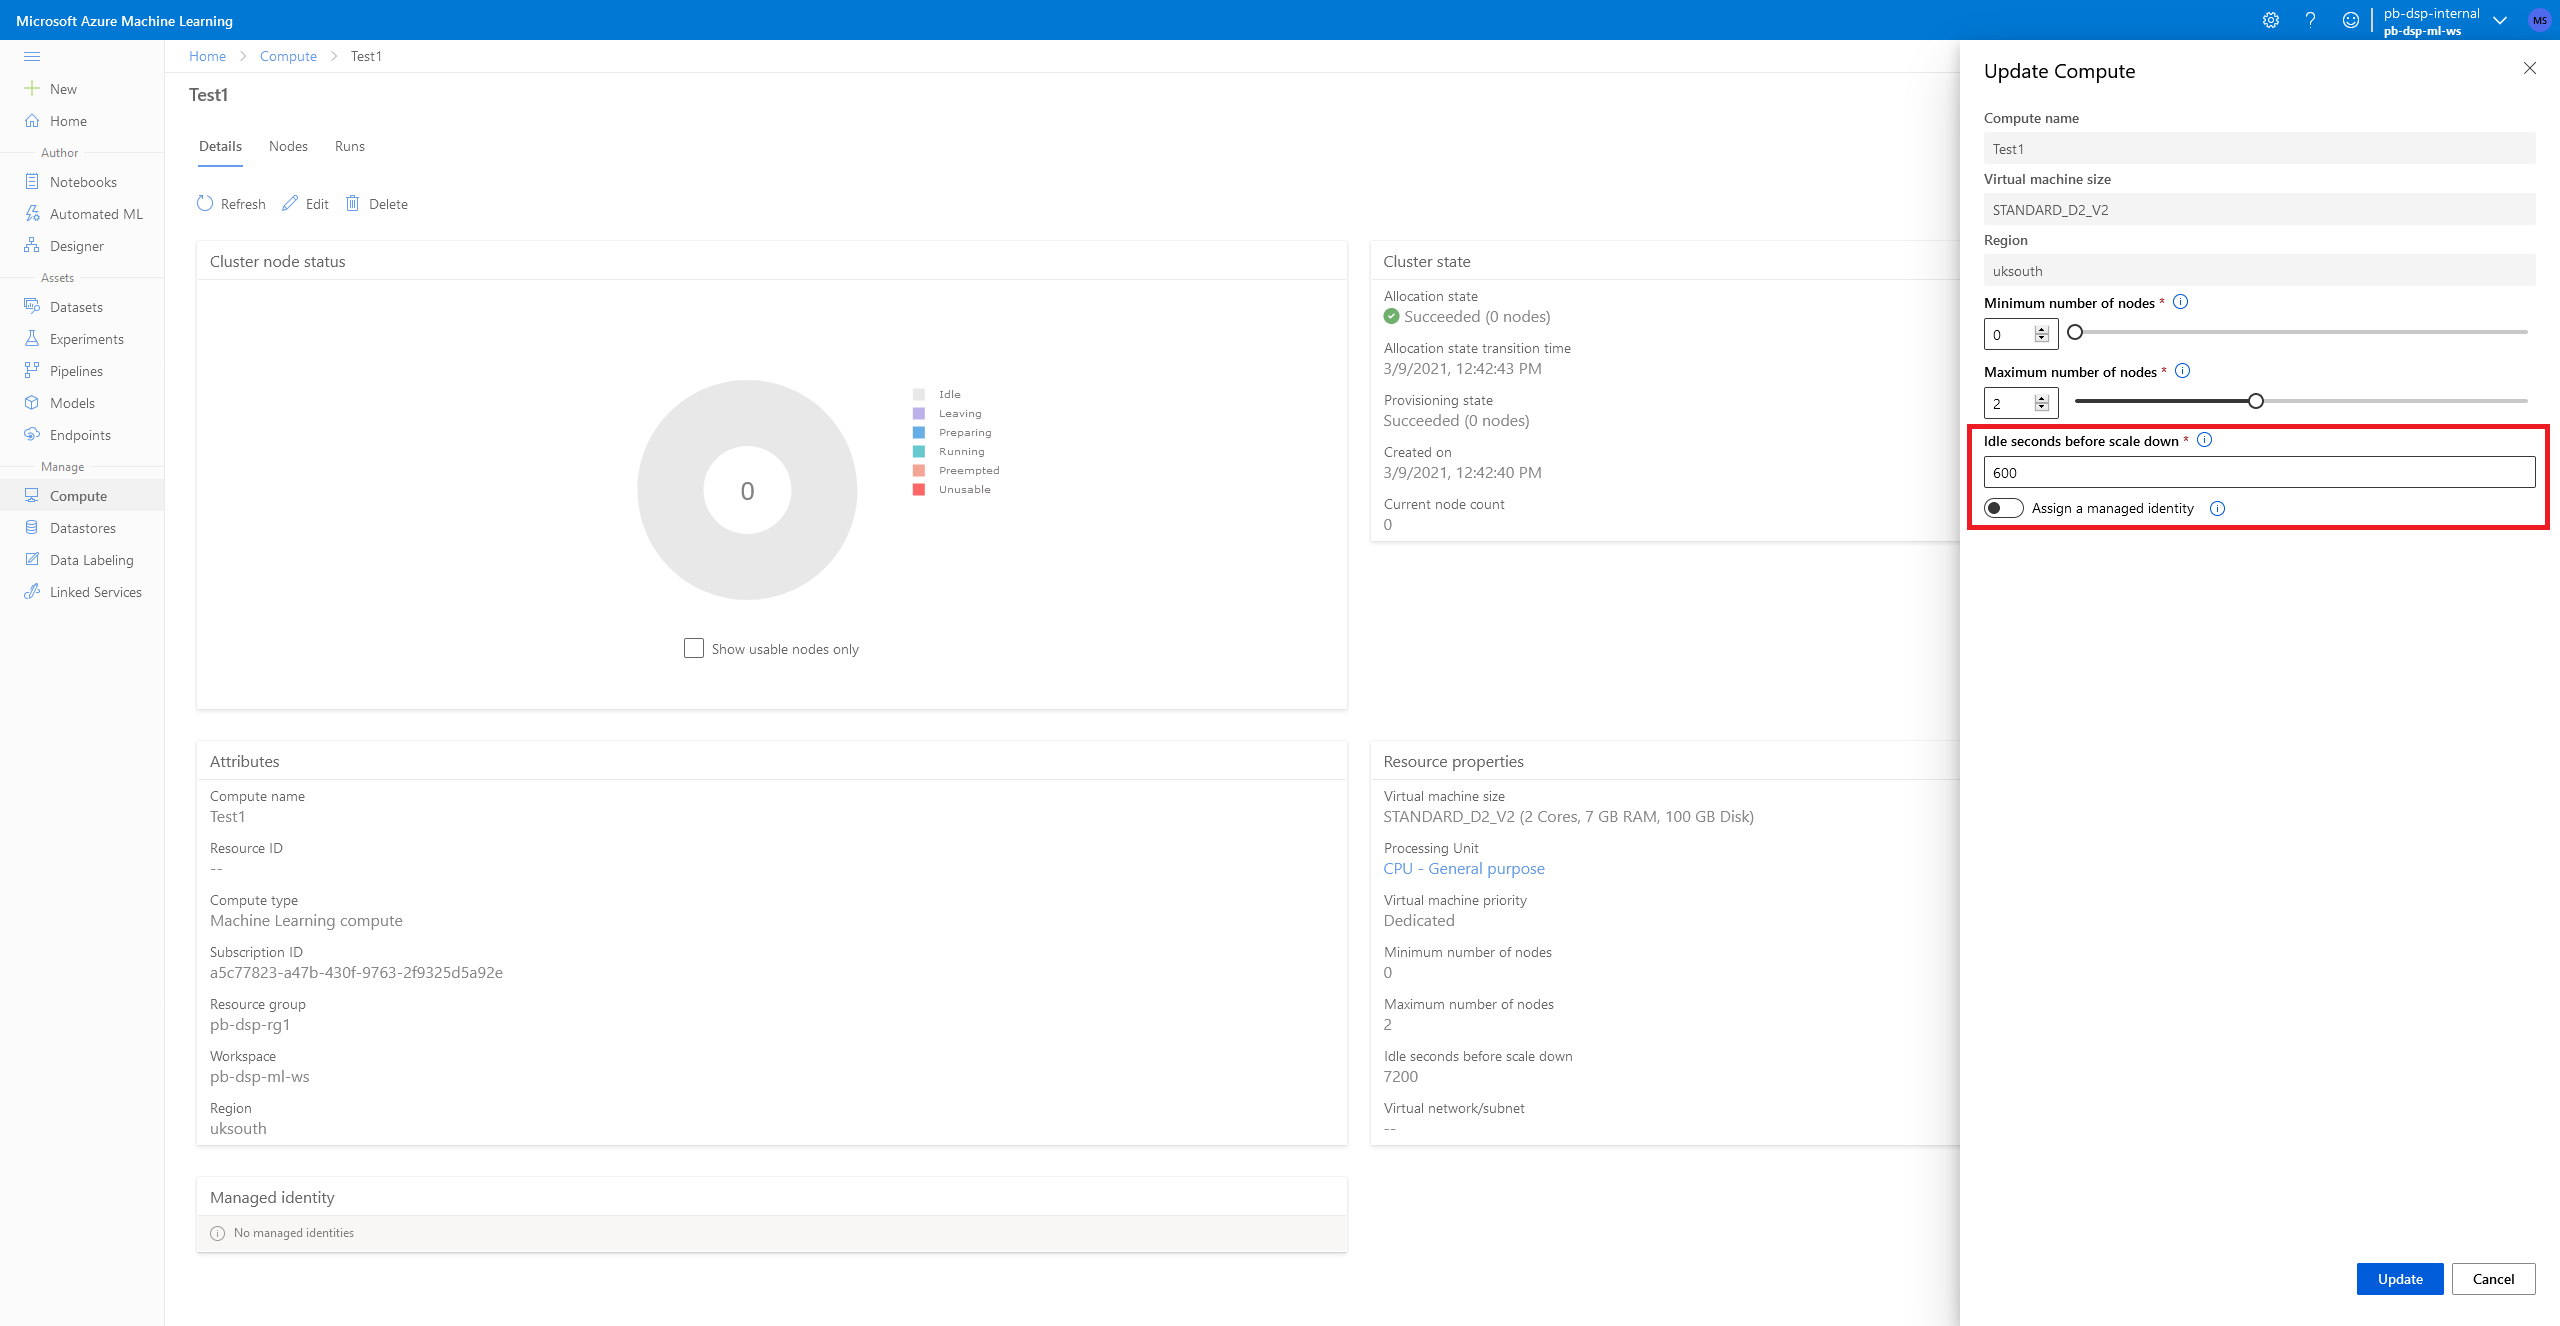
I would now recommend selecting the compute cluster you created, but before you click submit, head over to the ‘Compute’ section of Azure ML, select the ‘Compute clusters’ tab. Here, click on the name of the instance you created, press ‘Edit’ and you’ll want to change the ‘Idle seconds before scale down’ from 7200 seconds, which is 2 hours, down to something more responsible like 600 seconds, which is 10 minutes and hit ‘Update’.
This means that after 10 minutes of inactivity on the cluster, it will be scaled down to the minimum number of nodes which is zero – saving you from paying for compute power you aren’t using.
-
You can then go back to your graph and press ‘Submit’, it will prompt you to create an ‘Experiment’ which is just a method of categorising your projects. Once you’ve done this your experiment will start and each of the steps in your flowchart will go from ‘Queued’ to ‘Running’ to ‘Complete’.

-
If you click on the ‘Evaluate Model’ box at the end of the flowchart, open the ‘module_statistics’ folder, and open the ‘left_port_confusion_matrix’, you can see the accuracy of your model has been evaluated for each of the categories in your dataset (in this case, dogs, cats, and frogs). Look at that, we have 100% accuracy!
Do note that this is likely due to us evaluating on such a small proportion of our dataset (only 10% was used for evaluation). In a future blog post when we repurpose this template for our own use, we may find that our accuracies aren’t quite this good.

-
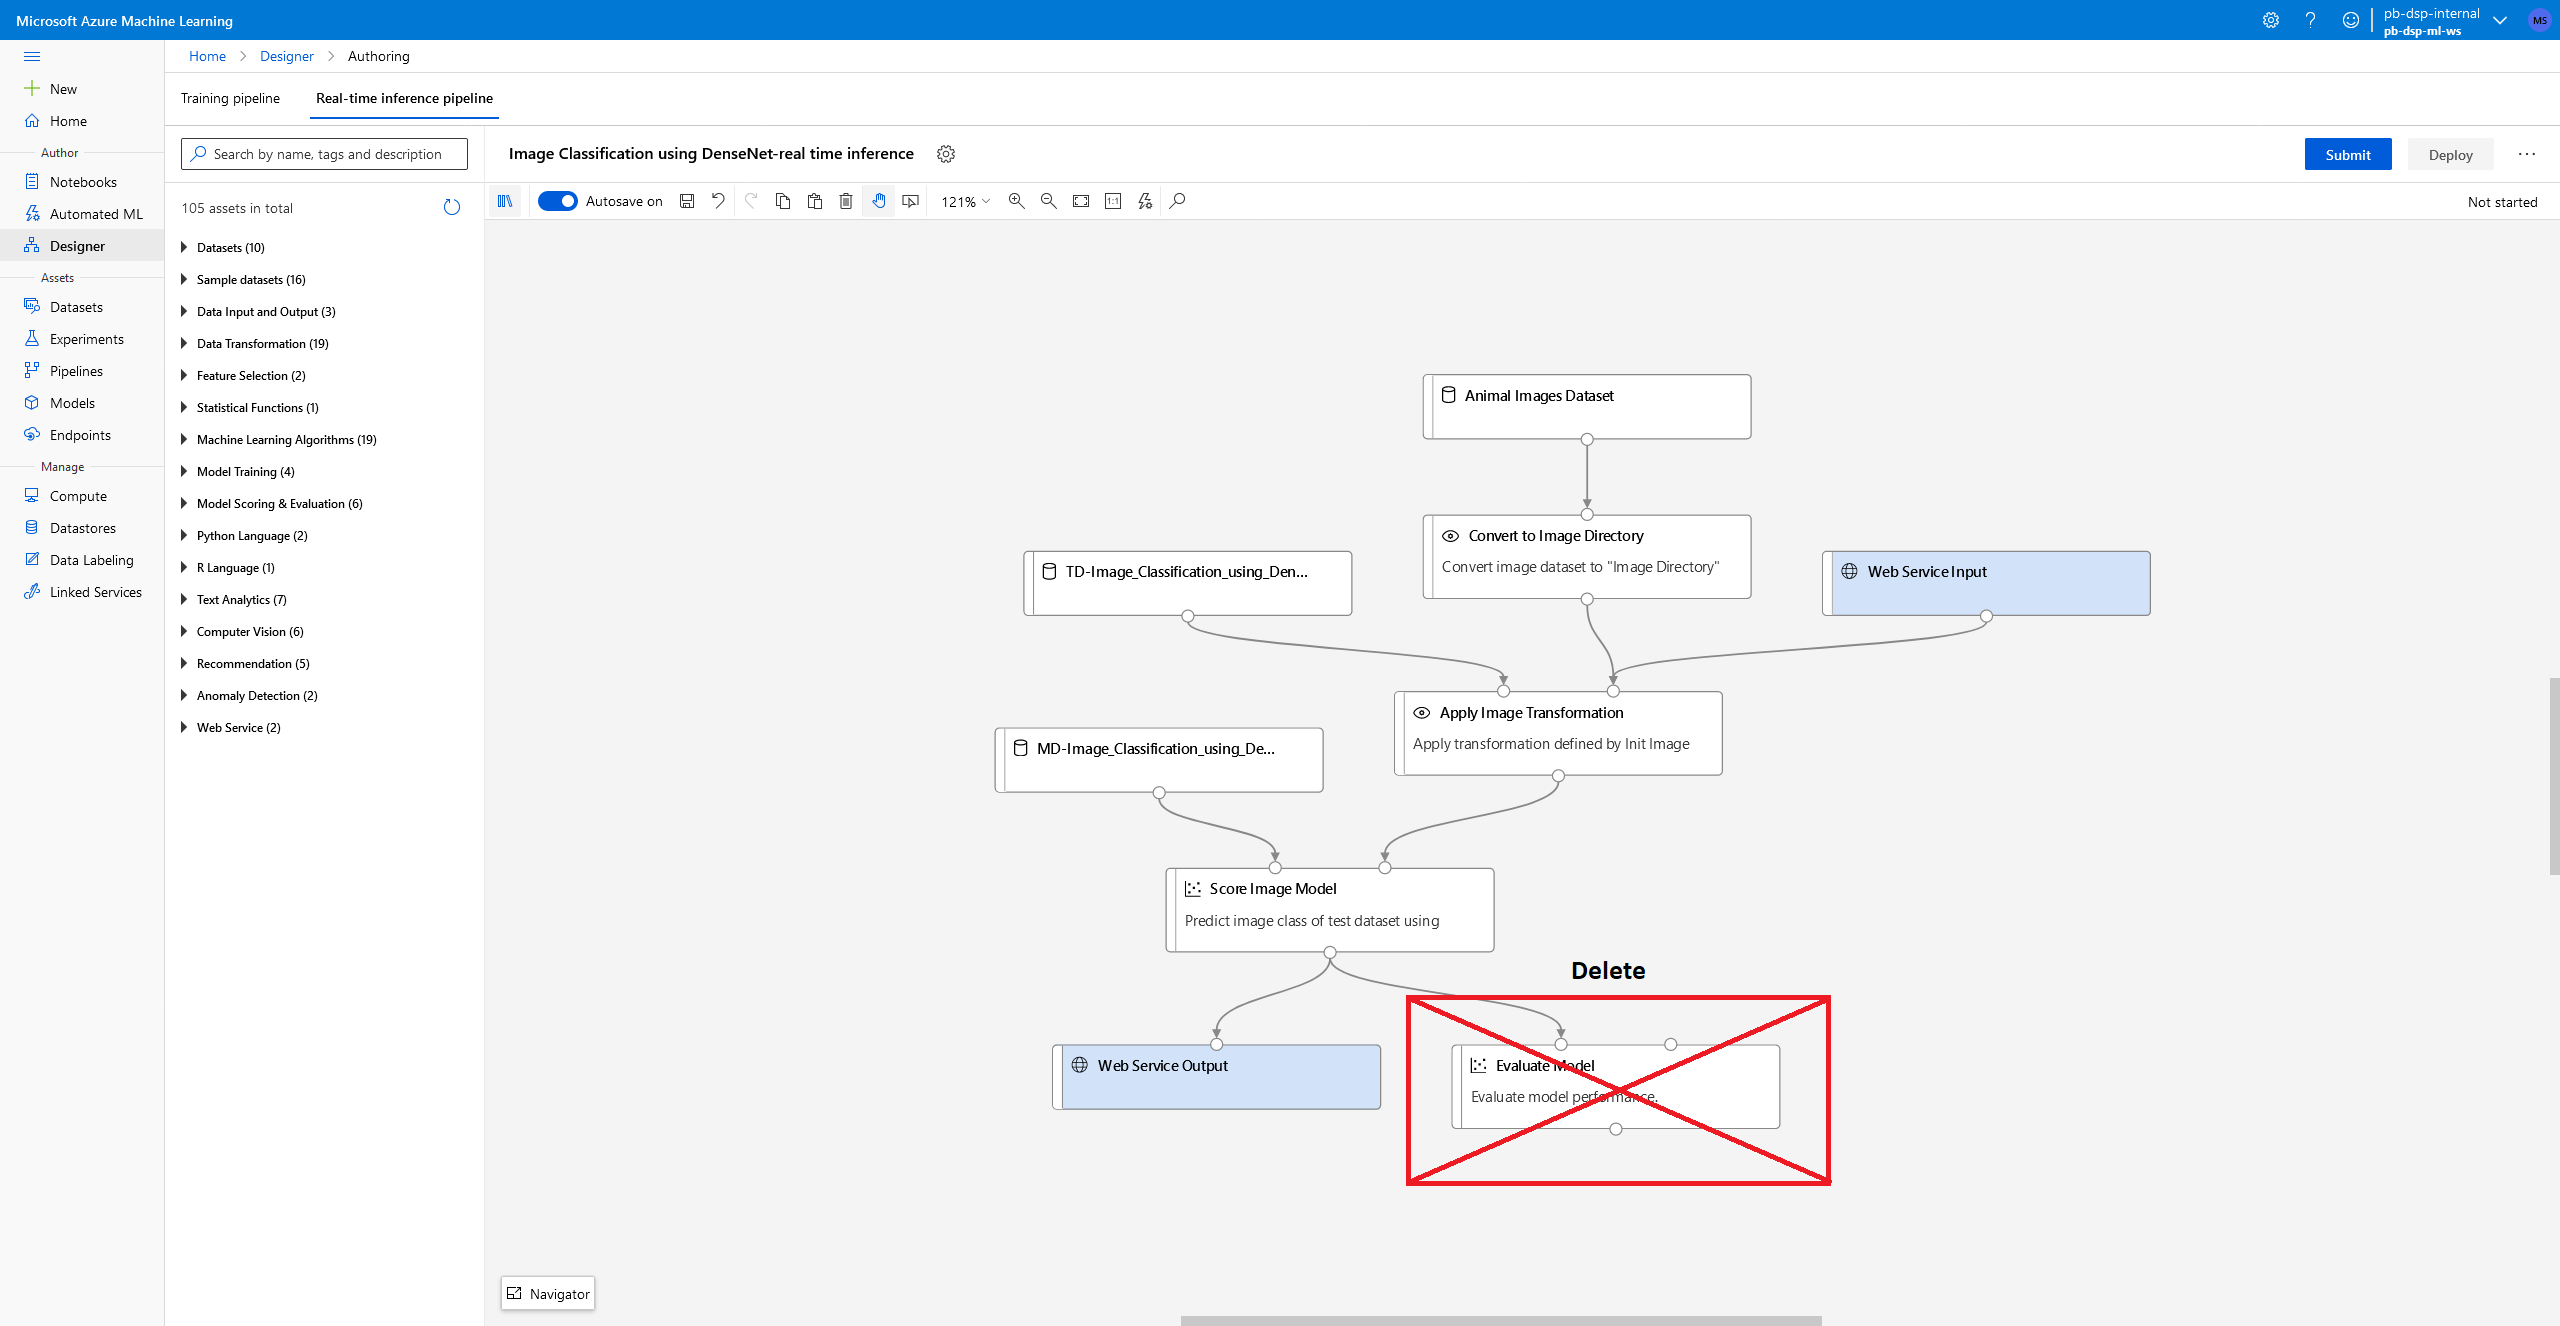
Moving on to creating the API, click on ‘Create inference pipeline’ at the top right and create a ‘Real-time inference pipeline’. This will automate the process of creating a flowchart for a web-API. I recommend deleting the ‘Evaluate model’ step at the end of the flowchart since we’ve already evaluated and are happy with its performance. Pressing ‘Submit’ now will run the flowchart.
-
Finally, clicking ‘Deploy’ will ask you to assign a compute instance to your API. Make sure you change the number of CPU cores allocated from 0.1 to 1 since we will need at least one core to perform classification... and you’re done!
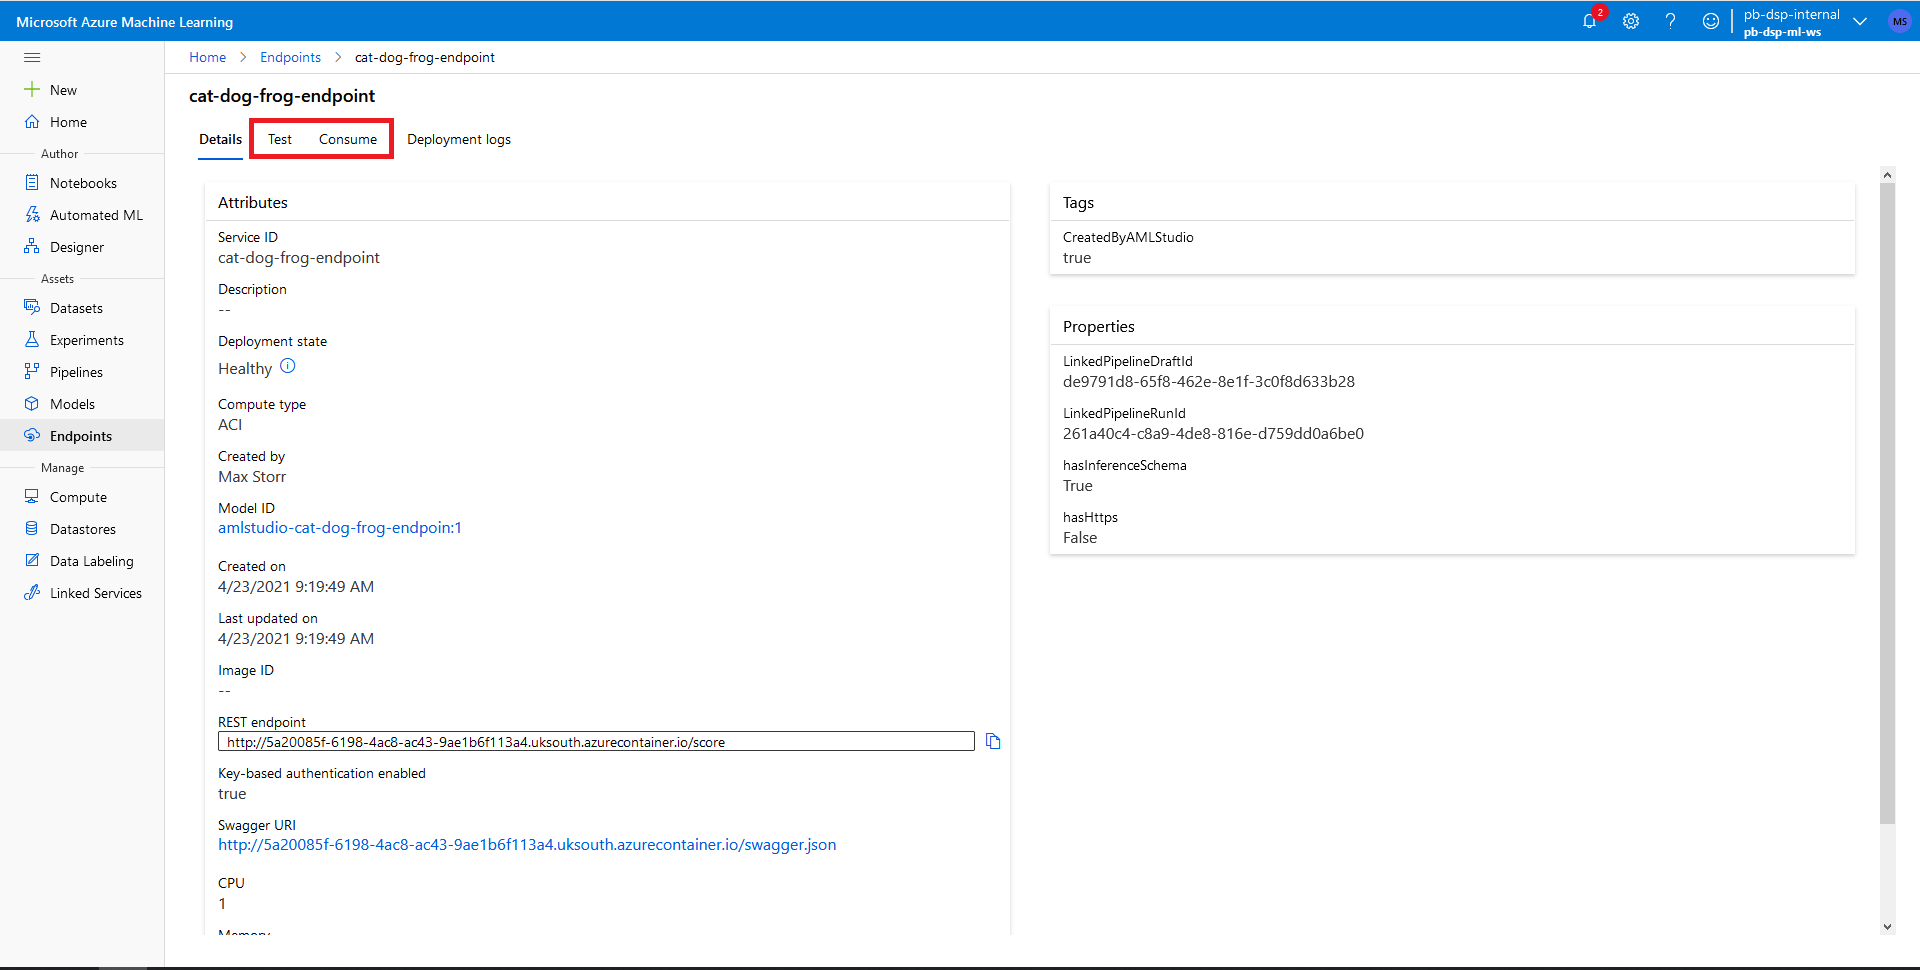
Using the API
There are two methods of utilising the API, either by use of the Azure console provided, or programmatically using the stub provided on the endpoint’s consumption page. If you head over to the ‘Endpoints’ tab you can read a general description of our endpoint, once its deployment state is set to ‘Healthy’ you may access the ‘Test’ and ‘Consume’ tabs which are the two methods of using your API, shown here:
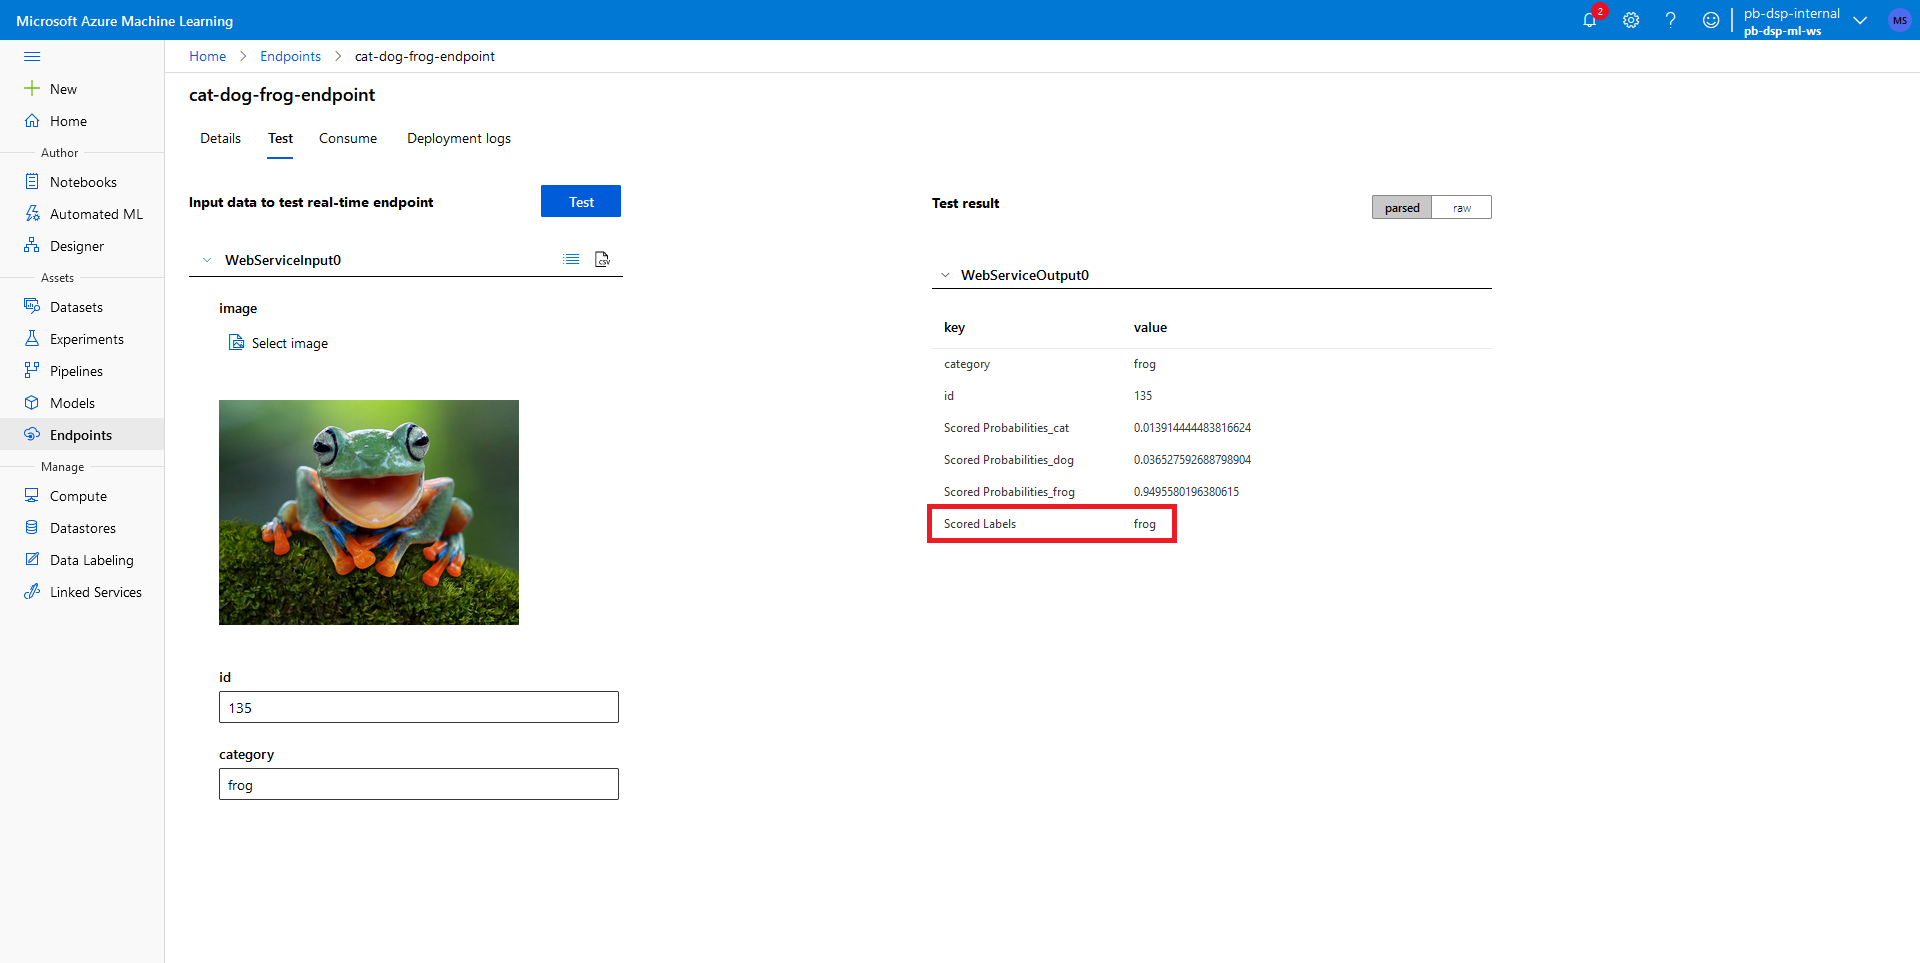
On the Test tab, we can simply upload any photo we wish to classify – I’ve chosen the first image of a frog that I could find, uploading this image and clicking on the blue ‘Test’ button provides us with the classification. This provides us with the probabilities for each of our classes, and the class with the largest possibility is the ‘Scored Label’ – and here we can see that our model has correctly predicted that our image contains a frog!
We haven’t written a single line of code, we’ve only used template components, and we already have a fully functioning API capable of recognising animals in an image. Hopefully this has been enough to demonstrate that Azure ML provides a quick and accessible method of developing ML APIs.
In Part 2 of this series I will demonstrate how we can repurpose this template to recognise human emotion from photos by simply changing the input dataset and a few parameters of the model, and also how you can make use of the API stub to programmatically call for your model to perform classification.
In the meantime, get in touch with our experts or head to our website for more information on our work with Artificial Intelligence, or you can book a meeting...

DSP acquires leading Oracle Applications Managed Services Provider, Claremont, to further extend its data management capabilities.
DSP is recognised for the second consecutive year in the 2023 Gartner® Market Guide for Oracle Cloud Infrastructure Professional and Managed Services
Explorer Recognised as Oracle Digital Partner of the Year 2019