- About

Getting to know us
- Technology
Recent case study:
Oracle EBS Cloud Deployment
Consolidating and Migrating assets into Oracle Cloud Infrastructure.
.png?width=250&name=stonewater-logo%20(1).png)
Most Visited Pages
-
- Industries
DSP-Explorer acquires leading Oracle Applications Managed Services Provider, Claremont, to further extend its data management capabilities.

Resources
- Contact us
Setting up OCI Bucket storage and accessing from APEX
Contents
I recently needed to set up and use OCI bucket storage for use with an APEX application. Although I found some helpful reference guides out there, they all appeared a little out of date. Once I had everything configured in OCI and accessible from an APEX application, I thought it would be a good idea to put it all in a blog.
This guide assumes you have already created an OCI tenancy and an APEX Workspace. For this blog, I created an Always Free OCI tenancy for the bucket storage and an APEX Workspace on apex.oracle.com.
Setting up Buckets in OCI
The first part of this guide details how to create an OCI bucket and set up the required API keys to access it from your APEX application.
Create a Compartment
A compartment is used to protect and group resources in an OCI tenancy and is the first thing we need to create.
1. Select Identity & Security from the main menu and select Compartments.
2. Click on the Create Compartment button.
3. Enter a name and description, e.g. APEXStorage.
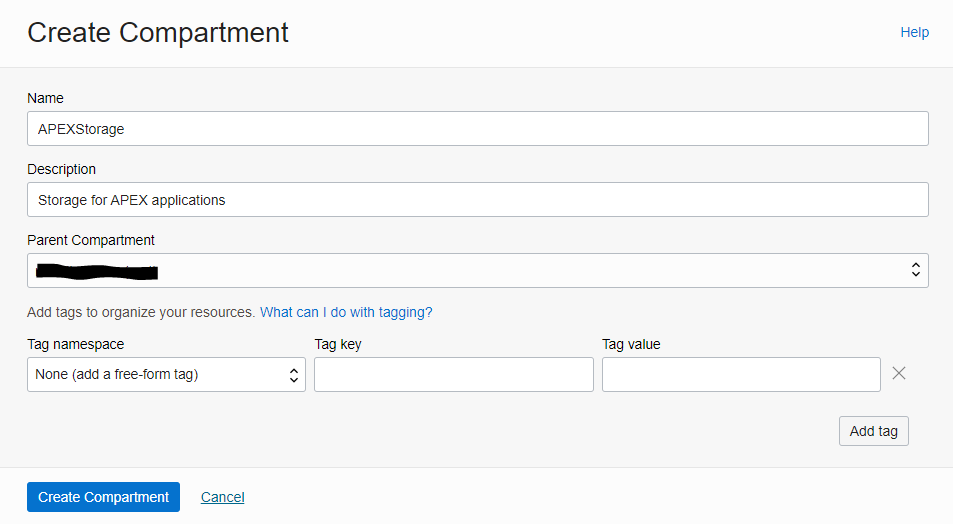
4. Click on the Create Compartment button.
5. Open the new compartment and make a note of the OCID using the Copy link.
Bucket
We can now create a bucket in the compartment and upload a few sample files.
1. Select Storage from the main menu and select the Buckets option.
2. Ensure the APEXStorage compartment is selected.
3. Click on the Create Bucket button.
4. Enter a name for the bucket, such as e.g., APEXFileStorage and click on the Create button.
5. Once created, open the bucket.
6. Click on the Upload button.
7. Add a few sample files and click on Upload.
8. Click on the three dots option alongside one of the uploaded files and select View Object Details.
9. Make a note of the URL Path (URI), as we will need this later when building our APEX application. It will be something like this;
https://objectstorage.uk-london-1.oraclecloud.com/n/lr4.............
Now we have created a bucket in our compartment, we need to create a user with privileges to access it. The first step is to make the group and associated policy our user will need.
Group
Groups are assigned to users and used to manage their privileges via one or more policies allocated to the group.
1. Select Identity & Security from the main menu and then select Domains.
2. Ensure the root compartment is selected and open the Default domain.
3. Select Groups from the Domain menu.
4. Click on the Create Group button.
5. Enter a name and description, e.g. APEXStorageAdminGroup.
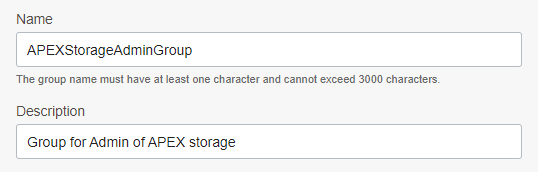
6. Click on the Create button.
Policy
The group we created has no permissions until we link a policy to it, as it is the policies that dictate permissions. We will now create a policy to allow the group to read and manage buckets in our compartment.
1. Select Identity & Security from the main menu and select Policies.
2. Ensure the APEXStorage compartment is selected.
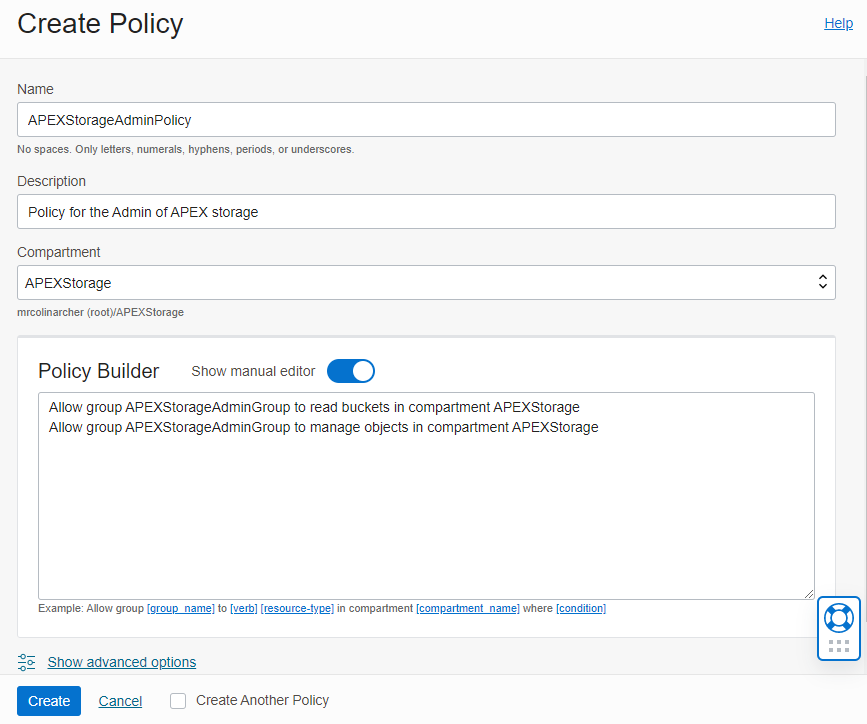
3. Click on the Create Policy Button.
4. Enter a name and description, e.g. APEXStorageAdminPolicy.
5. Use the manual editor to add two policies.
Allow group APEXStorageAdminGroup to read buckets in compartment APEXStorage
Allow group APEXStorageAdminGroup to manage objects in compartment APEXStorage
6. Click on the Create button.
User
To access the bucket, we need to use a user account which has the required privileges. We will now create a user and assign the APEXStorageAdminGroup group to it, which has the needed policy assigned.
1. Select Identity & Security from the main menu and then select Domains.
2. Ensure the root compartment is selected and open the Default domain.
3. Select Users from the Identity domain menu.
4. Click on the Create User button.
5. Enter a last name e.g., APEXStorageAdminUser and a valid email address for the username.
6. Ensure the APEXStorageAdminGroup group is ticked.
7. Click on the Create button.
8. Once the user is created, click on the Edit Capabilities button.
9. Ensure only API Keys are ticked and save changes.
API Keys
The last step is to generate API keys for the user account, which we will need when accessing the bucket from our APEX application using REST.
1. While still within the details for APEXStorageAdminUser, select API Keys from the Resource menu.
2. Click on the Add API Key button.
3. Select Generate API key pair.
4. Click on the Download private key button and keep the details safe.
5. Click on the Add button.
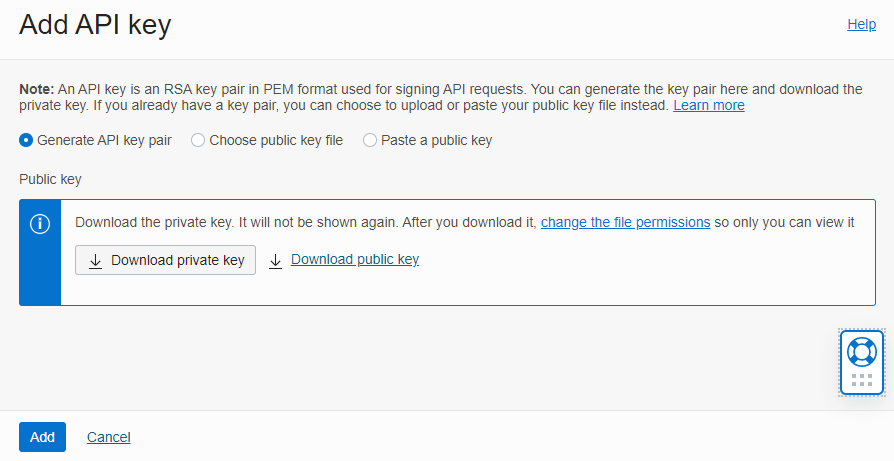
6. And take a copy of the configuration file details (User OCID, fingerprint, and Tenancy OCID).
7. Click on the Close button.
APEX Configuration
Now we have created our OCI bucket and created a user with access and the required API keys, we can use it within our APEX application via REST data sources.
For this blog, I have already created a new Workspace on apex.oracle.com, which I will now use to create a simple application to demonstrate access to the OCI bucket storage.
Create a New APEX application
1. From the Application Builder home page, click on the Create Button.
2. Select New Application.
3. Enter a name such as OCI Bucket Storage and click on the Create Application button.
Create Web Credentials
Next, we need to create the Web Credentials to use with the REST data sources required to access the bucket. To create this, we need the configuration file details and the API Key string created earlier for the user APEXStorageAdminUser.
The API Key created has a header and footer and is split across multiple lines. Before it can be used for the Web Credentials, the header (-----BEGIN PRIVATE KEY-----), footer (-----END PRIVATE KEY----) and ALL carriage returns must be removed to leave a single string on a single line.
1. From the Application Builder home page, click on Workspace Utilities.
2. Select Web Credentials from the menu.
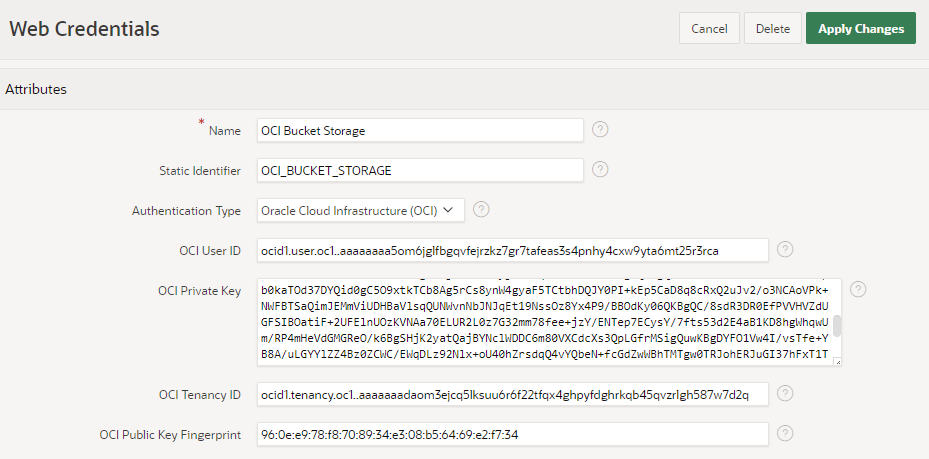
3. Click Create and enter the following details using the configuration file details and the API Key.
a. Name: OCI Bucket Storage
b. Static Identifier: OCI_BUCKET_STORAGE.
c. Authentication Type: Oracle Cloud Infrastructure (OCI)
d. OCI User ID: OCID for the user
e. OCI Private Key: API Key with the header, footer and carriage returns removed
f. OCI Tenancy ID: OCID for the Tenancy
g. OCI Public Key Fingerprint: Fingerprint ID
4. Click on Create.
Create a REST data source for Listing Bucket Objects
We will now create a REST data source to return a list of files in the bucket. First, we need to prepare the bucket URL string, which we can do using the one we copied earlier when uploading some sample files. Take the URL for the sample file, which will contain your OCI region, tenancy name, bucket name, and filename.
- Delete the filename from the URL (that’s everything after the /o/)
- Replace the bucket name (e.g. APEXFileStorage) with :bucket_name
When updated, your URL will look something like this:
https://objectstorage.uk-london-1.oraclecloud.com/n/lr2rixxzxxl4f/b/:bucket_name/o/
Now we have the URL, we can use it for the endpoint of our REST data source. We replaced the bucket name with a parameter, so it is not fixed and can be changed when the REST Data Source is used. This will allow multiple buckets from the same OCI compartment to be accessed in the future.
1. Open your application and navigate to Shared Components.
2. Select REST Data Sources and click on Create.
3. Select From Scratch and use the following:
a. REST Data Source Type: Oracle Cloud Infrastructure (OCI)
b. Name: files_in_bucket
c. URL Endpoint: The URL you edited.
d. URL Parameter 1 (bucket_name) Value: Name of your bucket, e.g. APEXFileStorage
4. Click Next and then Next again.
5. Select Authentication Required and use OCI Bucket Storage for the following Details
6. Click on the Advanced button and add the following second parameter
a. Parameter Type: Query String variable
b. Parameter Name: fields
c. Value: name,size,eTag,timeCreated,md5,timeModified,storageTier,archivalState
d. Is Static: Yes.
7. Click the Discover button.
8. Review and click on Create REST Data Source.
Substitution Strings
Before we create any pages to interact with our bucket, lets add some substitution strings to our application for the base URL, bucket name and Web Credentials.
1. From the Application Builder home page of your application, click on Edit Application Definition.
2. Add the following substitutions, ensuring the values are the ones you used.

The base URL is the string used when creating the REST Data Source, with everything after the /b/ removed.
Interactive Report of Bucket Objects.
Now we have created a data source to list the files in a bucket we can use it to create an Interactive Report on our home page.
1. Navigate to the home page of your application.
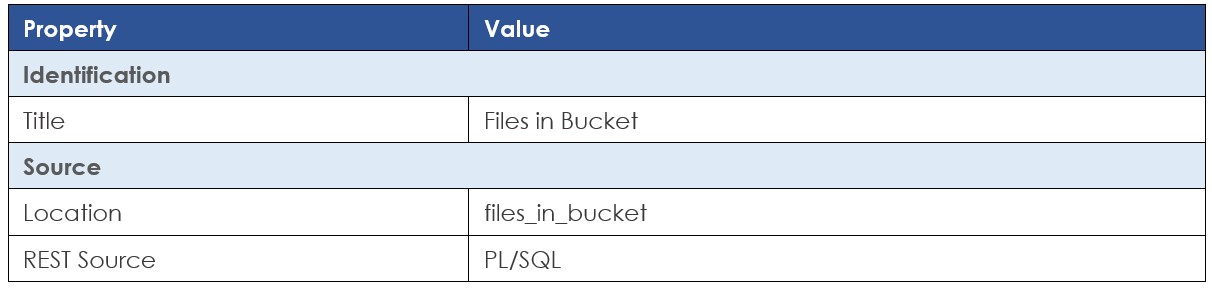
2. From the Regions gallery, drag an Interactive Report to the page BODY placeholder.
3. Update the properties using the following values.
 In the Rendering Tree, look at the parameter bucket_name within the Files in Bucket region. This is set to the default static value for our bucket but can be set at runtime if you wish. For example, if you had multiple buckets, you could use a List of Values to pick the one to use.
Open Objects in the Bucket
Next, let’s add functionality to our Interactive Report to open/download an object from the list. First, we need to create a page to make a web service request to get the file from the bucket and download it.
1. Create a new blank page 999 named File Download, don’t add it to the navigation menu.
2. Add two hidden items to the page, named P999_BUCKET and P999_FILENAME.
3. Add a Before Header PL/SQL process called Download File with the following code:
DECLARE
  l_response     BLOB;
  l_url          VARCHAR2(32000);
  l_type         VARCHAR2(32000);
  l_length       VARCHAR2(32000);
  download_error EXCEPTION;
BEGIN
  l_url      := :G_OCI_BASE_URL || :P999_BUCKET || '/o/' || :P999_FILENAME;
  l_response := apex_web_service.make_rest_request_b(p_url                  => l_url,
                                                     p_http_method          => 'GET',
                                                     p_credential_static_id => :G_OCI_CREDENTIALS);
  IF apex_web_service.g_status_code = 200 THEN
    FOR hdrloop in 1..apex_web_service.g_headers.count
    LOOP
      IF apex_web_service.g_headers(hdrloop).name = 'Content-Length' THEN
        l_length := apex_web_service.g_headers(hdrloop).value;
      END IF;
      IF apex_web_service.g_headers(hdrloop).name = 'Content-Type' THEN
        l_type := apex_web_service.g_headers(hdrloop).value;
      END IF;
    END LOOP;

    sys.htp.init;
    sys.owa_util.mime_header(TRIM(l_type),FALSE);
    sys.htp.p('Content-length: ' || l_length);
    sys.htp.p('Content-Disposition: attachment; filename="' || :P999_FILENAME || '"' );
    sys.htp.p('Cache-Control: max-age=3600');
    sys.owa_util.http_header_close;
    sys.wpg_docload.download_file(l_response);
    apex_application.stop_apex_engine;
  ELSE
    RAISE download_error;
  END IF;
END;
4. Save the page.
Now we have created the page to download a file from the bucket we need to add a link to the interactive report on the home page.
1. Navigate back to the home page.
2. Go to the Attributes tab for the Files in Bucket region update using the following:

3. Click on the No Link Defined button and update using the following:
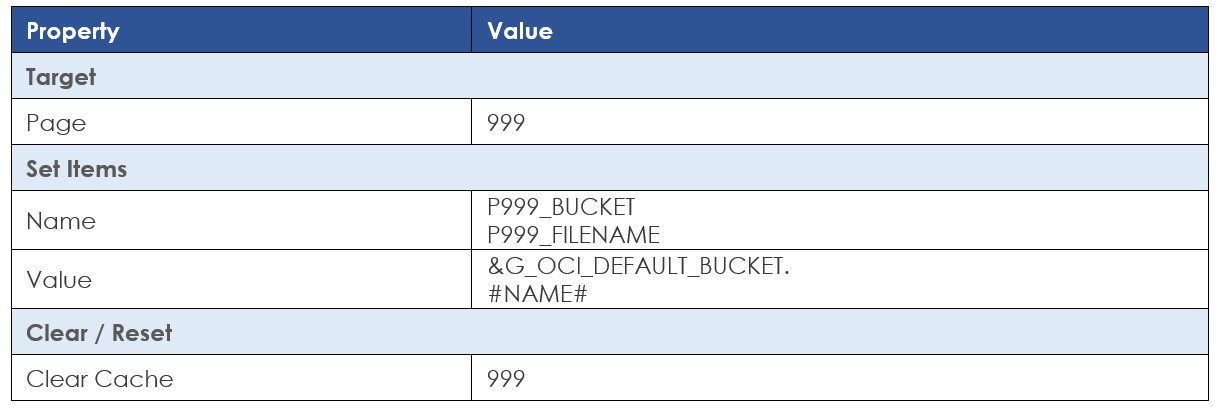
4. Click OK to save the link settings
5. Click on the Save and Run the page.
When you click on the download link for one of the files, APEX navigates to page 999 and the before header process makes a GET request to the OCI environment for the file from the bucket. The stop_apex_engine command stops the page from loading and leaves the user on the home page after the file download has been triggered.
Adding Objects to the Bucked
Now we can list and open files from our bucket, lets add a modal page to add new files.
1. Create a new blank modal page 2 named File Upload.
2. Add a Static File region called Details to the Content Body placeholder.
3. Add a hidden item named P2_BUCKET to the Region Body placeholder.
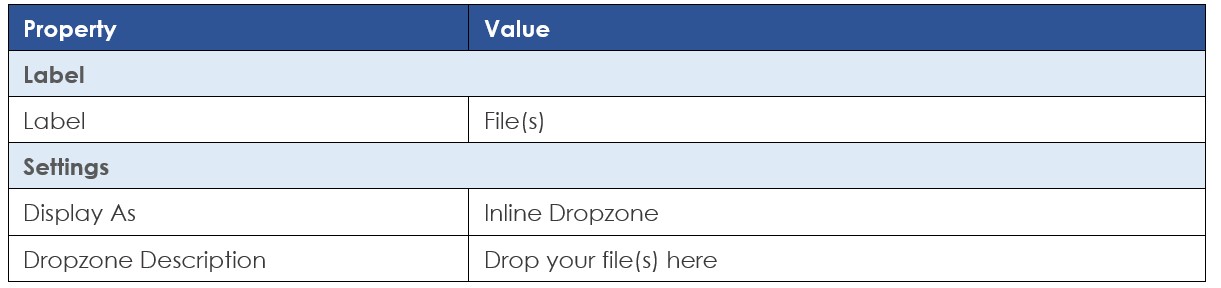
4. Add a File Browse item named P2_FILE to the Region Body and update the following properties:
5. Add a Hot Text button named Upload to the Create placeholder.
6. Navigate to the processing tab
7. Add a new PL/SQL Process named Upload File to fire when the UPLOAD button is pressed and add the following code.
DECLARE
  l_url         VARCHAR2(1000);
  l_length      NUMBER;
  l_response    CLOB;
  failed_upload EXCEPTION;
BEGIN
  FOR lr_files in (SELECT * FROM apex_application_temp_files WHERE name = :P2_FILES)
  LOOP
    l_url := :G_OCI_BASE_URL || :P2_BUCKET || '/o/' || apex_util.url_encode(lr_files.filename);
    apex_web_service.g_request_headers(1).name := 'Content-Type';
    apex_web_service.g_request_headers(1).value := lr_files.mime_type;
    l_response := apex_web_service.make_rest_request(p_url                   => l_url,
                                                     p_http_method          => 'PUT',
                                                     p_body_blob            => lr_files.blob_content,
                                                     p_credential_static_id => :G_OCI_CREDENTIALS);

    IF apex_web_service.g_status_code != 200 then
      RAISE failed_upload;
    END IF;
  END LOOP;
END;
8. Add a second Close Dialog process to close the modal after the Upload File process has been executed.
9. Save the page.
Now we have added a modal page to upload new files we need to link to it from the home page.
1. Navigate back to the home page.
2. Add a Hot Text Button to the Right of the interactive report search bar placeholder names ADD, and update using the following properties.

3. Click on the No Link Defined button for the Target and update using the following properties:
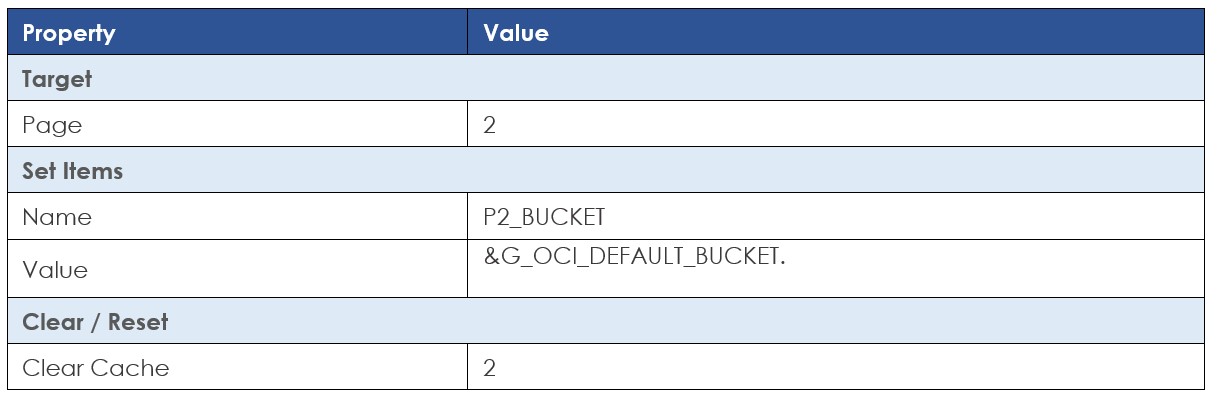
4. Right-click the ADD button and select Create Dynamic Action from the popup menu.
5. Set the name of the dynamic action to Refresh Files After Upload and set the Event to Dialog Closed.
6. Verify that a Refresh action has been added to refresh the Files in Bucket region.
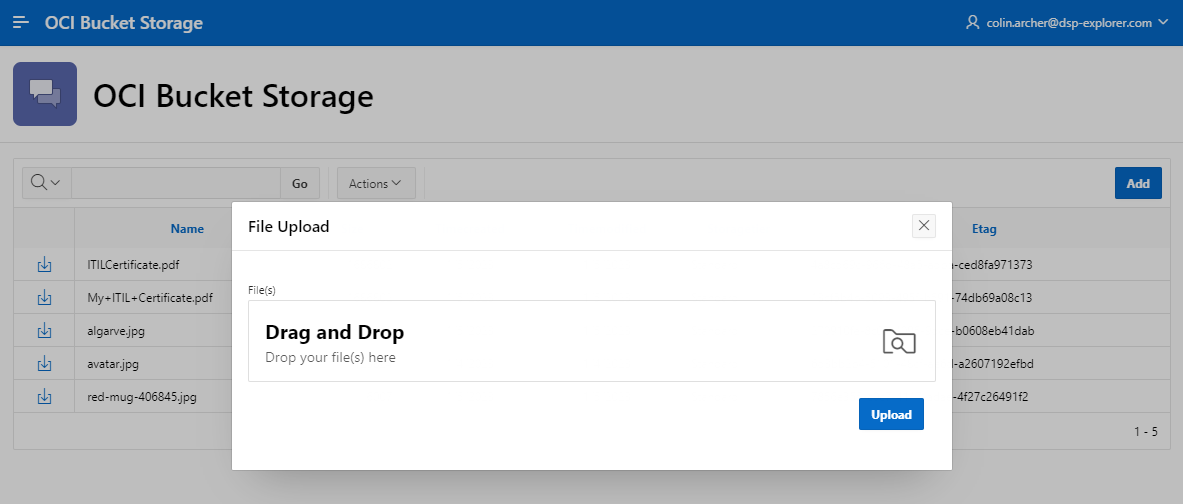
7. Click on the Save and Run page button.
You can now use the ADD button to open the modal page and add new files to be uploaded to the bucket. The PL/SQL process to upload the file executes a PUT web service request to the OCI bucket passing in the file.
You now have a simple APEX application to list, download and upload new files to your OCI storage bucket.
Why not try adding a second link to the interactive report on the home page to delete a file from the bucket. To do this, you need to execute a DELETE request and pass in the URL of the file to be deleted.
Note: For this blog, I used a Workspace on apex.oracle.com, which did not require creating additional ACLs or certificates for the OCI Rest Data Sources. If you are using your own environment, you may need to create the relevant ACLs and Certificates.
If this blog was of interest, be sure to discover more about our Oracle APEX Services, we'd be happy to discuss the art of the possible with you! Get in touch with our experts or book a meeting today...

If you liked this blog, check out our other APEX blogs here.