- Services

Getting to know us
- Industries
Recent case study:
Oracle EBS Cloud Deployment
Consolidating and Migrating assets into Oracle Cloud Infrastructure.
.png?width=250&name=stonewater-logo%20(1).png)
Most Visited Pages
-
- Resources
DSP-Explorer acquires leading Oracle Applications Managed Services Provider, Claremont, to further extend its data management capabilities.

Resources
- Contact us
APEX 24.1 – Document Generator Remote Printing
Contents
At the start of 2024, the in-built function ‘Document Generator’ was released in OCI and, therefore, became available for use within Oracle APEX. This topic was discussed in my colleague Mike Pickering’s blog, Document Generator in APEX: An alternative to AOP?, where he pondered whether it could rival the polished and established product of APEX Office Print.
In this blog, however, I will delve into the technical side of how to configure Document Generator for remote printing and use it in your projects. I will first show you how to get everything set up within your OCI environment and then how that links into the setup within Oracle APEX.
Document Generator is a pre-built function within OCI. It isn’t a plugin or native bit of APEX functionality, so it will require you to be on Oracle Cloud already or set yourself up on OCI before being able to use it. If you intend to use this new feature just for testing and learning, you can always visit https://apex.oracle.com to sign up for a free OCI tier, just like I have for this blog.
To ensure this blog isn’t too long, we will only cover steps pertinent to the setup of Document Generator. I won’t cover how to do the following steps, but if you’re starting from a fresh OCI environment, you will need to create a compartment and an application before beginning the steps below. Many blogs and resources are available online if you’re unsure how to do so.
How to Configure (OCI)
Let’s start with my brand new OCI environment. To begin with, we will need to:
1. Navigate to ‘Developer Services’ from the side menu and then to ‘Pre-Built Functions’.
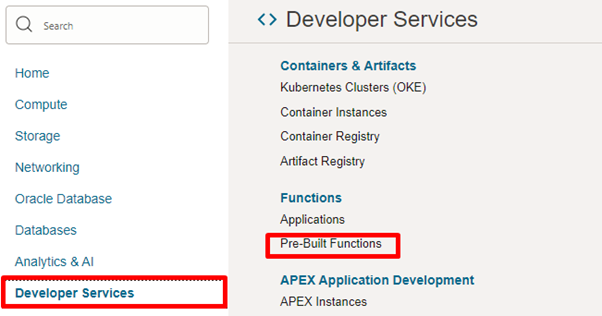
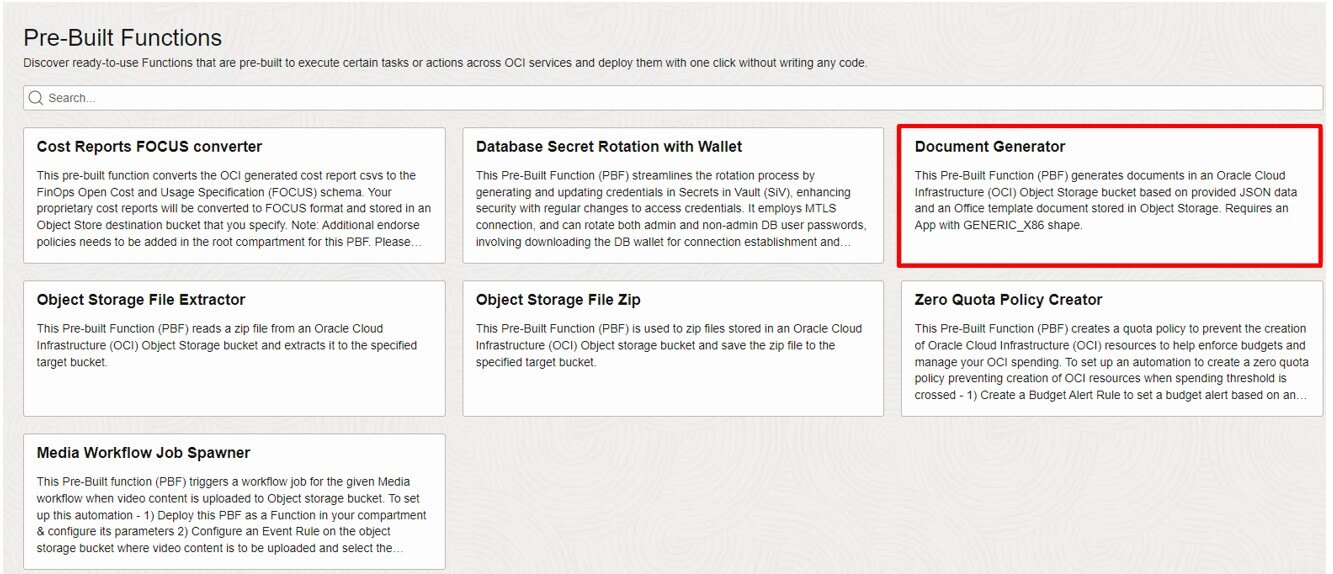
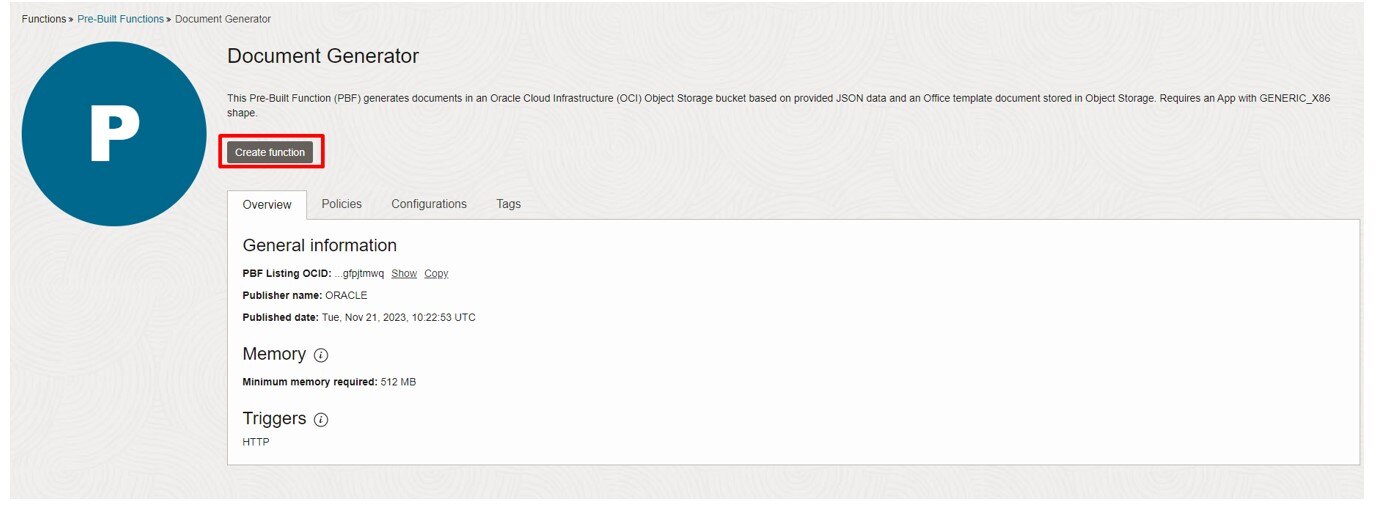
2. This is where we will find our new tool for today. We will click ‘Document Generator’ and then ‘Create Function’.
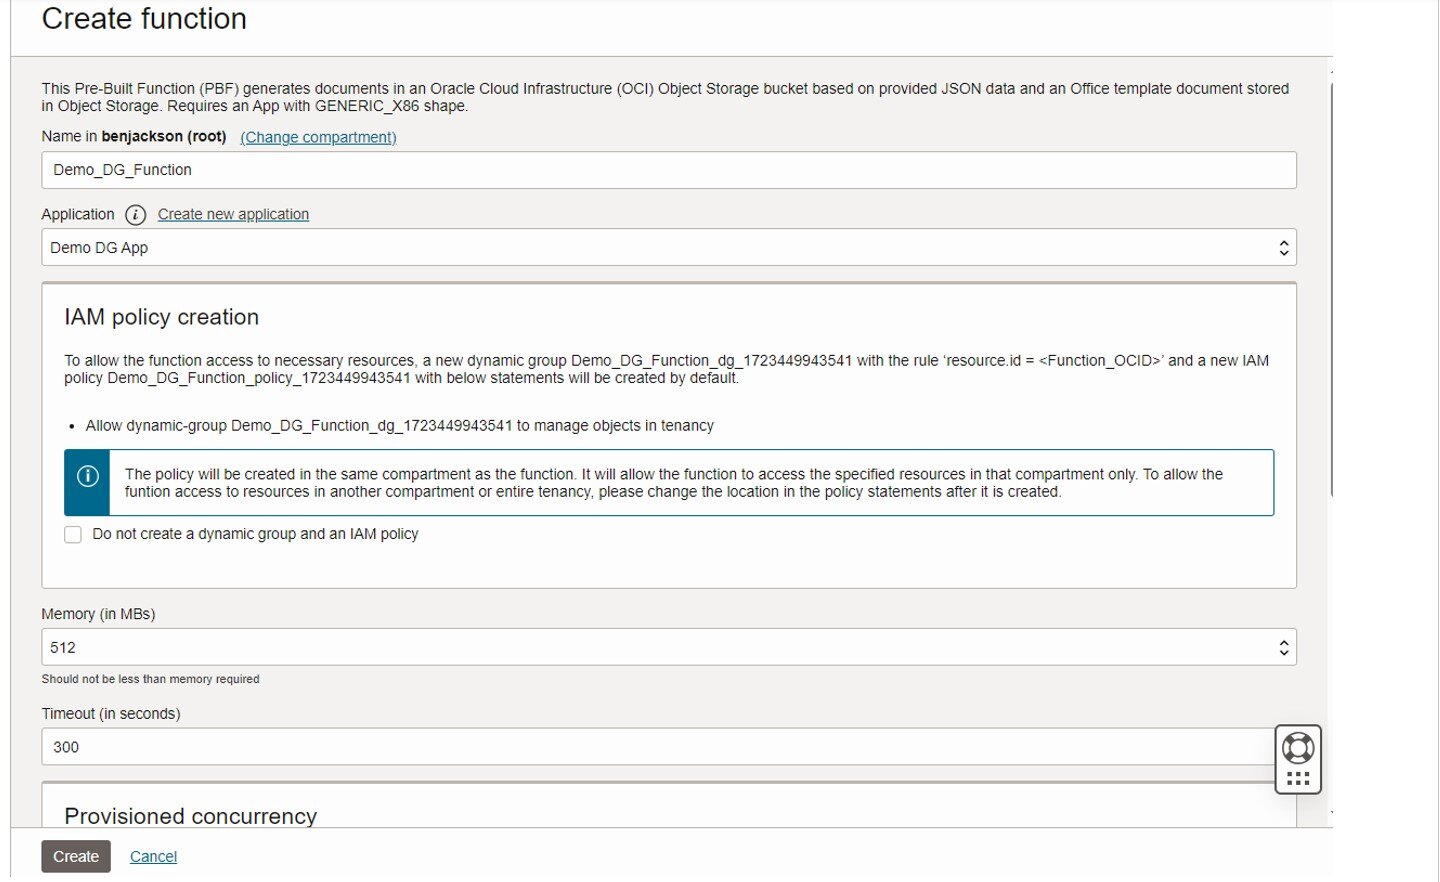
3. I will type in a name for this function and choose which compartment and application I want it to apply to. The name of this function can be anything you’d like it to be.
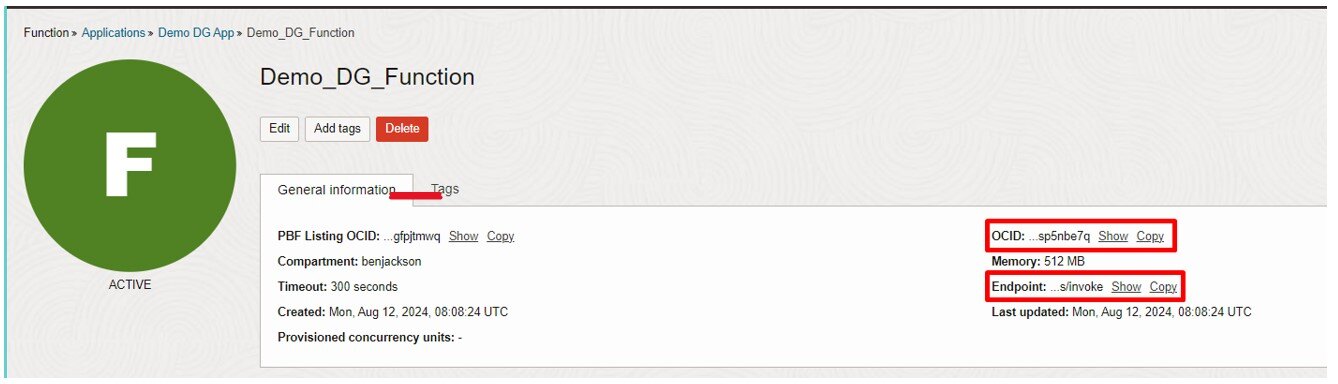
4. Now we have our new function created for our app, we will need to grab the details it has generated. These will be used for later steps, so copy both the OCID and the endpoint and store them somewhere useful, and we will be referencing them.
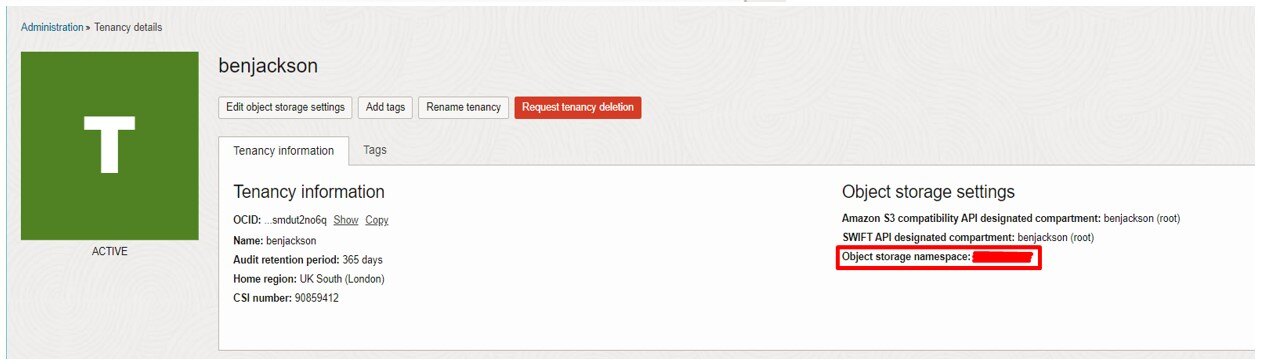
5. When creating the function, we saved the endpoint and OCID, but we will also need the details for the object storage. These are the Namespace, the compartment’s OCID and the root endpoint. They can be found by doing the following:
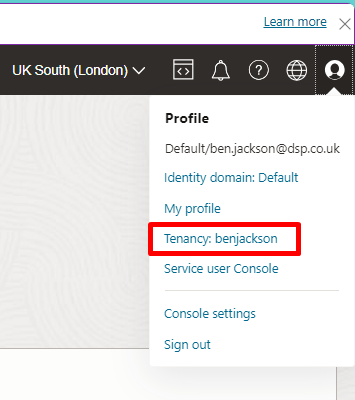
- Namespace – Profile (top right) > Tenancy > Object Namespace
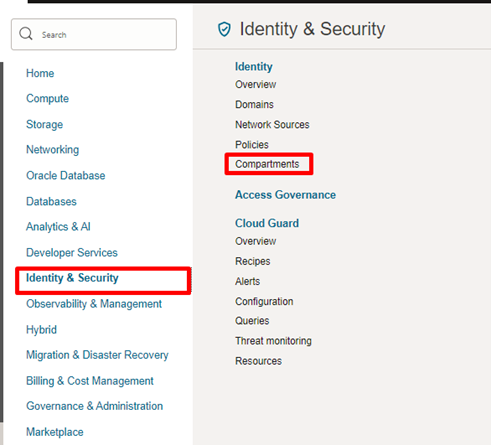
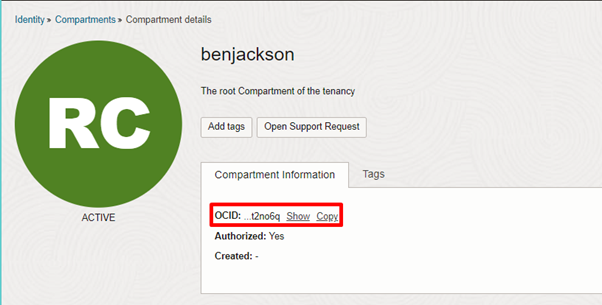
- Compartment OCID – Side menu > Identity & Security > Under the identity heading, you will find ‘Compartments’.
- Object Storage Endpoint – It will follow this format: https://objectstorage.{region-identifier}.oraclecloud.com. In this case, my region identifier is ‘uk-london-1’, so my endpoint would be https://objectstorage.uk-london-1.oraclecloud.com. If you’re unsure of what yours may be, you can check by following this link: Object Storage Service API | Oracle Cloud Infrastructure API Reference and Endpoints, which provides a list of them all.
Now, we will need to create a user, API and a group for the next steps.
6. To create a user, we will need to navigate to the side menu > Identity & Security > Identity > Domains > (Select the default domain) > Users. You will then need to ‘Create User’.

7. You can click into your newly created user once completed, and on the left-hand side, select ‘API keys’ as you will need to create a new one. Be sure to download the private key before adding it.
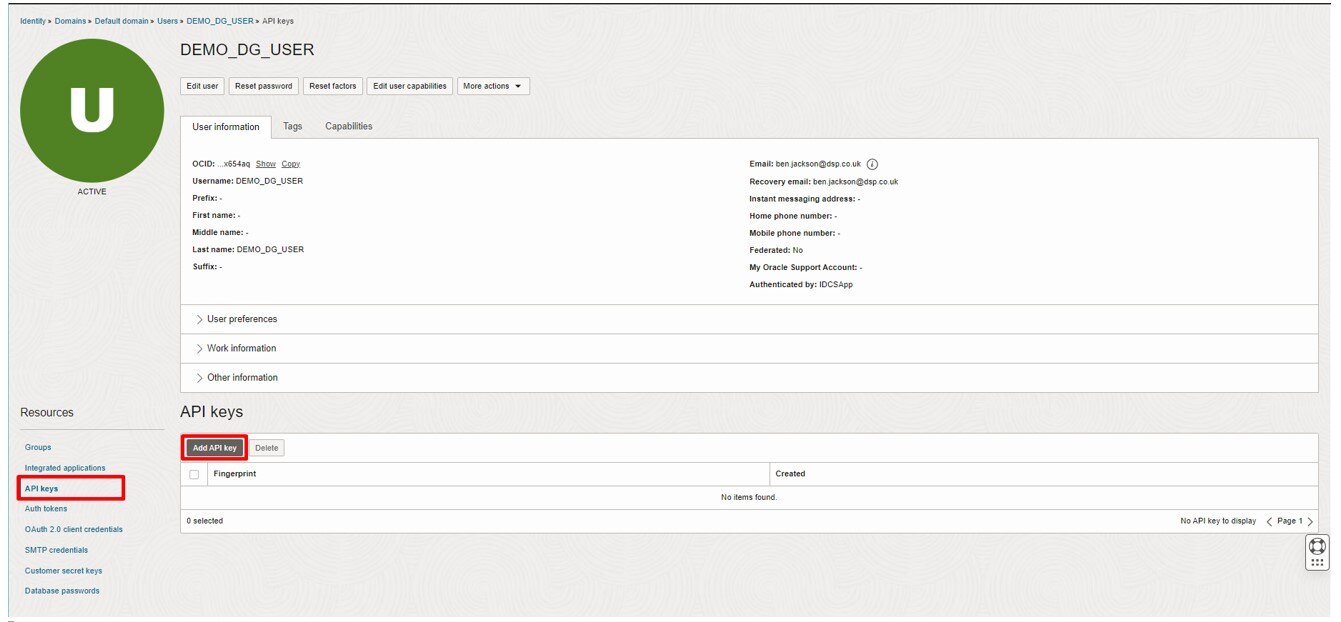

8. Once you add it, you should be shown a preview of the configuration. Make sure to copy that to your clipboard. You will need to ensure you keep the details on there as they’re used for when we create our cloud credential.
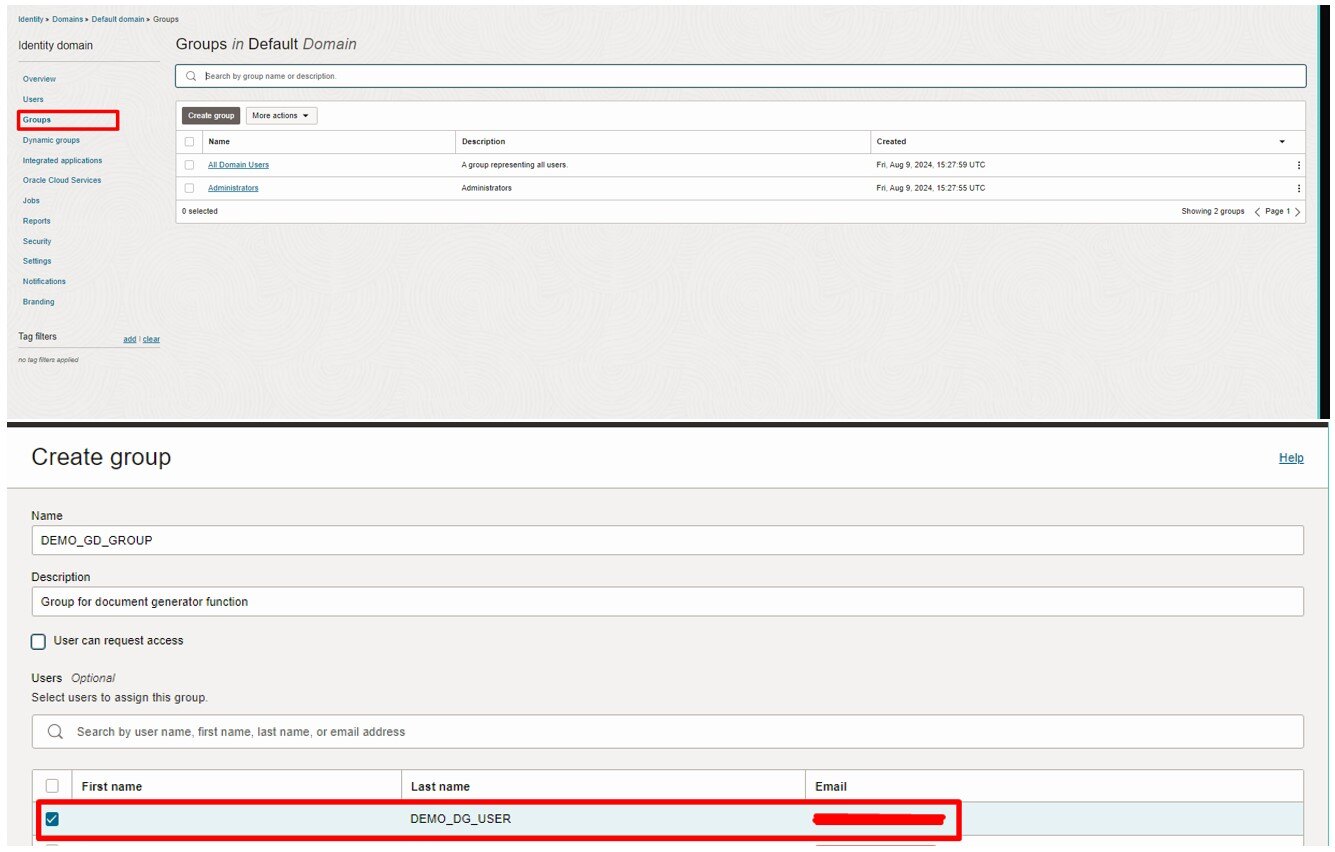
9. Head back to your default domain and navigate to the groups option, where we will create a new group. Again, you can call this whatever you’d like. Be sure to select the newly created user from the table.
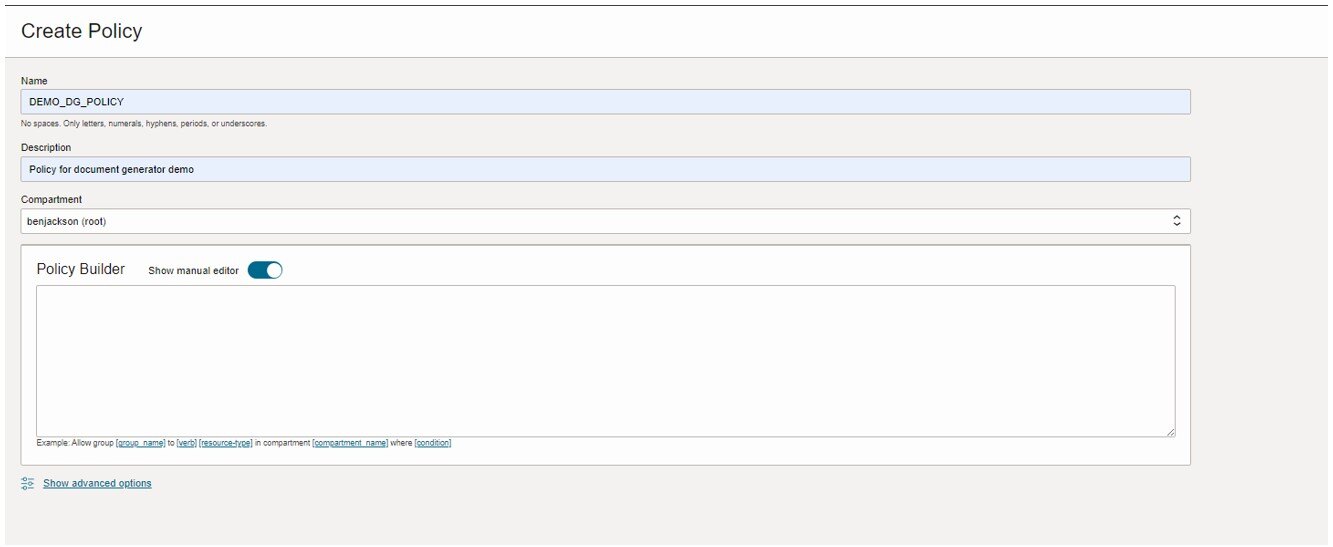
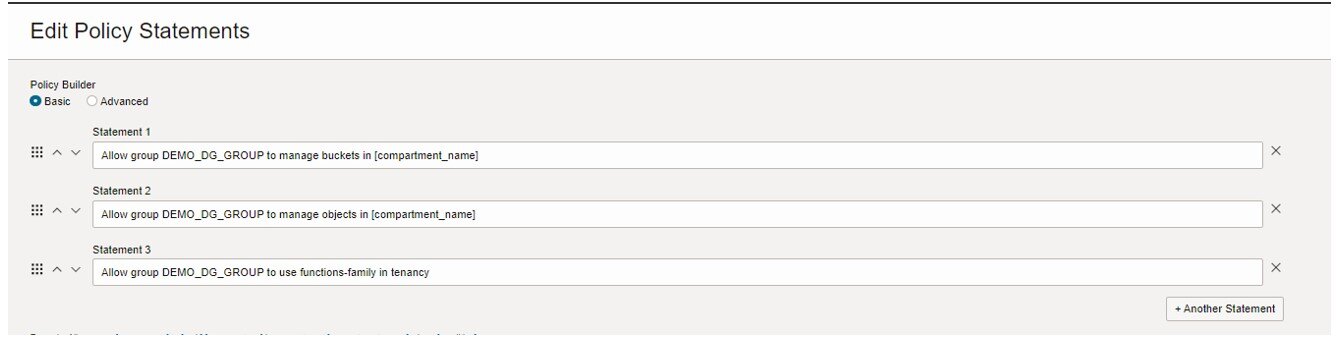
10. Once the group is set up, the last step is to create policies for the group. This will determine the actions allowed for the group. The syntax for this, if you’d like to use the manual editor, can be found here: Create an Oracle Cloud Infrastructure Policy. You will need three statements: one to manage the buckets, one to manage the objects and one to use functions-family.
Now that everything is set up nicely within OCI, the next step is to create a database credential in your Oracle Database. This credential will allow Oracle APEX to use Document Generator as a remote print server.
To create a database credential, you can use the CREATE_CLOUD_CREDENTIAL procedure under the APEX_INSTANCE_ADMIN package. An example of a call to this procedure is:
BEGIN
    APEX_INSTANCE_ADMIN.CREATE_CLOUD_CREDENTIAL (
    p_credential_name   => ‘CREDENTIAL_NAME’,
    p_user_ocid                =>  ‘user_OCID_copied_from_configuration_preview’,
    p_tenancy_ocid         =>  ‘tenancy_OCID_copied_from_configuration_preview’,
    p_private_key            =>  'private_key_copied_when_creating_API',
    p_fingerprint              => ‘fingerprint_copied_from_configuration_preview’);

END;
How to Configure (APEX)
Once the database credential is created and potentially depending on how your database is hosted, the DBMS_CLOUD package is installed too. You will then be able to configure the print server within your APEX environment.
To do so, you will need to
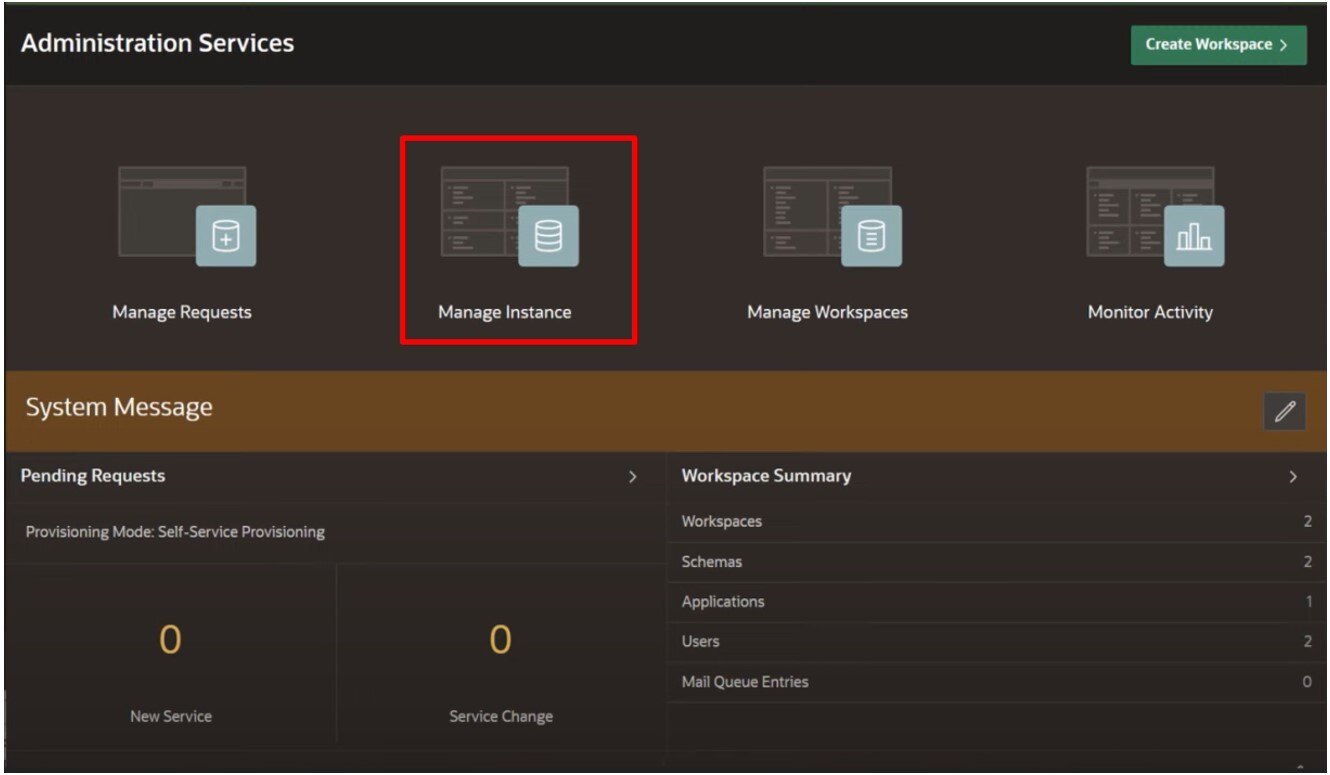
1. Log into ‘Administration Services’ (this is where you can manage the instance and set up the report printing settings).
2. Select the ‘Manage Instance’ module.
3. Then, select ‘Instance Settings’.
4. Select the ‘Report Printing’ tab.
5. Then, you can select from several options for the print server, including Oracle BI Publisher, Apache FOP and, of course, APEX Office Print. For this example, we will choose the ‘Oracle Document Generator Pre-Built Function’.
Input the cloud credential name specified when completing that step.
And provide the details for Object Storage. These contain:
- Object Storage Namespace
- Object Storage Bucket Compartment OCID
- Object Storage Bucket Endpoint
- Function OCID
- Function Endpoint
These were all (hopefully) copied and saved somewhere safe whilst we were setting up everything within OCI, ready to be used now.
Once all of those steps are completed, we should be all setup. This means that within your Oracle APEX environment, you can leverage Document Generator for your reports and downloads. As part of this, you will need to create templates and make sure they’re uploaded to your object bucket storage for use.
There are lots of different ways you can call and utilise this function, including dynamic actions, page processes (such as ‘Print Report’) or calling it via APIs, such as APEX_HTTP or APEX_PRINT. All of these options have accompanying documentation to learn how to use them.
Summary
This integration offers a great way to generate PDFs within Oracle APEX and, once implemented, can be used and moulded into many options. For OCI users, it’s a great route to go down to make the most of your subscription. With the right setup and attention to security, remote printing becomes a valuable asset in your Oracle APEX toolkit, enabling you to deliver high-quality documents on demand, wherever needed.
For more information, check out our Oracle APEX Services, and if you liked this blog, check out our other APEX blogs here.
Subscribe to Oracle APEX Insights if you want to stay tuned for more APEX updates.