- Services

Getting to know us
- Industries
Recent case study:
Oracle EBS Cloud Deployment
Consolidating and Migrating assets into Oracle Cloud Infrastructure.
.png?width=250&name=stonewater-logo%20(1).png)
Most Visited Pages
-
- Resources
DSP-Explorer acquires leading Oracle Applications Managed Services Provider, Claremont, to further extend its data management capabilities.

Resources
- Contact us
Sending emails from an APEX application in the cloud
Contents
Configuring and sending emails from an APEX application running in the cloud involves multiple steps and can sometimes be confusing.
Therefore, I decided to write this blog to give step-by-step instructions on how to do it for an APEX application hosted in OCI. You can find out more about our APEX services here.
Pre-requisite
- You have already set up and configured an Oracle Cloud instance running an Autonomous Database (ATP).
- You have created an APEX workspace in your OCI environment.
Summary
Sending emails from your APEX application on your OCI ATP environment involves four simple steps.
- Generate SMTP credentials for Email Delivery.
- Create an approved sender for Email Delivery.
- Configure the SMTP parameters within the APEX instance.
- Set up and send a test email using SQL Workshop within APEX.
Step by Step Guide
Step 1: Generate SMTP Credentials
In this step, you will generate the SMTP credentials to use when sending emails from your application.
1. Sign in to your OCI environment
2. Navigate to Identity & Security -> Users and click the username for which you want to create SMTP credentials.
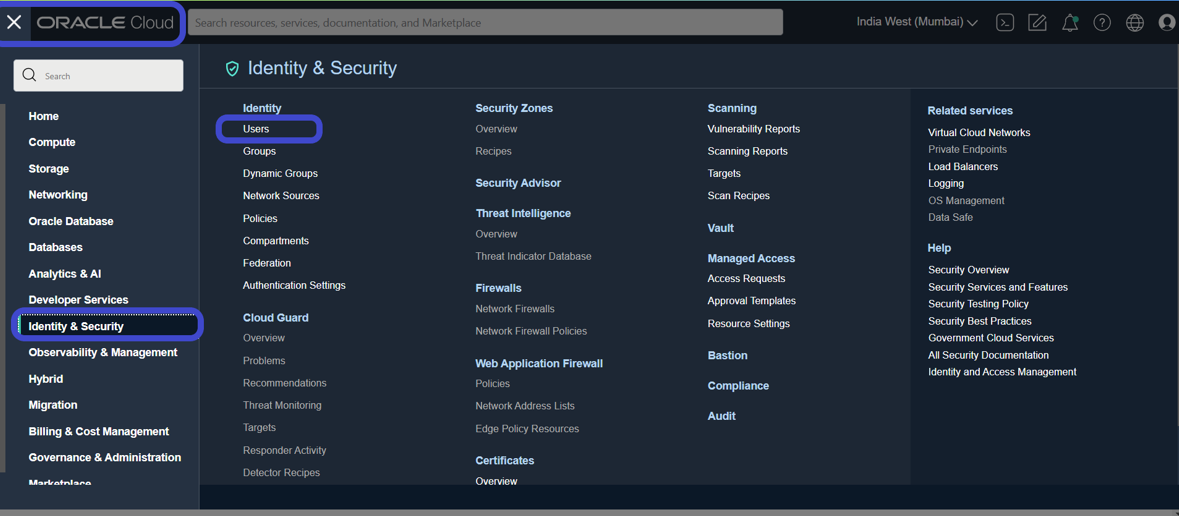
3. Here you'll find a list of users. Choose the one you would like to use for the SMTP credentials.
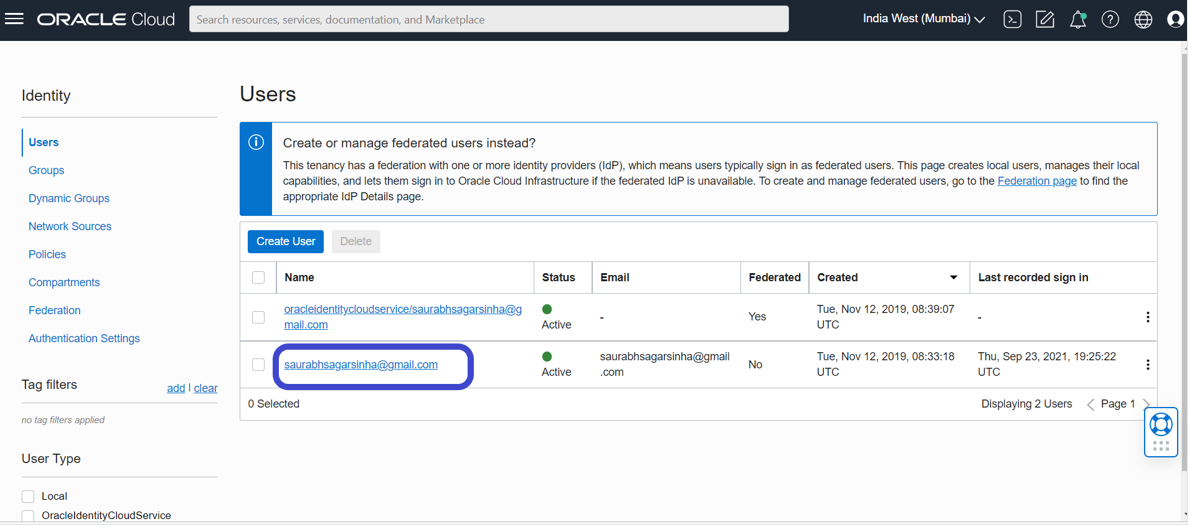
4. You can select one of the existing users or create a new one.
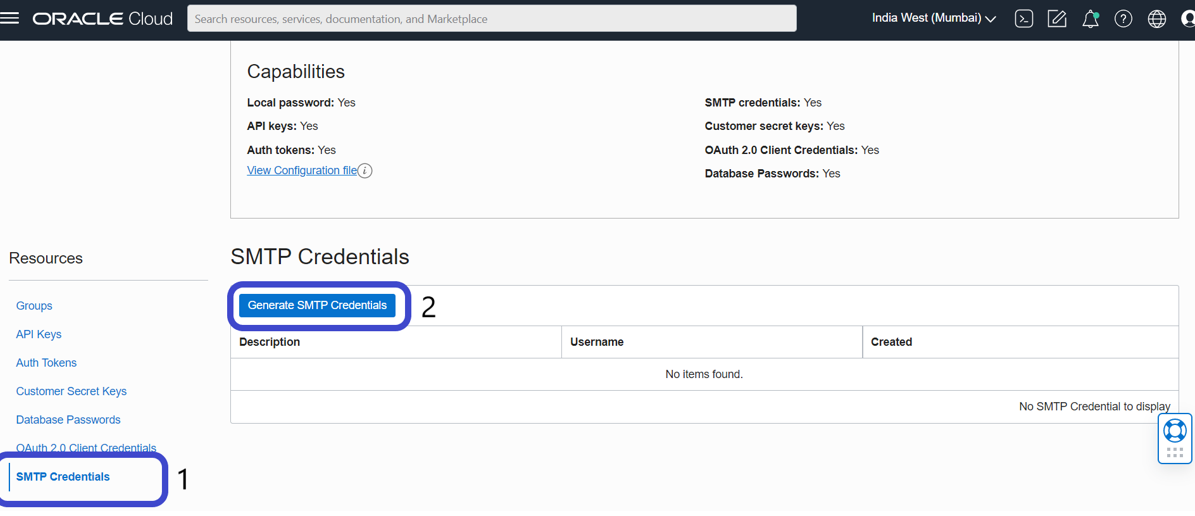
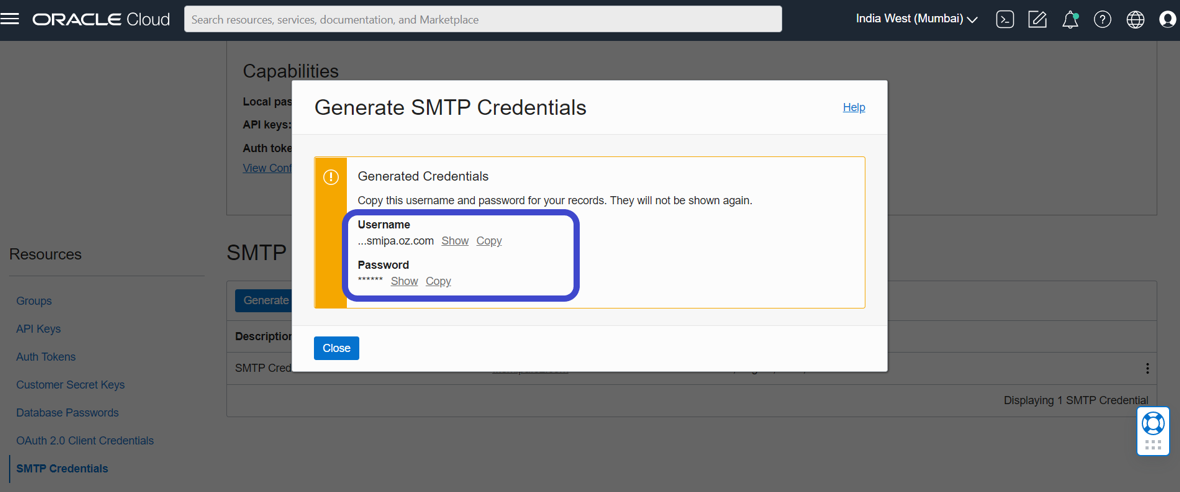
5. Select the username you wish to use and click on SMTP Credentials, which you will find under the Resources menu. Next, click on Generate SMTP Credential.
6. Enter a Description and click Generate SMTP Credentials again.
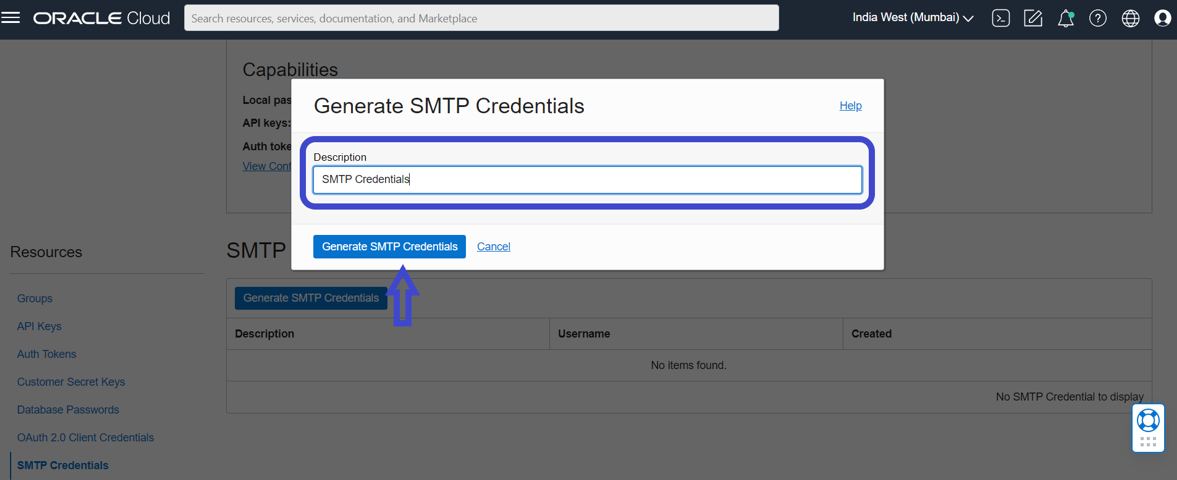
7. Copy the username/password and keep them safe because you will need them later.
Step 2: Creating an Approved Sender for Email Delivery
You will set up an approved sender for email delivery in this step.
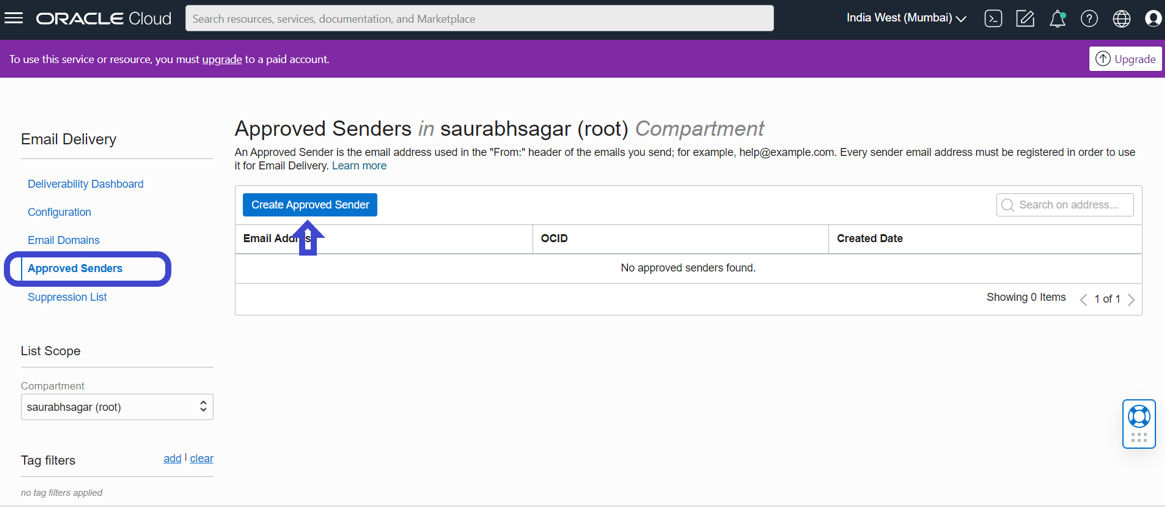
1. In the OCI console, search for Email Delivery and then click on the option within the search results.

2. Under Email Delivery, select Approved Senders and then click on the Create Approved Sender button.
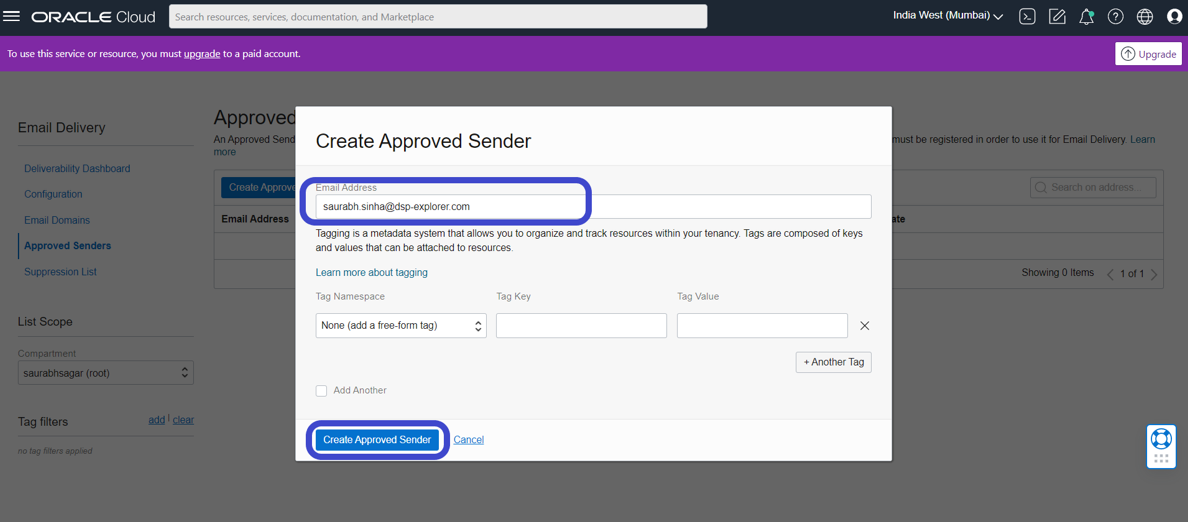
3. After that, enter a valid email address and click on Create Approved Sender.
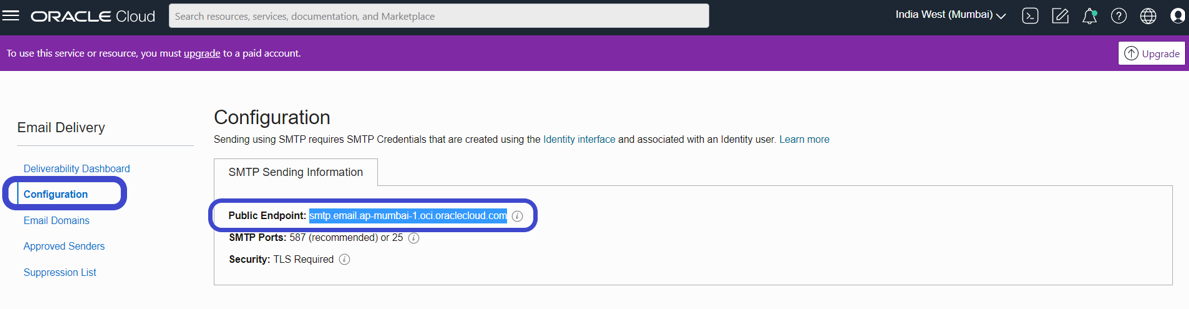
4. You also need to identify the SMTP connection endpoint for email delivery.
5. Under Email delivery, click on Configuration and then copy the value for Public Endpoint. You will need this later in the process.
Step 3: Configure the SMTP parameters within the APEX instance
Now you have generated the SMTP credentials, you need to let the APEX instance know what they are.
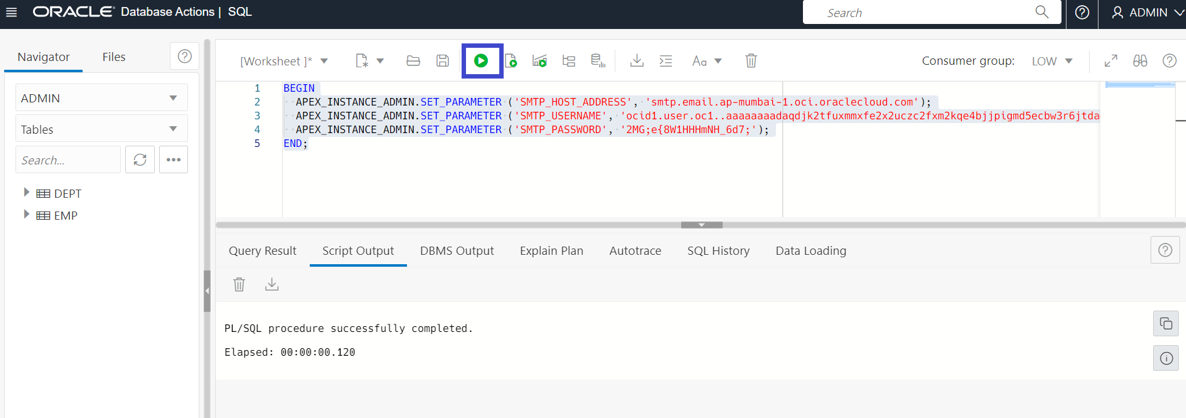
1. First, you need to connect to the Autonomous Database using a SQL client (for example, SQL Developer Web) and set the SMTP parameters using the APEX Instance Admin set parameter.
2. For the following, PL/SQL uses the apex_instance_admin API to set the required parameters for the host address, username and password.

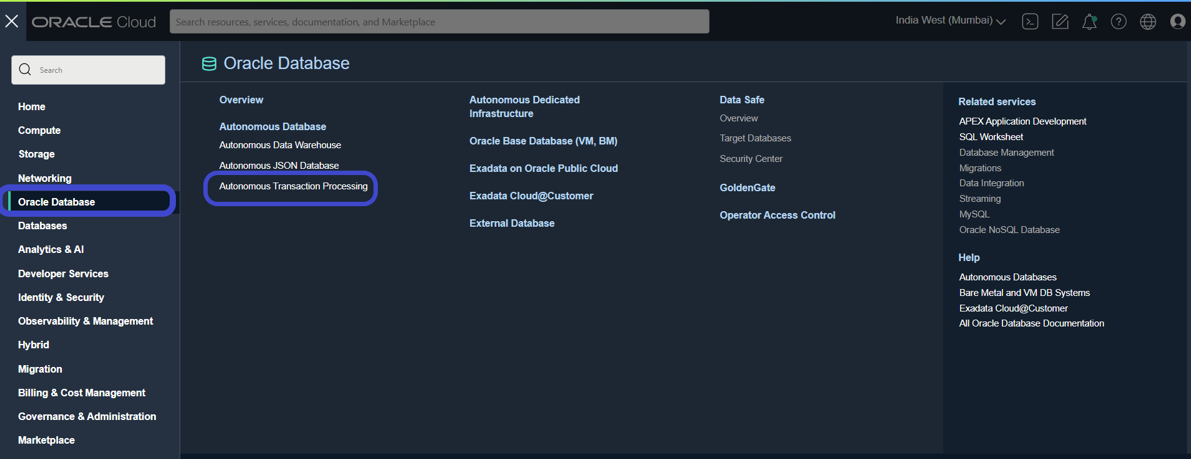
3. In the left side menu, navigate to Oracle Database and then Autonomous Transaction Processing.
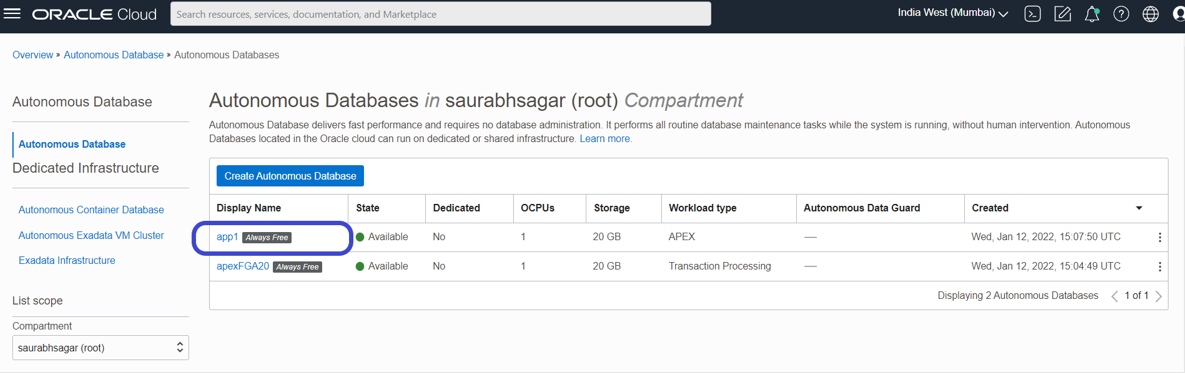
4. Click the relevant Instance Name.
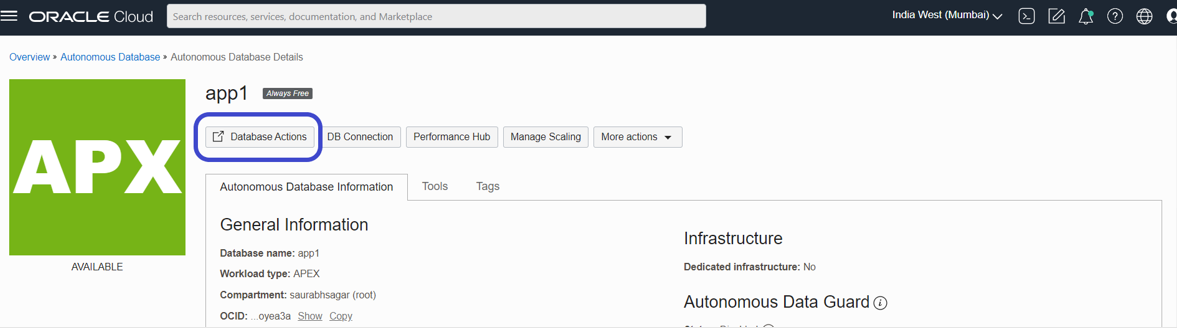
5. After that, click on Database Actions.
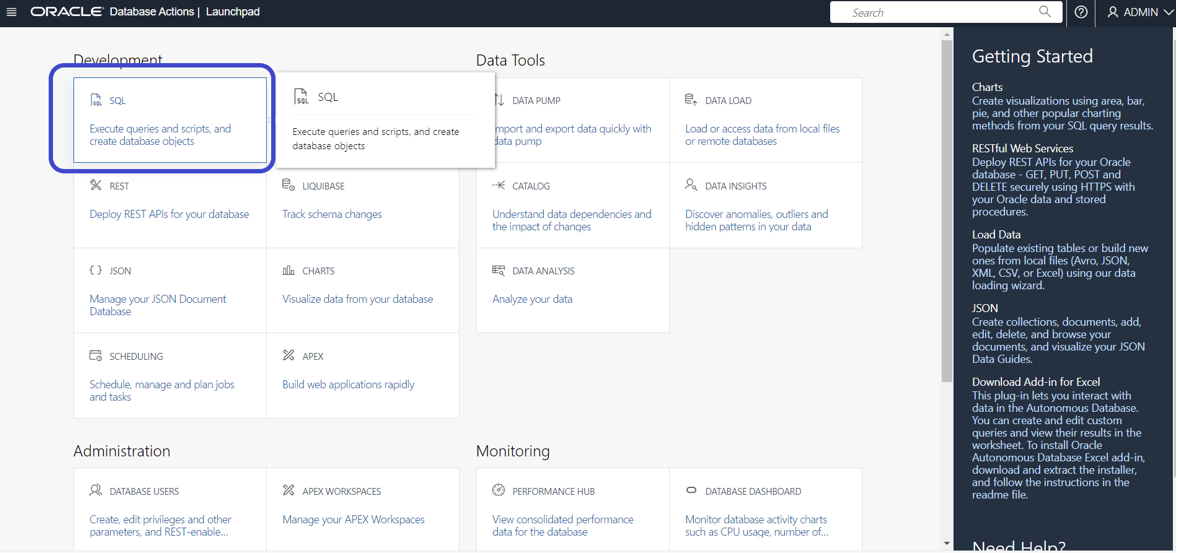
6. Right-click on the SQL option and open in new tab to open SQL Developer Web in a new browser window.
7. In SQL Worksheet, enter your PL/SQL code based on the example in step 2 and run the statement.
Step 4: Sending a test email using Oracle APEX > SQL Workshop
Now set all the required parameters, you can finally test sending an email from your APEX application using the API apex_mail.
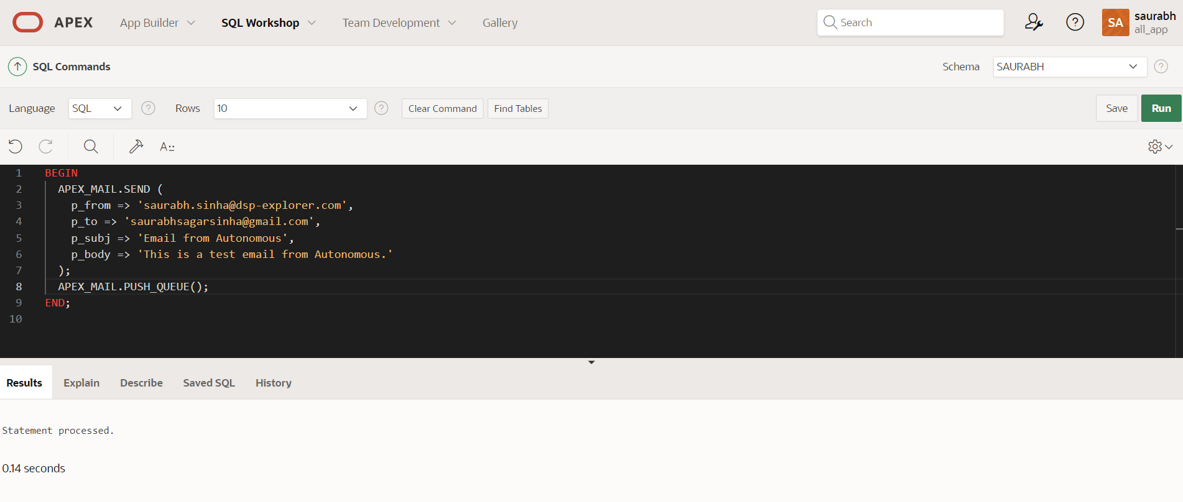
1. To send an email using the API, you need to specify 4 values as a minimum.
- The approved sender email address that you created in OCI
- Any valid email address as the recipient
- A subject
- Some text for the email body

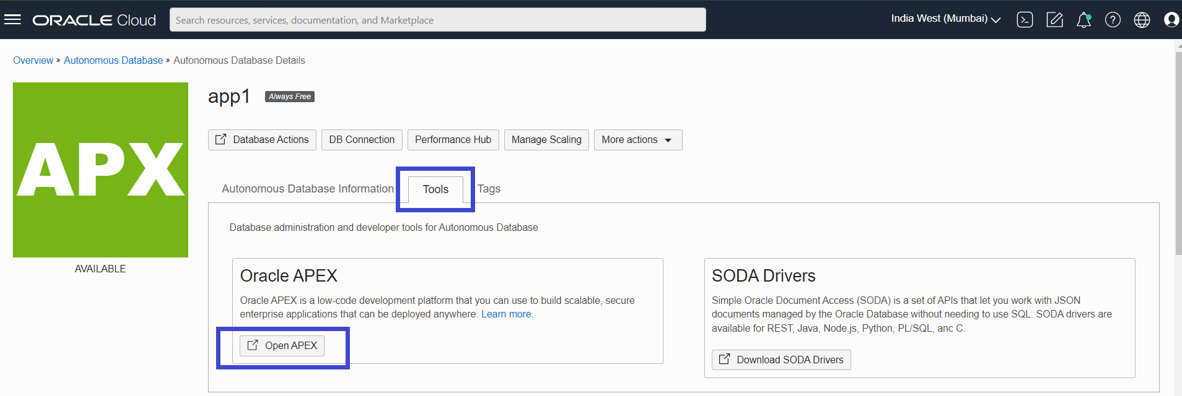
2. Navigate to your instance details page, and under the Tools tab, click on the Open APEX button within the Oracle APEX card.
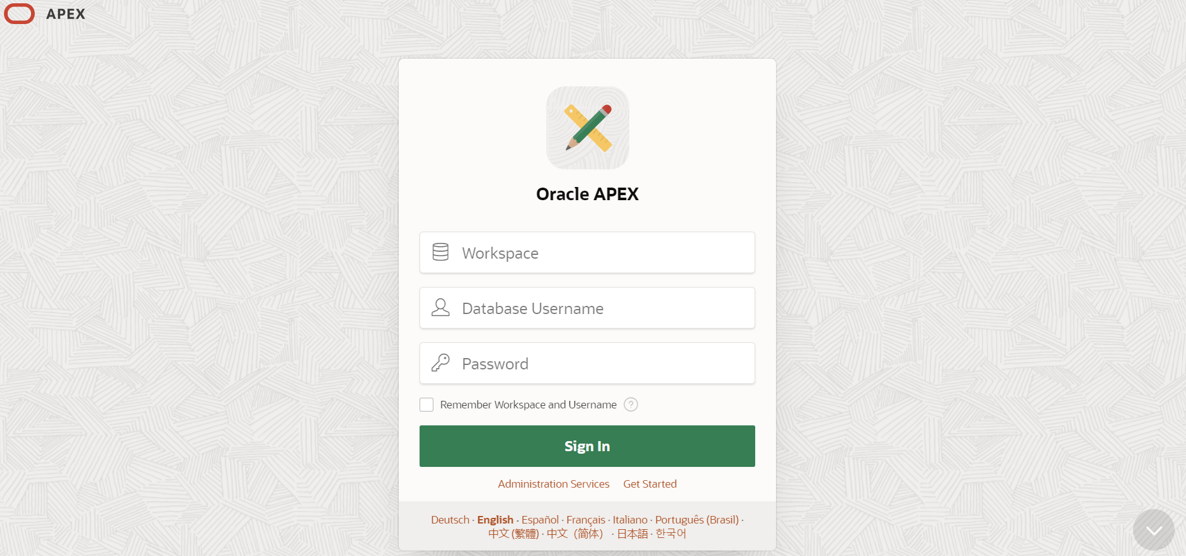
3. Enter your existing application's Workspace, Username, and Password and sign in.
4. Navigate to SQL Workshop and select the SQL Commands option.
5. Enter the PL/SQL code based on the example from step 1 and run it.
6. Now you can Query the APEX_MAIL_LOG view to verify if the email has been successfully delivered or not.
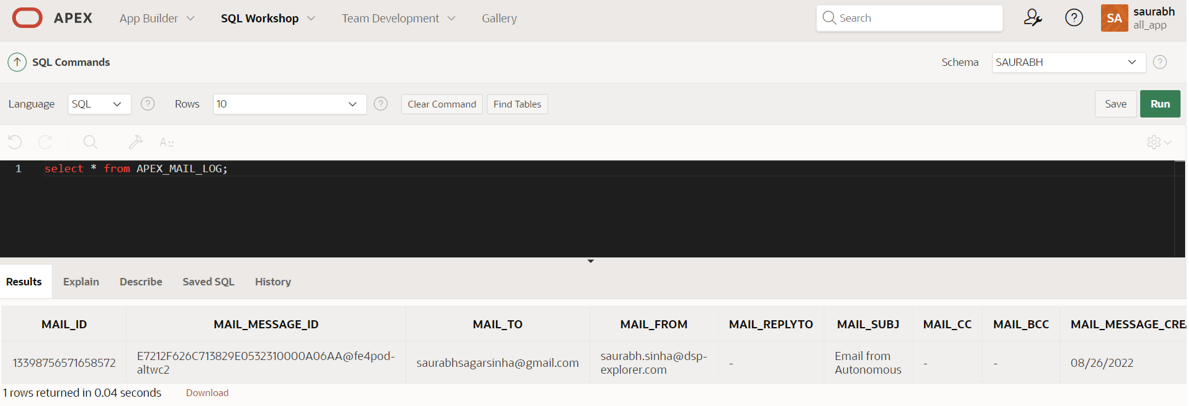
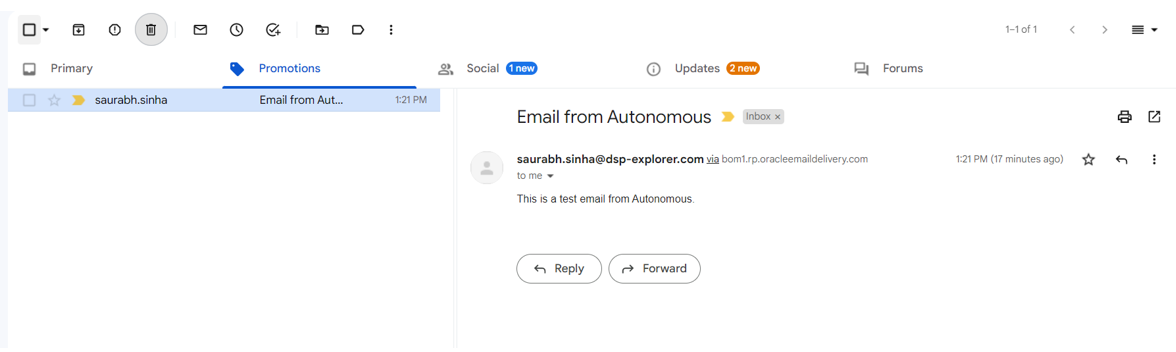
7. Assuming your email has been successfully delivered, you can now check your inbox to confirm.
Conclusion
So, after following all the above steps, we can send the email from our Oracle APEX applications hosted in OCI.
If you would like to speak to one of our Oracle APEX experts, get in touch through enquiries@dsp.co.uk or book a meeting...