- About

Getting to know us
- Industries
Recent case study:
Oracle EBS Cloud Deployment
Consolidating and Migrating assets into Oracle Cloud Infrastructure.
.png?width=250&name=stonewater-logo%20(1).png)
Most Visited Pages
-
- Resources
DSP-Explorer acquires leading Oracle Applications Managed Services Provider, Claremont, to further extend its data management capabilities.

Resources
- Contact us
Flexible Field functionality
Contents
Flex Fields
From time to time, the users may wish to be able to extend their application by adding extra fields to tables without contacting IT to perform a change request. For example an application designed for a Coffee Shop may wish to add a Twitter Username to the customer table. The field was never specified when the application was built and may even have pre-dated Twitter itself. The developer can somewhat future-proof an application by the addition of what are known as “Flexible Fields”.
This is a concept that EBS developers and users will be familiar with and many developers will have built custom flexible field solutions in the past. Flexible fields allows super users to be able to configure how these fields should be displayed and launch these modifications without the need to invoke the whole change process (e.g. define, build, test, deploy) with IT.
If I were to build Flexible Field functionality in my application from scratch; I would not be quoting for a small development as I believe this would be of significant work. APEX takes out some of the pain of building this functionality as Flexible Fields are already a feature of 3 packaged applications (Application Standards Tracker, Customer Tracker & P-Track). Using this functionality we can create Text, Number, Date or even CLOB fields; we can use Select Lists and provide a List of Values and even create Help Text– the functionality available here is very rich.
Unfortunately the only guide you ever get about how to use this plug-in are the words “You can review how this item plug-in is utilized in P-Track and Customer Tracker”. Therefore in this blog, I will describe in detail how to incorporate this functionality in to your application.
We are going to base our work on the Customer Tracker application, and we are going to create a Flex Registry (somewhere to store the fields), some screens to maintain the registry, configure these screens within the registry and finally show these fields on our APEX pages.
1. Creating a Repository table
In this example, I’m going to reuse an existing repository table called eba_cust_flex_registry which was created when I installed the Customer Tracker packaged application. As the word ‘cust’ stands for ‘customer’ in Customer Tracker you can create your own Repository as a copy of this table if you prefer; providing a new name.
2. Adding Flex columns to a table
Now you need to add as many flex columns to the main data table as you wish. So in the Coffee Shop example, I think 10 columns should be sufficient. At this point, it’s an estimate, as I don’t know the quantity or types of fields the users will be creating in the future. I need to create these using the naming convention below. The Admin screen prevents you creating more flexible fields than the table supports.
The column names need to be:
| Data Type | Name | Example |
|---|---|---|
| String | %_FLEX_XX | CUSTOMER_FLEX_08 |
| Number | %_FLEX_NXX | CONTACT_FLEX_N25 |
| Date | %_FLEX_DXX | ORDER_FLEX_D02 |
| CLOB | %_FLEX_CLOBXX | ORDER_ITEM_FLEX_CLOB01 |
3. Adding the Flex columns in the Registry
You now need to add the Flex Columns to the Registry. You need to add these columns as inactive entries. This way, you can use the admin screens without needing to define all the fields perfectly in SQL.
Here is a script I use which sets the minimal amount of data: (You’ll need to change the values in red for FLEXIBLE_COLUMN and DISPLAY_AS).

For demonstration purposes, I created 5 Text Fields, 3 Number fields and 2 date fields.
4. Create Administration Pages
In order to define the Flexible Fields you’ll need a series of pages to support the administration of these fields.
You technically have two options:
(1) Remove all pages from the Customer Track application apart from pages 39, 41, 71, 80, 81, 82, 83 & 84. You can then rename this application as your Flexible Fields Administration Application.
(2) Copy the above pages from Customer Track in to your application e.g. The Coffee Shop application (you’ll need to copy or use existing lists when prompted). When copying Page 39, create an ‘Administration’ Navigation Entry as Page 39 is the IR of flexible fields. You can also copy the pages to a different page ID; however you’ll need to manually modify all the branches and dynamic actions to match the new page numbers.
5. Configure Flexible Fields
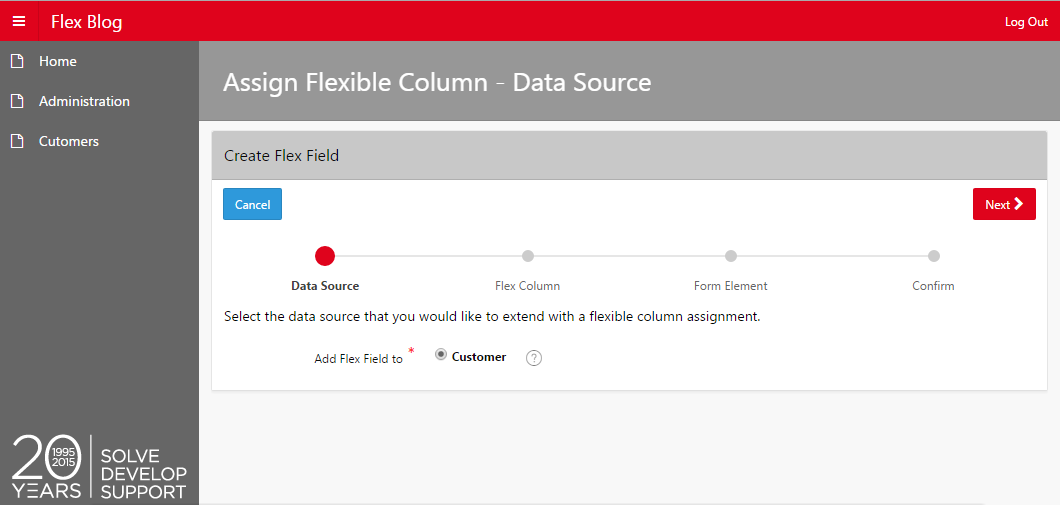
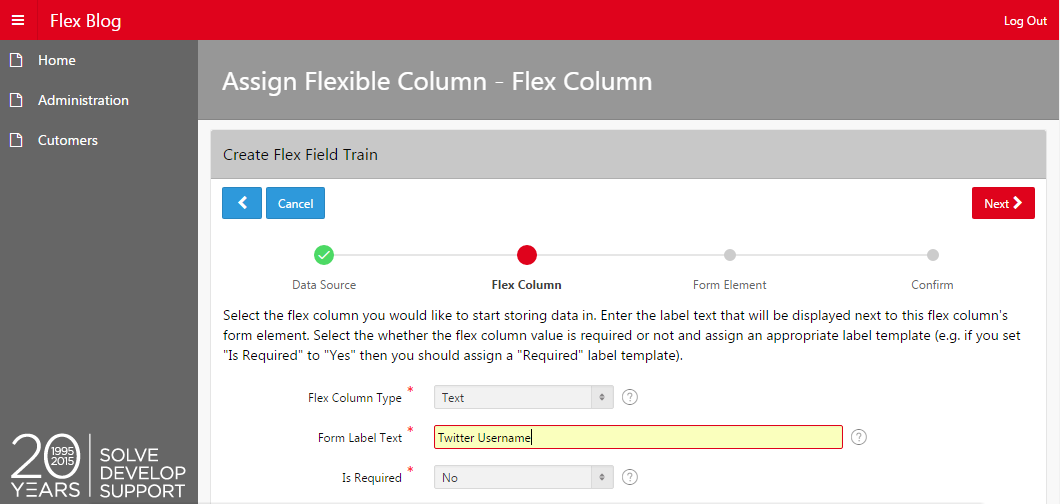
Now use the screens to set up a new flexible field for the Customer table. For example I will create a Text field on the Customer table for the Twitter username.
You are unable to select a column by name, so just add all the Text fields in field order i.e. add all the Text fields in order then all the Number fields in order, and so on. Therefore the first text field I add will be assigned to column CUSTOMER_FLEX_01.
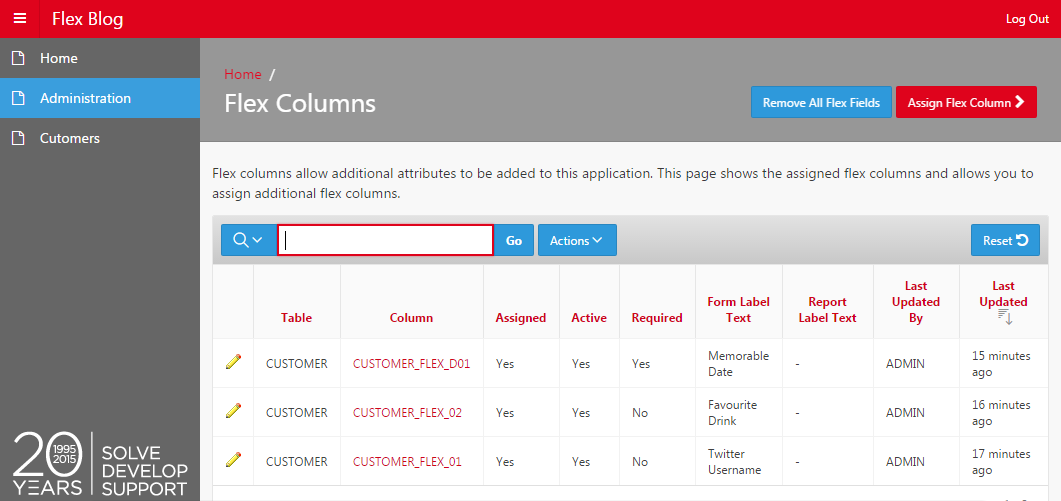
Once you have configured all the flex fields in the registry you should see them in the Interactive Report.
6. Using the Flexible Fields within your Pages
Export the Flex Field plugin from Customer Track to the file system.
Now in your application (e.g. the Coffee Shop application), you need to edit Shared Components and go to the Security Attributes and tick the Modify This Application checkbox under the set Runtime API Usage (which is found in the Database Session region).
Import the plugin and set your registry name e.g eba_cust_flex_registry. If you wish to change this you can do so within Component Settings (which is found in Shared Components).
Create a Form & Report on your table which contains flexible fields. e.g. customers table.
Edit the Form Page which has just been created. Change the type attribute for all your flexible field Page items to Flex Fields [Plug-in].
You’ll also need to add a Rows Returned condition for each Flexible field. You can use the following for page Items changing the value in red for each field.

You can use the condition below for the IR Reports Columns:

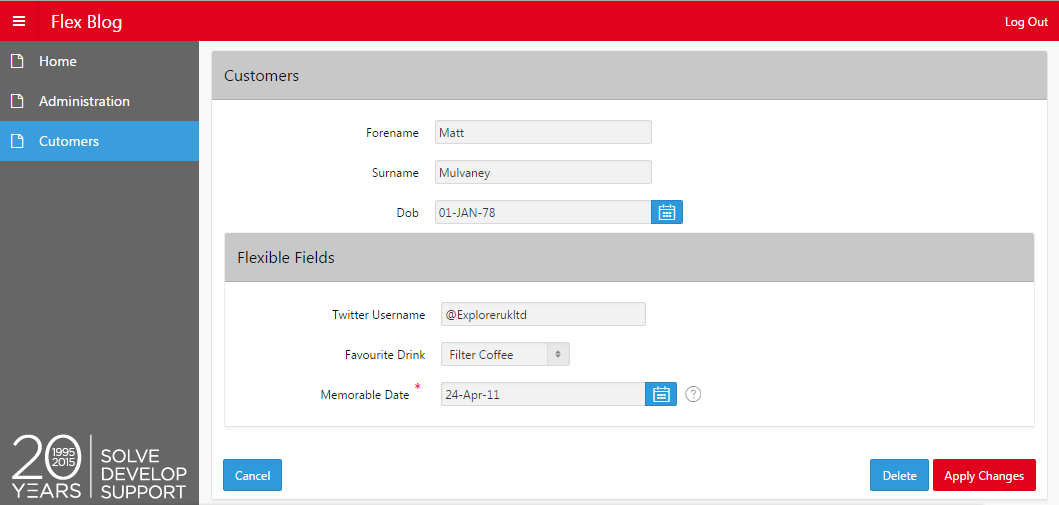
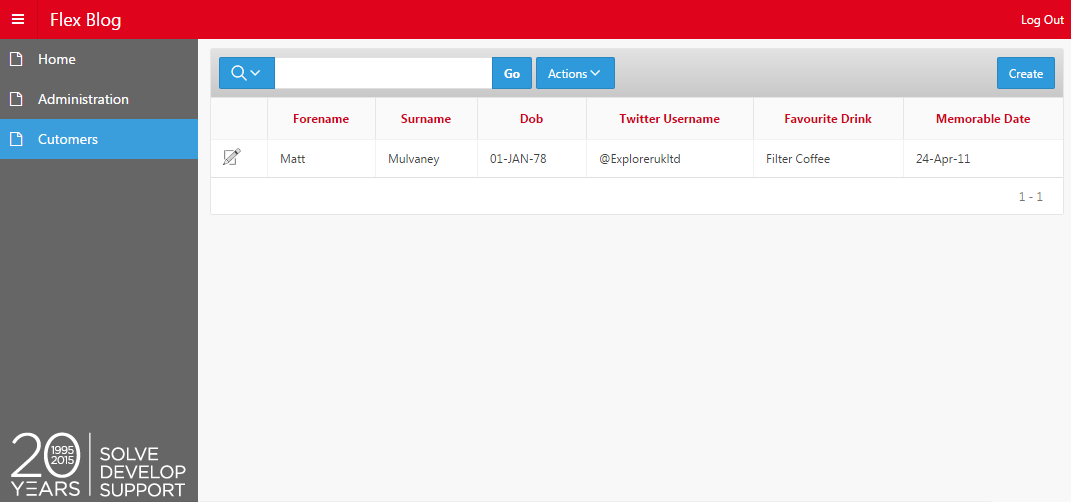
Here is the final product. Happy Flexing!
Author: Matt Mulvaney
Job Title: Senior Oracle APEX Development Consultant
Bio: Matt is an experienced APEX solution designer having designed numerous complex systems using a broad range of Oracle Technologies. Building on his previous experience of Oracle Forms & PL/SQL, he is entirely focused on providing functionally rich APEX solutions. Matt promotes APEX as a software platform and openly shares best practises, techniques & approaches. Matt has a passion for excellence and enjoys producing high quality software solutions which provide a real business benefit.