- About

Getting to know us
- Industries
Recent case study:
Oracle EBS Cloud Deployment
Consolidating and Migrating assets into Oracle Cloud Infrastructure.
.png?width=250&name=stonewater-logo%20(1).png)
Most Visited Pages
-
- Resources
DSP-Explorer acquires leading Oracle Applications Managed Services Provider, Claremont, to further extend its data management capabilities.

Resources
- Contact us
PL/PDF – PDF Images
Contents
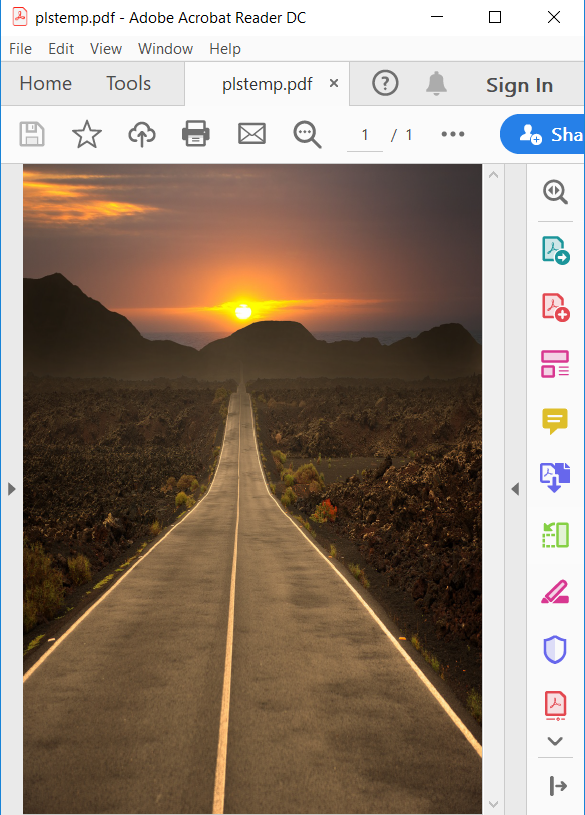
Continuing the blog series about PL/PDF, this blog is all about adding images to a PDF report. In this first step, we are going to create a page cover and add this image.

The image used on this report is stored in a blob table column. I recommend this for better performance..
To print an image in a PDF we can use the following procedure
plpdf3.PrintImageBox(

    p_x =>  --X of top-left corner

    p_y =>  --Y of top-left corner

    p_w =>  -- Image Width,

    p_h =>  -- Image Height,

    p_name => -- Image description

    p_data => -- image blob files,

    p_props => -- image properties

    );
p_x and p_y
If we just want to print an image in the PDF, we can just set the coordinates x and y to define where to place the image in this PDF as an offset from the top-left corner . In this example, we are using the image to cover the full background, that means both x and y position is 0.
p_w and p_h
This is used to define the image size. To stretch the image to cover the whole page background we can set those parameters based on the page size (plpdf_util.crFormat( p_w => , p_h => );) or use a procedure to get the page height(plpdf.getPageHeight) and width (plpdf.getPageWidth).
P_name
The end user will not see the Image description (p_name). This is an internal information for the PDF.
P_data
This is the image blob file.
P_props
This is a PL/PDF parameter to add some runtime settings. We can talk about that in a future blog.
Lets try!
DECLARE

  lb_image            BLOB;

  lv_description      pdf_report_images.image_description%type;

  l_pdf_file          BLOB;

  l_PDF_format        plpdf_type.t_pageformat;

BEGIN

/* set pdf format*/

l_PDF_format := plpdf_util.crFormat( p_w => 595, p_h => 842); -- A4 SIZE

plpdf.init();

plpdf.NewPage( );


    select blob_image,image_description
      into lb_image,lv_description
      from pdf_report_images
     where description = 'BACKGROUND';


/*Print the image*/

 plpdf3.PrintImageBox(

    p_x => 0, --X of top-left corner

    p_y => 0, --Y of top-left corner

    p_w => plpdf.getPageWidth,

    p_h => plpdf.getPageHeight,

    p_name => lv_description,

    p_data => lb_image,

    p_props => null

    );

plpdf.SendDoc( p_blob => l_pdf_file);

INSERT INTO PDF_REPORTS VALUES (l_pdf_file);

end;
The result is the pdf below
We can add more elements to the page, however the order in which these elements are included will reflect on how they show in the PDF, If we want, an image to be in the background then the image procedure needs to execute first.
The next step is to add a title to the page cover. First, we need to specify the font settings
plpdf.SetPrintFont(p_family => -- font family name(Arial, Helvetica, etc)*

                   p_style =>  -- font style (null: Regular B: Bold I: Italic U: Underline The styles may be combined (i.e. BI will be Bold and Italic)

                   p_size =>   -- Font Size);
*PL/PDF comes with build in fonts,
- Times-Roman” (Bold, Italic, BoldItalic)
- “Helvetica” (Bold, Oblique, BoldOblique)
- “Courier” (Bold, Oblique, BoldOblique)
- “Symbol” and “ZapfDingbats”.
However is possible to add more fonts (for more details on this, please see here -> https://www.plpdf.com/pdfportable.php.
plpdf.PrintoutText(p_x => --X of top-left corner

                   p_y => --Y of top-left corner

                   p_txt => -- text to print

                   );
By Default, the colour text will be black, to change the text colour, we can use the nonstrokingcolor procedure to change set the RGB colour code. More info here -> https://www.w3schools.com/colors/colors_rgb.asp
plpdf.nonstrokingcolor(p_r => Red code

                       p_g => Green Code

                       p_b => Blue Code

                        );
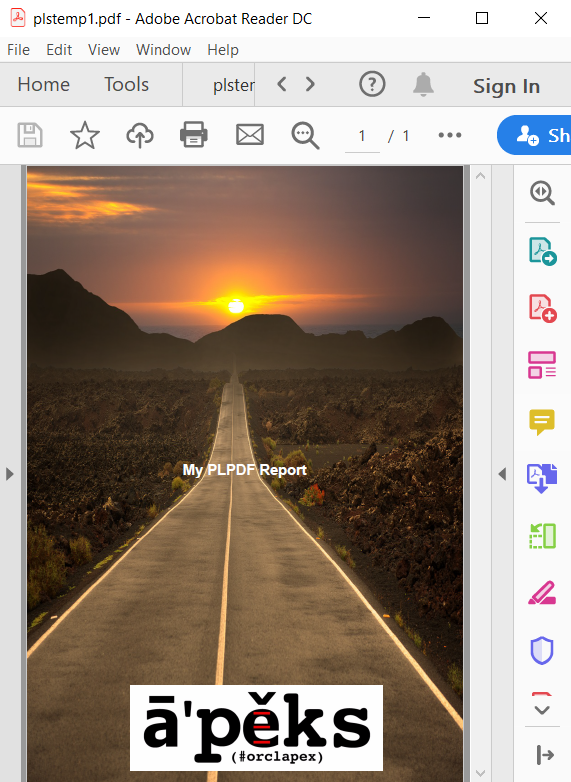
Let’s add that to our pdf and another image
DECLARE

  lb_image            BLOB;

  lv_description      pdf_report_images.image_description%type;

  l_pdf_file          BLOB;

  l_PDF_format        plpdf_type.t_pageformat;

  lv_report_title     VARCHAR2(1000);

BEGIN

/* set pdf format*/

l_PDF_format := plpdf_util.crFormat( p_w => 595.276, p_h => 841.89);

plpdf.init();

plpdf.NewPage( );

lv_report_title := 'My PLPDF Report';

    select blob_image,image_description

      into lb_image,lv_description

      from pdf_report_images

     where description = 'BACKGROUND';


/*Print the background image*/

 plpdf3.PrintImageBox(

    p_x => 0, --X of top-left corner

    p_y => 0, --Y of top-left corner

    p_w => plpdf.getPageWidth,

    p_h => plpdf.getPageHeight,

    p_name => lv_description,

    p_data => lb_image,

    p_props => null

    );

   /*print the title*/

   /* Font color */

   plpdf.nonstrokingcolor(p_r => 255,p_g => 255,p_b => 255);

   /* Font Settings */

   plpdf.SetPrintFont(p_family => 'Helvetica',p_style => 'B',p_size => 20);

   /* title Text (used some maths to centre the text) */

   plpdf.PrintoutText(p_x => (plpdf.getPageWidth/2)-(length(lv_report_title)*2),

                      p_y => plpdf.getPageHeight/2,

                      p_txt => lv_report_title);

    select blob_image,image_description

      into lb_image,lv_description

      from pdf_report_images

     where description = 'LOGO';

/*Print the second image*/

 plpdf3.PrintImageBox(

    p_x => 50, --X of top-left corner

    p_y => 250, --Y of top-left corner

    p_w => 120.96,

    p_h => 41.04,

    p_name => lv_description,

    p_data => lb_image,

    p_props => null

    );

plpdf.SendDoc( p_blob => l_pdf_file);

INSERT INTO PDF_REPORTS VALUES (l_pdf_file);

end;
The result is the pdf below
If we want to add more pages to the PDF we just need the (plpdf.NewPage( );)
DECLARE

  lb_image            blob;

  lv_description      pdf_report_images.image_description%type;

  l_pdf_file          BLOB;

  l_PDF_format        plpdf_type.t_pageformat;

  lv_report_title     VARCHAR2(1000);

BEGIN

/* set pdf format*/

l_PDF_format := plpdf_util.crFormat( p_w => 595.276, p_h => 841.89);

plpdf.init();

plpdf.NewPage( );

lv_report_title := 'My PLPDF Report';

    select blob_image,image_description

      into lb_image,lv_description

      from pdf_report_images

     where description = 'BACKGROUND';

/*Print the image*/

 plpdf3.PrintImageBox(

    p_x => 0, --X of top-left corner

    p_y => 0, --Y of top-left corner

    p_w => plpdf.getPageWidth,

    p_h => plpdf.getPageHeight,

    p_name => lv_description,

    p_data => lb_image,

    p_props => null

    );

   /*print the title*/

   /* Font color */

   plpdf.nonstrokingcolor(p_r => 255,p_g => 255,p_b => 255);

   /* Font Settings */

   plpdf.SetPrintFont(p_family => 'Helvetica',p_style => 'B',p_size => 20);

   /* title Text (used some math to centre the text) */

   plpdf.PrintoutText(p_x => (plpdf.getPageWidth/2)-(length(lv_report_title)*2),

                      p_y => plpdf.getPageHeight/2,

                      p_txt => lv_report_title);

    select blob_image,image_description

      into lb_image,lv_description

      from pdf_report_images

     where description = 'LOGO';

/*Print the image*/

 plpdf3.PrintImageBox(

    p_x => 50, --X of top-left corner

    p_y => 250, --Y of top-left corner

    p_w => 120.96,

    p_h => 41.04,

    p_name => lv_description,

    p_data => lb_image,

    p_props => null

    );

/* start of the second page */

plpdf.NewPage( );

   /* Font color */

   plpdf.nonstrokingcolor(p_r => 17,p_g => 18,p_b => 18);

   /* Font Settings */

   plpdf.SetPrintFont(p_family => 'Helvetica',p_style => 'B',p_size => 20);

   /* title Text (used some math to centre the text) */

   plpdf.PrintoutText(p_x => (plpdf.getPageWidth/2)-(length(lv_report_title)*2),

                      p_y => plpdf.getPageHeight/2,

                      p_txt => 'Second page');

/* end of the second page */

plpdf.SendDoc( p_blob => l_pdf_file);

INSERT INTO PDF_REPORTS VALUES (l_pdf_file);

end;
The result is the pdf below
.webp)
For more information, check out our Oracle APEX Services, and if you liked this blog, check out our other APEX blogs here.
Contact us today and one of our expert developers will be in touch.
Author: Rodrigo Mesquita
Job Title: Oracle APEX Development Consultant
Bio: Rodrigo is an Oracle ACE and APEX Developer Expert certified by Oracle and is an experienced software engineer with emphasis in analysis, design and development of bespoke Oracle applications utilising development tools such as PL/SQL, APEX and Forms for a variety of international businesses. Rodrigo speaks regularly at Oracle community events and enjoys creating APEX plugins and writing blogs.