- About

Getting to know us
- Industries
Recent case study:
Oracle EBS Cloud Deployment
Consolidating and Migrating assets into Oracle Cloud Infrastructure.
.png?width=250&name=stonewater-logo%20(1).png)
Most Visited Pages
-
- Resources
DSP-Explorer acquires leading Oracle Applications Managed Services Provider, Claremont, to further extend its data management capabilities.

Resources
- Contact us
APEX REST Enabled Forms
Contents

Following on from my previous blog, today I am going to take a look at the REST enabled form improvements first introduced in APEX 19.1. It is now possible to declaratively create an APEX form based on Web Service using a Web Source Module. I will also take the opportunity to demonstrate REST enabled objects, which allow you to easily REST enable tables, views, packages, procedures and functions.
For this demonstration I will be using APEX version 20.1 on an apex.oracle.com workspace and the OEHR_JOBS table from the HR Data sample dataset.
Prerequisites
Before starting you will need to complete the following prerequisite tasks.
- Install the HR Data sample dataset into your schema (SQL Workshop > Utilities > Sample Datasets).
- Ensure your schema is registered for ORDS (SQL Workshop > RESTful Services).
REST Enabled Objects
Before we can create a REST enabled form, we need to create a RESTful Web Service over a data source. One of the simplest ways to do this is to use the REST Enabled Object feature which can be accessed via the SQL Workshop.
- Open the SQL Workshop and Select Object Browser.
- Select the table OEHR_JOBS.
- Click on the REST tab and use the following settings:
| REST Enabled Object | Yes |
| Object Alias | jobs |
| Authorisation Required | No |
- Click Apply.
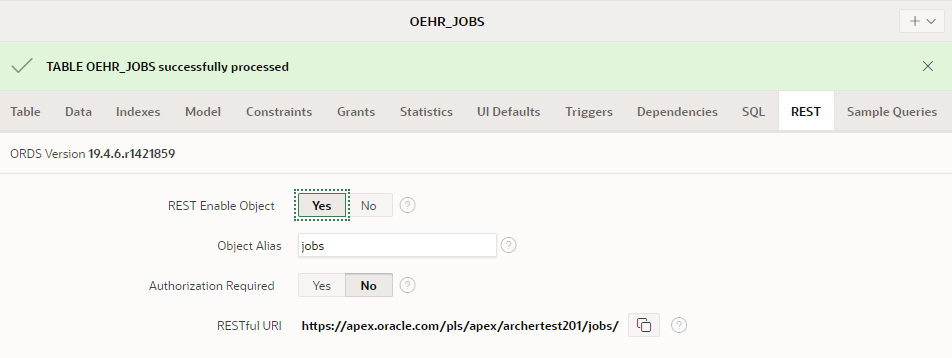
You will see a success message meaning that the table has been REST enabled, complete with HTTP methods for GET, PUT, POST and DELETE.
The RESTful URI will now be displayed.
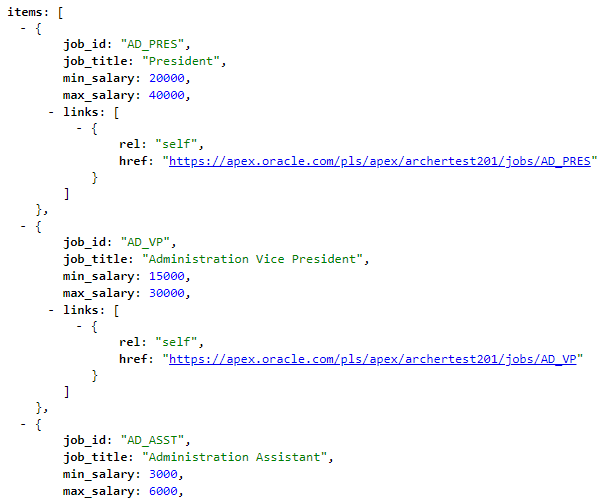
- Copy the RESTful URI, paste it into a new browser window and press ENTER.
The GET Web Service is called and data from OEHR_JOBS is returned to the browser in JSON format. In the above example the JSON text has been formatted using a browser extension. If you are not using one there are many free online formatting tools available.
- Select RESTful Services from the SQL Workshop menu.
- Select Enabled Objects from the RESTful Data Services tree.

You will see objects that the table have been enabled for REST, which in this example is just the table OEHR_JOBS.
Web Source Module
Now we have a suitable Web Service we can use for a REST Enabled Form we can create the Web Source Module.
- Return to the App Builder and open your application.
- From Shared Components select Web Source Modules within the Data Sources area.
- Click CREATE and select From Scratch.
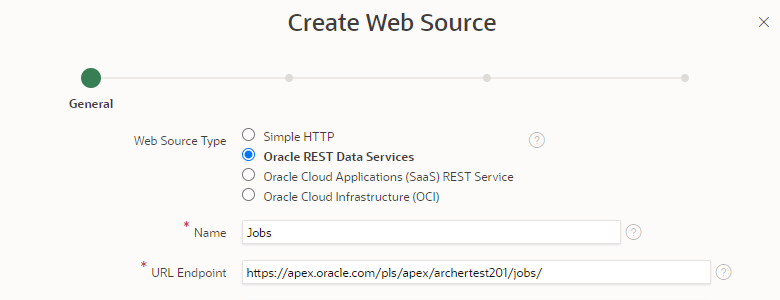
- Click Next and use the following settings:
| Web Source Type | Oracle REST Data Service |
| Name | Jobs |
| URL Endpoint | The RESTful URI you copied |
We can select the Oracle REST Data Service option because we are using a Web Service generated by REST enabling a table, so we know it follows the Oracle REST standard and has GET, PUT POST and DELETE operations.
- Click Next.
- Keep the Remote Server defaults and click Next.
- We are not using authentication in this example, so leave it turned off and click Discover.
- Sample data and the data profile are returned. Review and then click Create Web Source.
The Web Source Module has now been created.
Click on the newly created Web Source Module to open the details and scroll down to Operations.
You can see that the operations we required for the REST Enabled form have all been added automatically.
REST Enabled Form
We can now create a linked report and form using the Jobs Web Source Module.
- Return to the application builder home page and click on Create Page.
- Click on Form.
- Click on Report with Form and use the following settings:
| Report Type | Interactive Report |
| Report Page Name | Jobs |
| Form Page Name | Job Details |
| For Page Mode | Modal Dialog |
- Select the option to create a new navigation entry if you wish and click Next.
- Use the following settings for the data source.
| Data Source | Web Source |
| Web Source Module | Jobs |
| Report Columns | Keep the default of all columns selected |
- Click Next and use the following settings for the form page:
| Form Columns | Keep the default of all columns selected |
| Primary Key Column | JOB_ID |
- Click Create and the click on the Save and Run Page button.APEX has created an Interactive report with a linked form using the Web Service we created over the OEHR_JOBS table which we can use to query, update, insert and delete. This has all be done declaratively using standard APEX components.
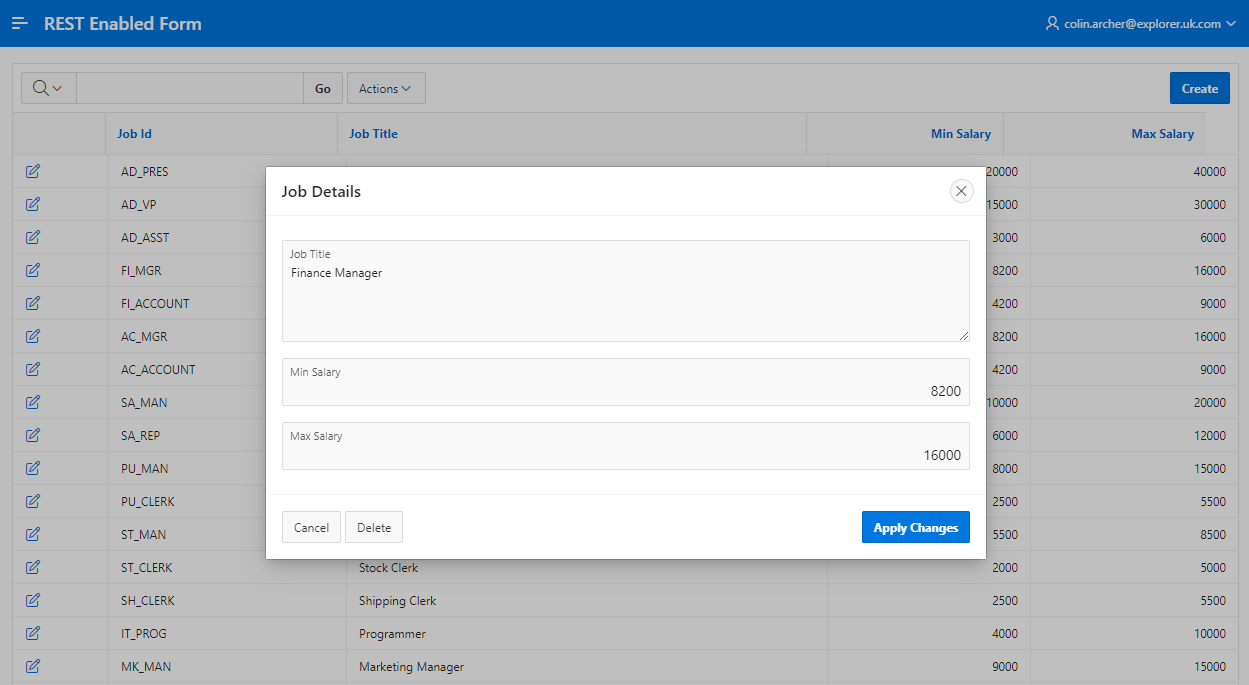
- Test the form by creating, updating and deleting some jobs.
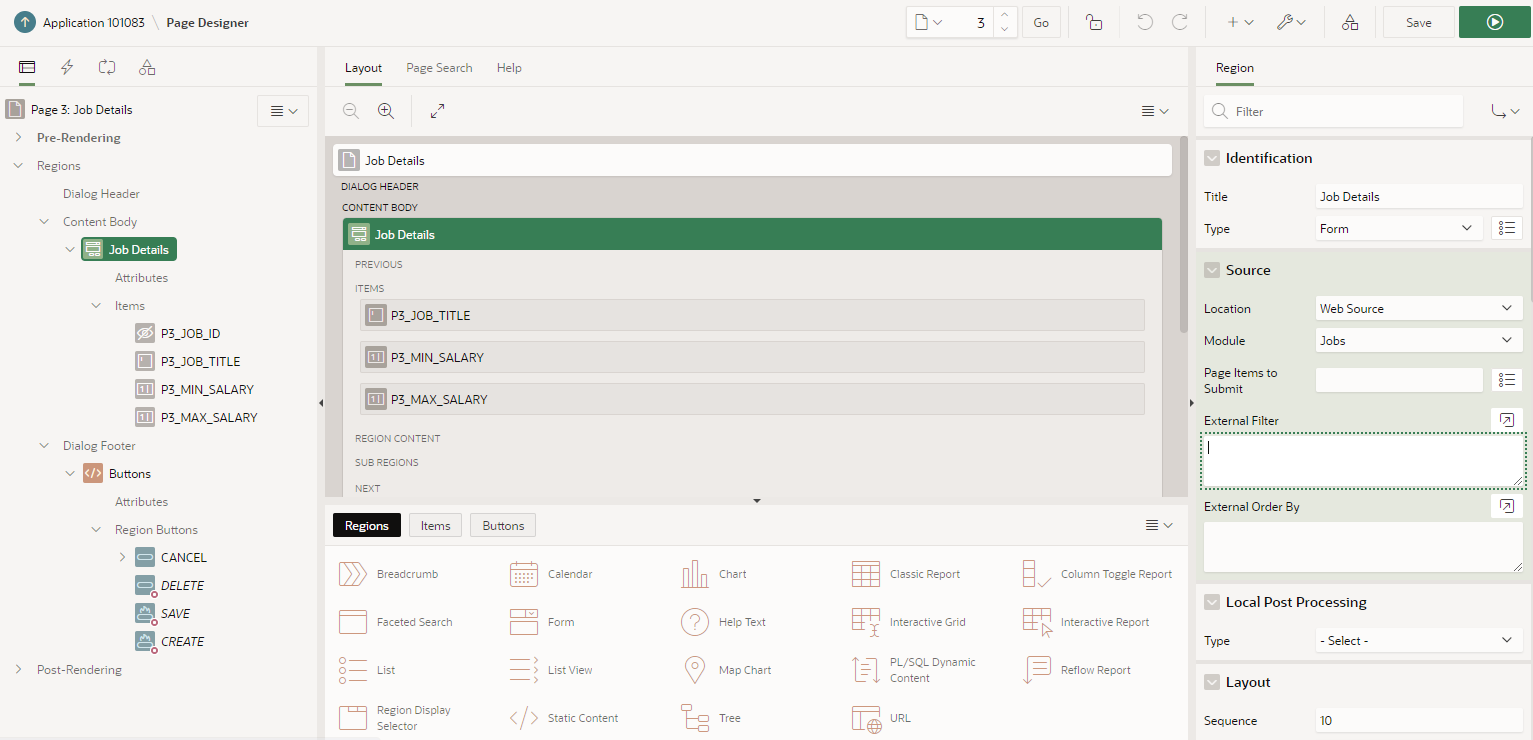
- While on the form page, click Edit Page on the developer toolbar and take a look at how the page has been built by APEX.
If you take a look at the Job Details region you will see it is a Form Region with the data source set to the Jobs Web Source we created.
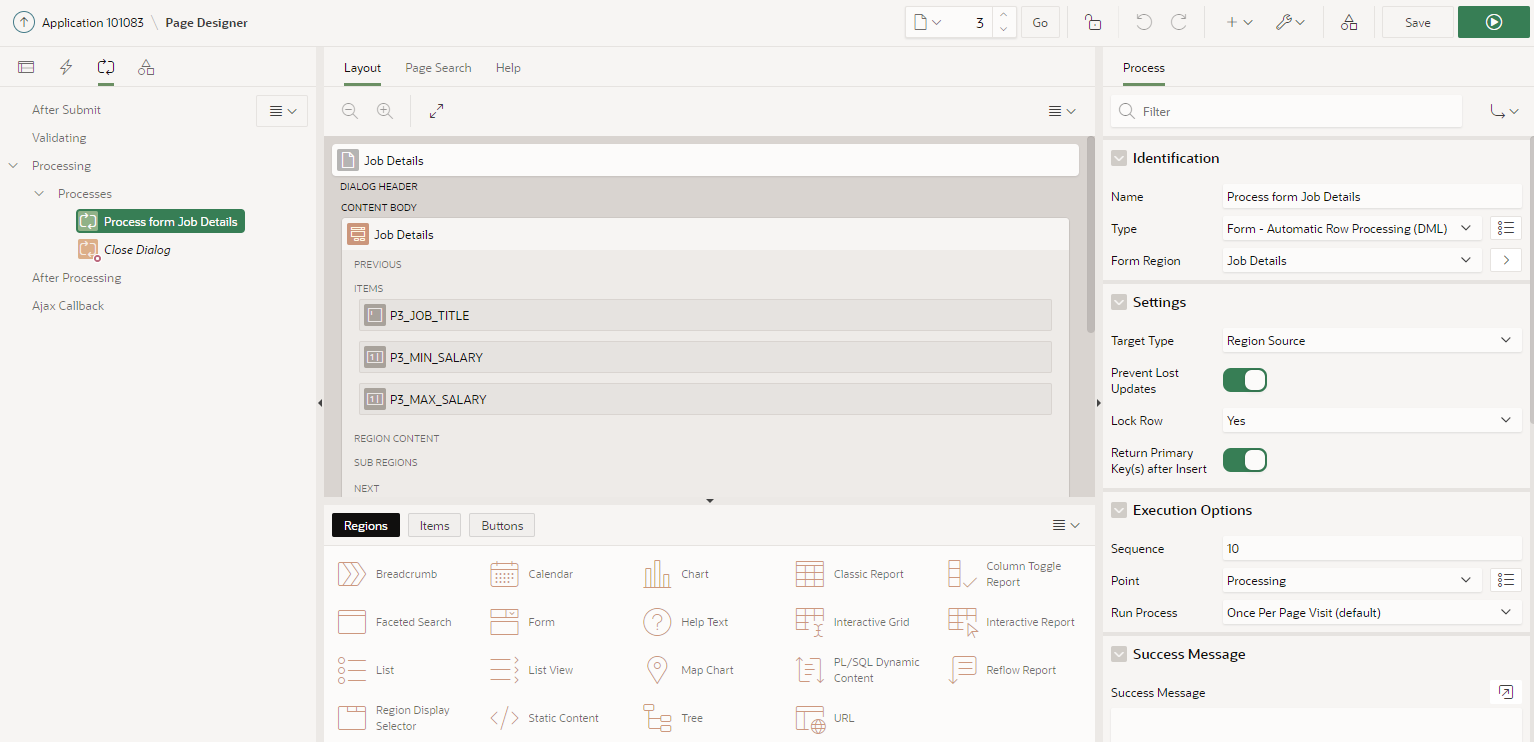
Take a look at the processing APEX has created and you will see it uses the Form Automated Row Processing (DML) type.
Author: Colin Archer
Job Title: Senior Oracle APEX Development Consultant
Bio: Colin is a Senior Development Consultant at DSP with 20 years’ experience of analysis, design, and development of bespoke Oracle applications for a wide variety of business functions. Building on his previous experience of Forms and PL/SQL he is now focusing on developing high quality fit for purpose solutions using APEX.