- About

Getting to know us
- Industries
Recent case study:
Oracle EBS Cloud Deployment
Consolidating and Migrating assets into Oracle Cloud Infrastructure.
.png?width=250&name=stonewater-logo%20(1).png)
Most Visited Pages
-
- Resources
DSP-Explorer acquires leading Oracle Applications Managed Services Provider, Claremont, to further extend its data management capabilities.

Resources
- Contact us
APEX Classic Reports and Comment Template
Contents
At DSP we carry out a range of unique tasks for our customers. The Oracle APEX low-code platform allows us to develop scalable applications modified to our customer's needs. This blog displays how we have used Oracle APEX in one of these cases.
Recently, I was tasked by a customer to enable users to add comments to an APEX report, with the comments shown in a bubble format, like those regularly seen when leaving a review on shopping websites. This also needed to include the date the comment was created.
Conducting research and going through the comment template properties in APEX 21.1 allowed me to seamlessly carry out this task.
Here is an insight into the steps I took.
1. Create a classic report page based on your chosen table.
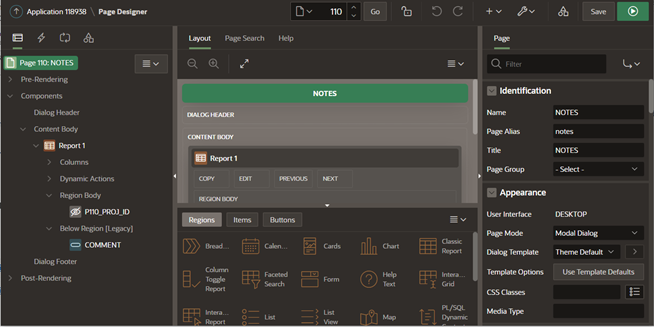
2. Create a 2nd page that will be used as a "comment display page" and make this a modal page. Next, add a button (COMMENT) below the report region with a redirect to a forms page (Page 115, in our example) based on the table where the comment data will be stored.
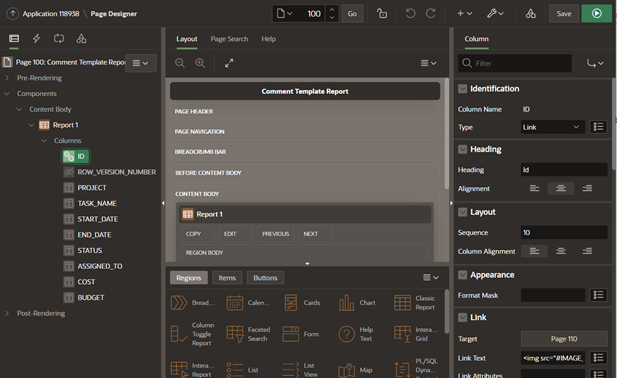
3. Make one of the columns in the classic report page a link to the modal page.
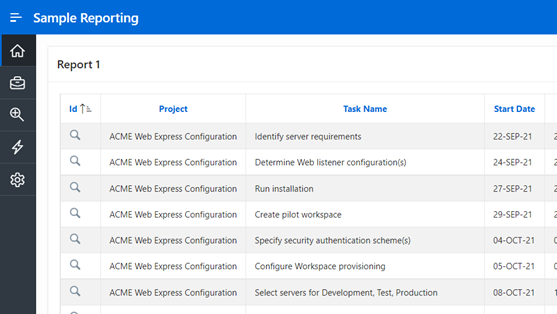
The resultant display on running the page will look like this:
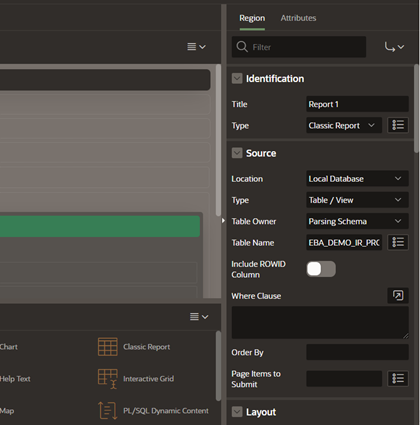
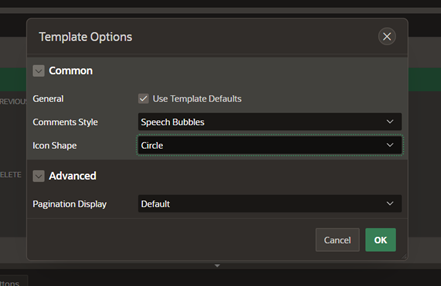
4. Go to the Modal page design and create a classic report. Click on the report and then Attributes and change the template to Comment.

The default Template Options can be modified to suit your requirements.
5. This will be the displayed image when you run the app and click on the link to open the modal page.
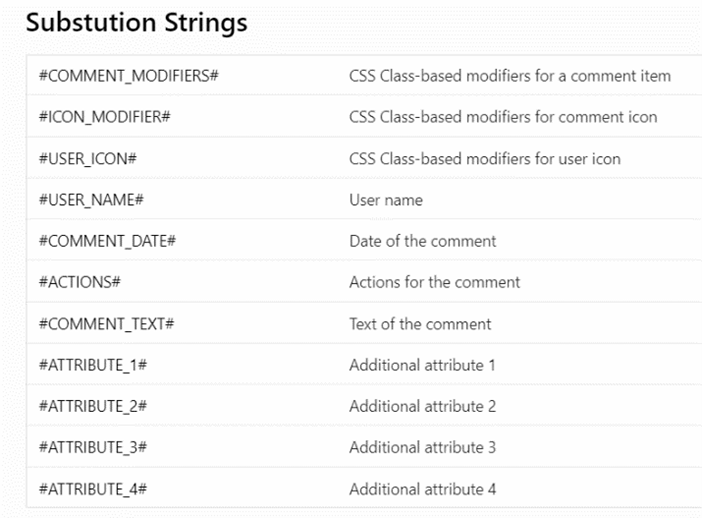
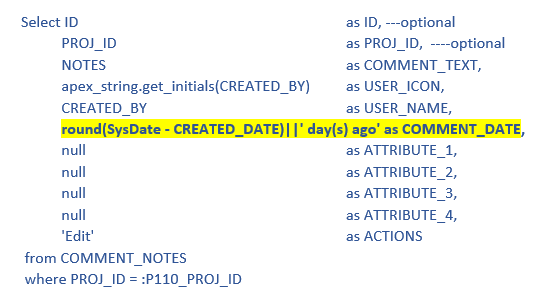
6. As you can see from the above image, the report query column aliases need to be modified to conform with the Comment template substitution strings. See the required substitution strings below. The column aliases must exactly match these substitution strings else the report will not display in a readable format.
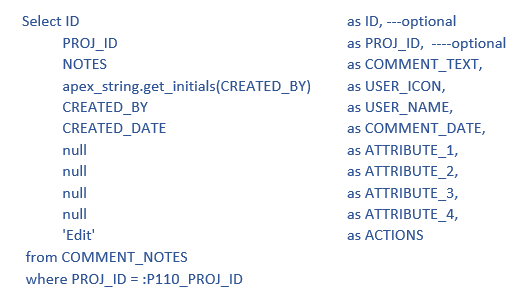
An example of what the modified comment report query will look like:
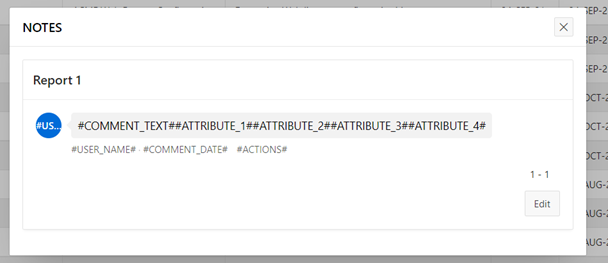
The image below is initially displayed after the column aliases have been modified as there will not be any data in the comment table.
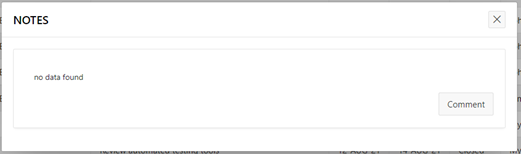
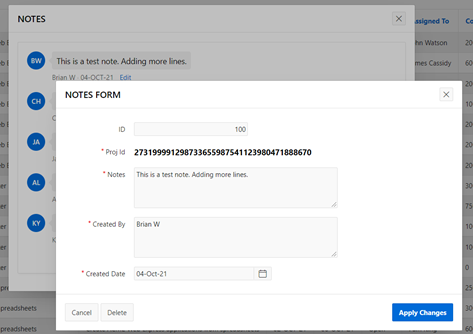
Note the “Edit” button was renamed “Comment”.
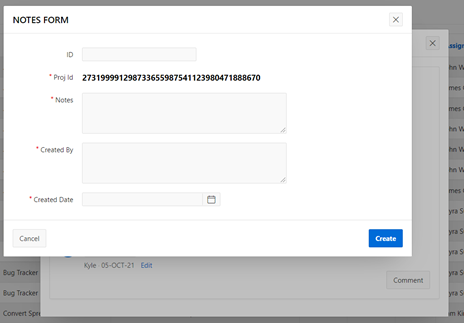
Click on this button and populate the forms page with test data and click “Create”.
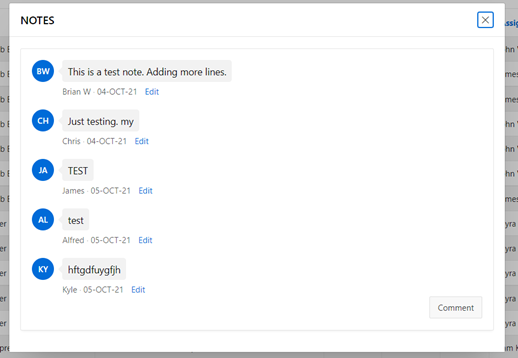
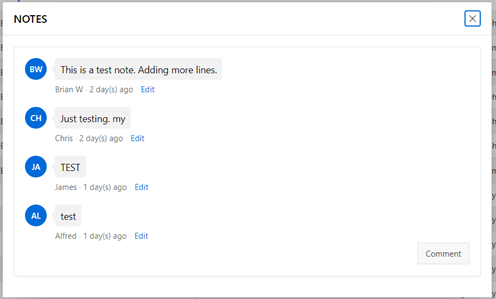
After adding a few comment notes, you should see a report with the test data similar to what is displayed below.
To show the comment date in "number of days", modify the report query COMMENT_DATE to:
And the resultant display will look like this:
7. Create a link on the “Edit” (ACTIONS) column by linking to the forms page (page 115), the source will be the table where the comment notes are stored. The “Edit” link opens the form in an update mode as you will be passing along the primary key column, whereas the “Comment” button opens the form in create mode as no IDs are passed along.
You can always add customisations to hide some ID fields or use display only page items.
If you are interested in our Oracle APEX Services you can speak to one of our development specialists today, visit Oracle APEX Consultancy or email us at enquiries@dsp.co.uk.